
Nachricht
buying guide
Is Glitter Tattoo Ink Safe? What to Know Before You Buy
Short answer: the product sold as "glitter tattoo ink" is almost always a temporary cosmetic product — cosmetic glitter in a skin-safe adhesive — not ink for a tattoo machine. No established professional ink brand sells a glitter ink for permanent tattooing: glitter flakes are far too large to pass through a cartridge needle cleanly. If you want sparkle that lasts, use real tattoo ink applied well — not a bottle with "glitter" on the label.
Search "glitter tattoo ink" and you will find two completely different products sharing one name: temporary glitter tattoos for festivals and parties, and the idea of a permanent tattoo that sparkles. Most listings and roundups only ever talk about the first one — and rarely say so clearly. That confusion is where buyers waste money, and where artists get asked to do something they should refuse.
What "Glitter Tattoo Ink" Actually Means
Three different products hide behind the same search term. Knowing which one you are looking at changes everything about safety and price.
Temporary glitter tattoo kits. Cosmetic-grade glitter, a water-based skin adhesive, and a stencil. Applied to the surface of the skin, no needle involved. This is what nearly every "glitter tattoo ink" listing actually sells. It lasts a few days and washes off.
Glitter tattoo ink pens and markers. Skin-safe markers with a glitter finish, again for temporary designs.
"Permanent" glitter tattoo ink for machines. The product buyers imagine — a bottle you load into a cartridge and tattoo into the dermis. It barely exists as a legitimate product.
If a listing does not say which of the three it is, that is your first red flag.
Temporary vs. Permanent Glitter: The Comparison That Matters
Temporary glitter tattoo
"Permanent" glitter ink
How it goes on
Glitter pressed onto skin adhesive through a stencil
Would need a tattoo machine and cartridge needle
How long it lasts
3–7 days, less with water and friction
Unproven — no established product or protocol
What is in it
Cosmetic-grade glitter + water-based adhesive
Unstandardised; often craft glitter in a carrier
Regulation
Cosmetic rules (ingredient list, skin safety)
No pro ink brand sells one; no standard exists
Who should use it
Anyone, including beginners and events
Nobody, until a reputable manufacturer proves it
Notice the pattern: the temporary column has answers, the permanent column has blanks. That is not a gap in this guide — it is a gap in the market.
Why No Major Pro Ink Brand Sells a Glitter Ink
Search the catalogues of the established professional ink brands — Eternal, Intenze, Dynamic, World Famous — and you will not find a glitter ink. That absence is the market telling you something, and it comes down to physics, not fashion.
Standard tattoo pigment is ground to a few microns across, small enough to flow through a cartridge and settle evenly in the dermis. Cosmetic glitter flakes are tens to hundreds of microns across — many times the size of a pigment particle, and wider than the gaps in a tight liner grouping like a 3RL. Push that through a cartridge and three things happen: the flakes jam between the needles, the ink flow turns patchy mid-line, and the flakes that do get through sit in the skin as visible foreign bodies rather than dispersing like pigment.
That is the detail most "glitter tattoo ink" content never mentions, because most of it is written by people who have never loaded a cartridge. A needle grouping is a precision instrument with clearances measured in microns. Glitter is, by design, a visible flake. The two do not belong in the same tool.
The regulatory picture backs this up. The FDA has not approved any pigment for injection into the skin. In the EU, REACH has restricted more than 4,000 substances in tattoo inks since January 2022, and Germany's Federal Institute for Risk Assessment notes that special-effect ink ingredients are largely unknown. A glitter flake that will sit in someone's dermis for decades, with no safety dossier behind it, is not a product a serious brand will put its name on.
The Particle-Size Problem Nobody Mentions
Even if you could get glitter through a needle, the healed result would disappoint. Pigment works because it disperses evenly and the skin heals over a uniform layer of colour. Glitter flakes are flat, reflective plates: they catch light at some angles and go dark at others, so a design that sparkles under the shop lights can look patchy and grey in daylight. And because the flakes are large foreign bodies, the body treats them differently from pigment — raised texture and granuloma-type reactions are a known risk with large-particle material in the dermis.
There is also a practical point artists discover too late: metallic pigments can create artefacts on MRI scans. A client with a glitter tattoo may face questions or a degraded scan years later, for a sparkle effect that never looked as good healed as it did fresh.
The honest summary: if the sparkle only exists because of a flake large enough to see, that flake is too large to tattoo safely.
How to Buy Temporary Glitter Tattoo Supplies
Temporary glitter work is a legitimate service — festivals, parties, and clients who want to try a design before committing:
Cosmetic-grade glitter only. Cosmetic glitter is polyester film with rounded edges, tested for skin use. Craft glitter is often cut from metalised PET film with sharp edges and is not meant for skin — never use it on a client, and never near the eyes.
Read the ingredient list. A real product lists its adhesive and glitter composition. No ingredient list means no purchase. Patch-test on the inner arm 24 hours before a full application.
Use a stencil for clean lines. Freehand glitter bleeds at the edges; a stencil gives you the crisp shape clients photograph. Print the design as a stencil with a thermal printer — our ultimate stencil printer guide covers which machine to pick — then apply adhesive through the stencil and press the glitter in.
Keep the work photographable. Glitter is one of the hardest things to shoot: direct light blows it out. A polarised anti-glare photography kit ($59.99) lets you shoot the finished design without the hot spots that ruin portfolio photos.
For the stencil step itself, a transfer gel that holds the line through a long session matters more than it looks: if the stencil lifts while you are pressing glitter in, the design smudges and you start over. Our stencil transfer gel ($8.88, 4 fl oz / 120 ml) is the same one we use for permanent stencil work — long-lasting and smudge-proof, which is exactly what a glitter application needs.
What to Buy Instead for a Permanent Sparkle
Clients who ask for glitter usually want a tattoo that catches the light, or a design that stands out in photos. Both are achievable with real ink and good technique — no glitter required.
White and light-colour highlights. A skilled artist can make a design pop with white ink highlights and high-contrast shading. It heals predictably, photographs well, and will not raise questions at an MRI appointment.
Metallic-effect colour work. Some colour palettes read as metallic on skin — golds, coppers, and bright yellows over solid black — without any metal flake in the ink. The effect comes from colour choice and contrast, not from particles.
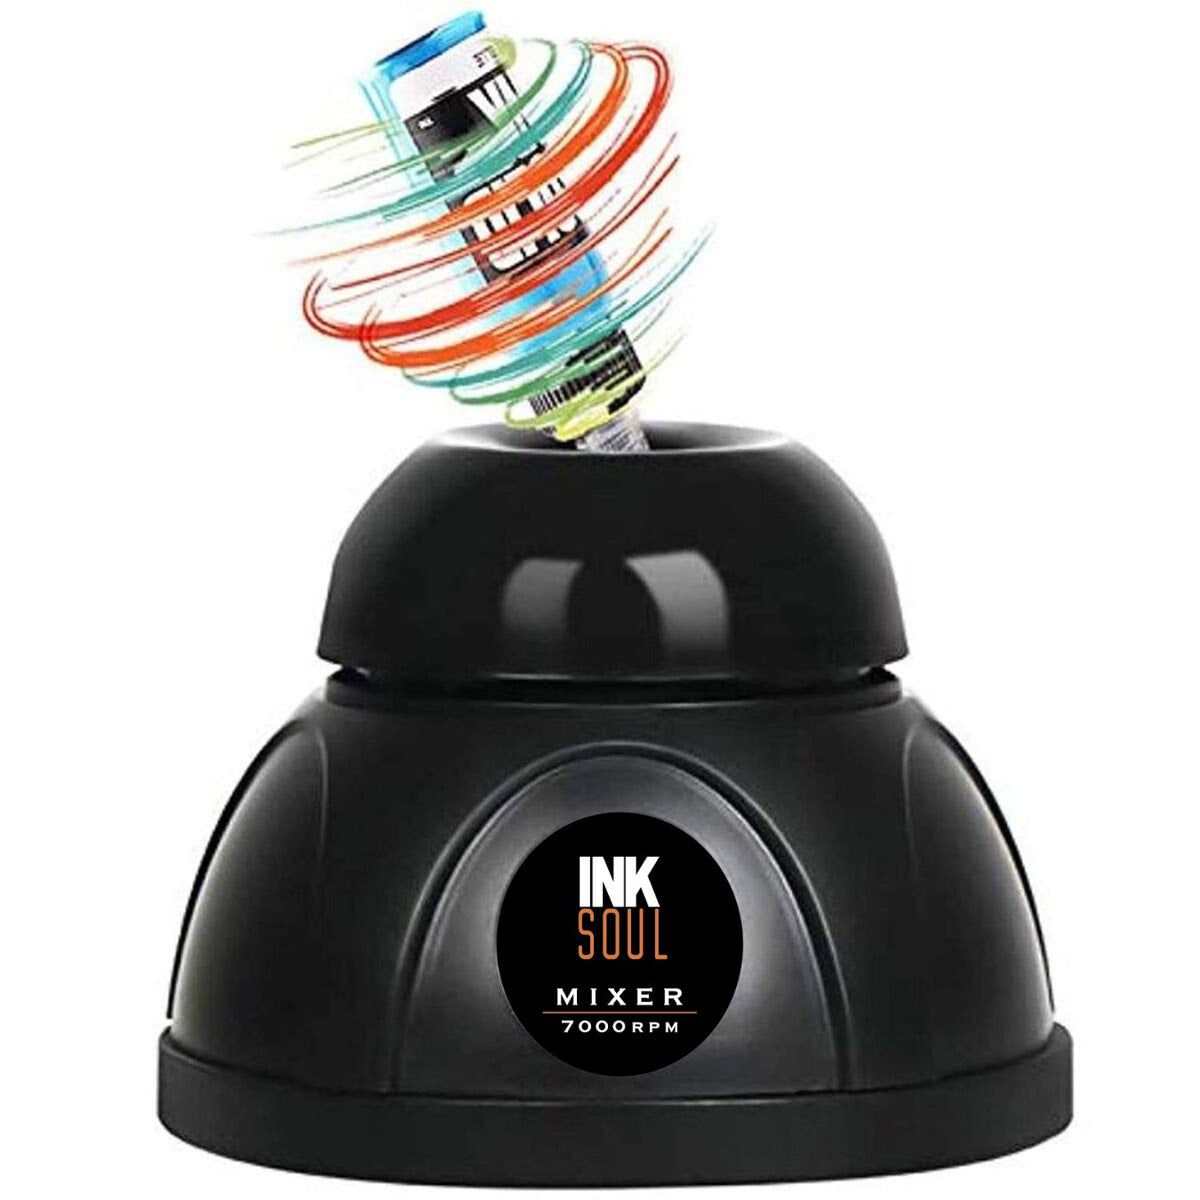
Keep your ink mixed and your station organised. The unglamorous truth behind bright, even colour is ink that is properly mixed before every session — pigment settles, and settled ink packs unevenly. A vortex mixer ($48.88) takes seconds and is the difference between a flat fill and an even one; a rotating ink rack (from $228.88) keeps 48 bottles mixed and within reach. Single-use silicone ink caps ($12.88 for 180) keep each colour clean and separate — soft enough that a needle knocked into the bottom does not blunt, and disposable so there is no cross-contamination between clients.
Red Flags When Shopping for Glitter Tattoo Ink
"Permanent glitter ink" with no brand behind it. If no established ink manufacturer sells it, a no-name bottle is not a discovery — it is an untested product.
Craft glitter relabelled for skin. "Glitter is glitter" is wrong. Cosmetic-grade and craft-grade are different materials with different safety profiles, and the label should say which one it is.
No ingredient list, no expiry date, no batch number. Professional ink always carries these. Their absence means the seller is not operating to professional standards.
Photos that only show the bottle, never a healed result. If every photo is fresh, wet, and under studio lights, the seller is hiding what it looks like in a month.
Claims of "FDA approved glitter ink." The FDA has not approved any pigment for injection into the skin. Any listing that says otherwise is lying about something basic.
FAQ
Is glitter tattoo ink safe?
Temporary glitter tattoo products made with cosmetic-grade glitter and a skin-safe adhesive are generally safe for most people, with a patch test first. Injecting glitter into the skin with a tattoo machine is not an established safe practice: no major professional ink brand sells a glitter ink, and the flakes are too large to pass through cartridge needles cleanly.
Can you tattoo with glitter ink using a tattoo machine?
Not recommended. Glitter flakes are tens to hundreds of microns across — far larger than standard pigment particles — so they jam between the needles in a cartridge, make ink flow patchy, and sit in the dermis as large foreign bodies. The result heals unevenly and carries a higher risk of raised texture and foreign-body reactions.
How long do glitter tattoos last?
A temporary glitter tattoo applied with skin adhesive lasts about 3–7 days, less with water, sweat, and friction. A "permanent" glitter tattoo has no proven lifespan — no standardised permanent glitter ink exists.
What is glitter tattoo ink made of?
Real glitter tattoo products are cosmetic-grade glitter (usually polyester film) in a water-based, hypoallergenic skin adhesive. That is a surface cosmetic, not a tattoo ink. Anything labelled "glitter tattoo ink" that does not list its ingredients should not go on a client's skin, let alone under it.
What should I buy instead for a permanent sparkly tattoo?
Use real professional tattoo ink: white and light-colour highlights, metallic-effect colour palettes, and strong contrast give clients what they actually want — a design that catches the eye and photographs well — without putting large foreign particles into the dermis. Keep ink properly mixed with a vortex mixer and the result will outlast any glitter.
Further reading: our earlier guides What Are Glitter Tattoos? and How Do Permanent Glitter Tattoos Work? cover the basics of temporary and permanent glitter designs.
freehand stencil
How to Draw on Tattoo Transfer Paper
Yes — you can draw directly on tattoo transfer paper with a ballpoint pen or a stylus, no printer needed. Draw on the top sheet with firm, even pressure and the carbon layer underneath copies every line onto the sheet that touches the skin.
Hand drawing is the fastest way to make a one-off stencil — a walk-in flash piece, a freehand adjustment, a design that only exists in your head. It is also the slowest way to make a complicated one. This guide covers the paper, the pen, the pressure, and when to stop drawing and print instead.
What you are actually drawing on
A sheet of tattoo transfer paper is a stack, and each layer has one job:
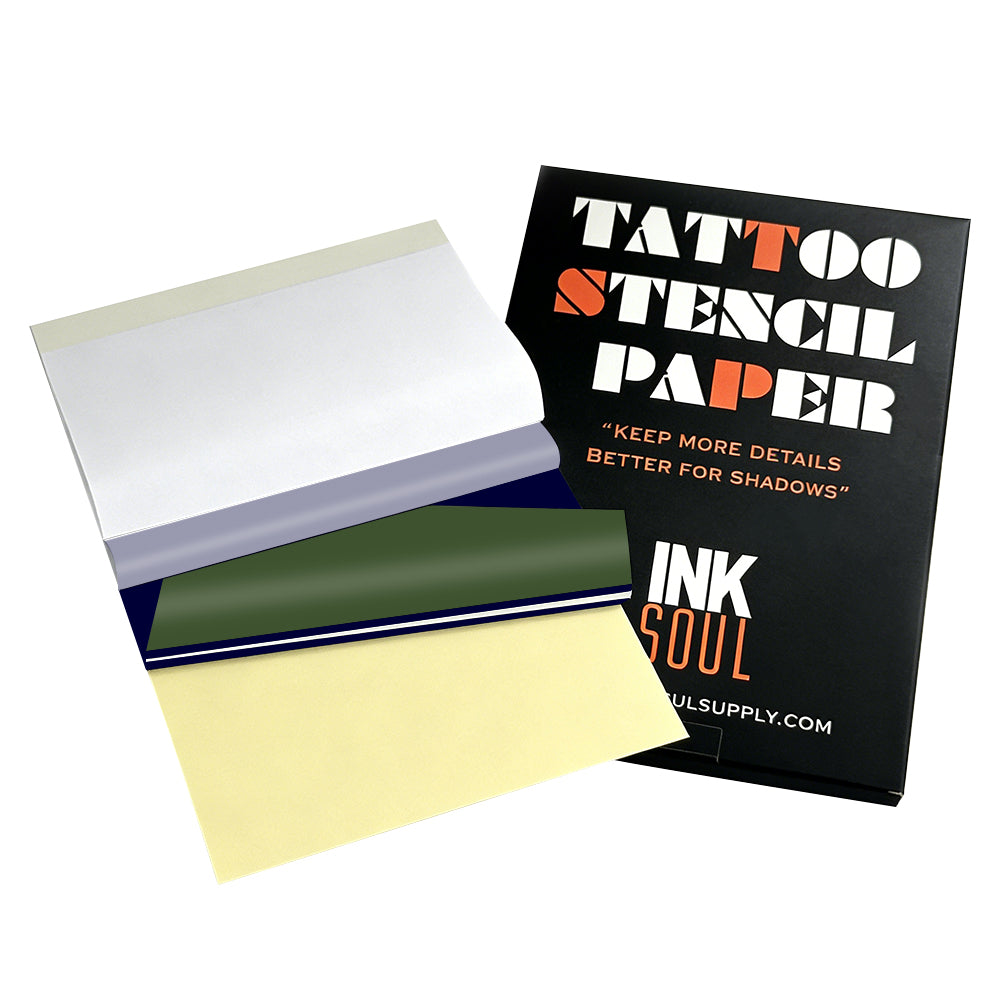
Top sheet (master sheet): the white sheet you draw on. Your pen never touches anything else.
Carbon layer: the purple or blue sheet in the middle. Your pen's pressure pushes its pigment onto the back of the top sheet — that back becomes the stencil.
Protective tissue (onion sheet): a thin separator that keeps the carbon from marking the top sheet in storage. Remove it for the darkest transfer (see step 2).
Backing sheet: the bottom layer. Leave it in place — it keeps the stack aligned and the carbon off your desk.
Two types of paper take hand drawing. Freehand (hectograph) paper is made for it: its carbon layer is pressure-activated and forgiving of uneven strokes. Thermal paper is made for heat. It also takes a pen, but the lines come out lighter and less consistent — its carbon layer is tuned for the printhead, not your hand. Use a stylus and firm pressure. For printed work the paper choice matters more: our SP100 is made for shadow work and the LP100 for line work, both $38.88 for 100 A4 sheets.
The right pen (and the wrong ones)
The pen is not leaving ink on the paper — it is pressing pigment through three layers. What works:
Medium-tip ballpoint pen: the studio standard. A firm, round tip presses evenly without cutting the top sheet. This is the tool to reach for first.
Stylus or hectograph pencil: purpose-built for this job. A stylus gives the most consistent line weight over a long session — the tip never goes soft or scratchy.
Fine-tip ballpoint: good for detail and lettering, but keep pressure light — a sharp tip tears the top sheet faster than a medium one.
What does not work: a soft graphite pencil (6B and softer). Graphite smears under your palm, and a soft lead cannot press the carbon evenly — grey smudge on top, faint broken line underneath. The final pass on transfer paper should always be pen or stylus.
How to draw on tattoo transfer paper: step by step
1. Set up a hard, flat surface
Carbon transfer needs resistance underneath. A clipboard or a hard table works. A soft surface — a sketchbook, a bed, your thigh — absorbs the pressure and your lines come out uneven. Tape the top corners down so it cannot shift mid-drawing.
2. Remove the tissue layer
Peel out the thin protective tissue between the top sheet and the carbon for the darkest transfer. Drawing through it still works, but the lines come out lighter — some artists keep it in while sketching, then remove it for the final pass. Keep the backing sheet underneath.
3. Draw on the top sheet, in one confident pass
Draw the design on the top white sheet, as you want it on the skin. Use smooth strokes and steady, even pressure — not a death grip. Work top to bottom (left to right if you are left-handed) so your palm never rests on lines already drawn; hand oils and friction smear fresh carbon.
4. Check the transfer before you commit
Halfway through, lift a corner and check the underside: lines should be solid purple and continuous. Faint or broken lines mean too light; a torn top sheet means too hard. Adjust now, while you can still redraw.
5. Trim close to the lines
Cut close to the design, leaving a small margin. Less loose paper means less chance of shifting or creasing when you press it to skin, and easier positioning on curved areas like ribs or forearms. Store finished stencils flat with the tissue slipped back in — heat and pressure in a bag smudge the carbon.
6. Prep the skin, then apply
Shave if needed, wash with antibacterial soap, wipe with alcohol, then apply a thin, even layer of stencil gel. Wait until it turns tacky — about 30 seconds to a minute — then place the stencil face down and press firmly for 30 to 60 seconds without sliding it. Peel from one corner. If a line looks weak, do not press the paper back down — it will double-print. Redraw instead. If the whole placement is wrong, wipe it off with green soap and water and start over — never tattoo over a stencil you cannot trust.
7. Let it dry before you tattoo
Give the stencil 5 to 15 minutes to dry fully — starting too soon turns a crisp stencil into a smudge halfway through the outline. For the full routine, see our guide on using stencil gel so the transfer stays sharp all session.
Do you need to draw it backwards?
No — the image flips twice. Your pen presses the carbon onto the back of the top sheet, which mirrors the drawing — then that back goes face down on the skin, which mirrors it again. The stencil lands the right way round. Draw normally, exactly as you want it to look.
The same applies when tracing a printed reference: trace what you see. A printed design that looks reversed is a printer problem, not a drawing problem — see which side of transfer paper faces up.
Pressure and line weight: the part that separates clean stencils from muddy ones
Hand-drawn lines come out on skin slightly heavier than they look on paper — the carbon spreads a fraction under pressure and the gel softens the edge. Two adjustments fix most muddy stencils:
Draw fine lines thinner than the final tattoo line. If the tattoo needs a 0.35 mm line, draw it like a 0.25 mm line — the transfer fattens it for you. Draw at full weight and the stencil looks bold before the needle touches skin.
Keep pressure even, not hard. Past a point, pressing harder does not darken the stencil — it tears the top sheet and embosses a trench that prints as a thick, blurred line. If lines are faint, make a second slow pass over the same stroke.
Shading is the hard limit of hand drawing: you cannot print grey wash with a pen. Map shadow areas as boundary lines and shade freehand with the machine. If the design lives or dies on smooth gradients, that is a printing job.
Hand-drawn vs printed: when to put the pen down
Hand-drawn on transfer paper
Printed (thermal stencil printer)
Best for
One-off designs, walk-in flash, freehand adjustments
Repeat designs, large pieces, fine-line detail
Speed
Minutes for simple designs; hours for complex ones
Seconds per sheet once the file is ready
Line consistency
Depends on your hand that day
Identical every time
Shading
Boundary lines only — shade with the machine
Prints shadow gradients (SP100 paper)
Gear needed
Paper + a ballpoint pen
Printer + paper + phone app
When you are redrawing the same design for the third time, printing starts paying for itself. Our pick is the INKSOUL T08FD ($188.88): its touchscreen lets you preview and size the design before it prints — the second look hand drawing cannot give you. The T08FS ($168.88) is the classic wireless model if you print from your phone. The transfer workflow bundle ($288.88) pairs the T08FD with LP100 and SP100 paper plus stencil gel. Our full comparison is in the best tattoo stencil printer for professional use.
5 mistakes that ruin a hand-drawn stencil
Mistake
What happens
Fix
Drawing through the tissue layer
Lighter lines than a direct pass
Remove the tissue for the final pass; keep it in only while sketching
Soft pencil instead of ballpoint
Grey smudge on top, broken line underneath
Sketch in pencil on scrap; final pass in pen or stylus
Resting your palm on drawn lines
Hand oils and friction smear the carbon
Work top to bottom; keep the drawing hand floating
Re-pressing a weak line
Double-printed ghost lines
Never re-press; redraw a fresh stencil
Trying to erase a wrong line
Correction fluid and alcohol smear the carbon
Start a fresh sheet; keep the spoiled one for practice
Tattooing before the stencil dries
Lines smudge under the first wipe
Wait 5–15 minutes; test with a light touch first
FAQ
Can you draw on thermal transfer paper by hand?
Yes, but not as well as on freehand paper. Thermal paper's carbon layer is thinner and tuned for heat, so hand-drawn lines come out lighter and less consistent — use a stylus and firm pressure. Freehand (hectograph) paper is the better choice if you are buying paper to draw on: its carbon is made for pressure transfer and more forgiving of uneven strokes.
What pen do you use to draw on tattoo transfer paper?
A medium-tip ballpoint pen is the studio standard: firm, even pressure without tearing the top sheet. A stylus or hectograph pencil works just as well and holds line weight better over a long session. Avoid soft graphite pencils — they smear and cannot press carbon evenly.
Do you draw on the carbon side or the white side?
Draw on the white top sheet, never directly on the carbon. Your pen's pressure pushes the carbon pigment onto the back of the top sheet, and that back is what transfers to the skin. Remove the protective tissue first; leave the backing sheet in place.
Why is my hand-drawn stencil too faint?
Usually one of three things: you drew through the tissue layer, the pressure was too light, or the paper sat on a soft surface that absorbed the force. Check by lifting a corner mid-drawing — the underside should show solid, continuous purple lines. If lines are broken, slow down and make a second pass over the same stroke instead of pressing harder.
Is it better to draw a stencil by hand or print it?
For a one-off design or a freehand adjustment, drawing is faster — paper and a pen, no file prep. For anything you will repeat, anything large, or anything with fine-line detail or smooth shading, print it: a thermal printer reproduces the same lines every time, and the T08FD's screen lets you check size and placement first.
buying guide
P19 vs INKSOUL T08FD: Which Stencil Printer Is Worth Your Money?
A $50 gap is enough to make any tattoo artist stop and ask: is the P19 at $138.88 really the same deal as the INKSOUL T08FD at $188.88? The short answer: no — and not for the reason you might expect. The P19 is cheaper, but it is also a rebranded printer you can buy direct from its original brand for less, it publishes no resolution or paper-size specs, and its headline shading claim is contradicted by the original manufacturer's own blog. The T08FD costs more because it does the one thing that pays for a stencil printer: real grayscale shading for realism and black-and-grey work.
If you only ever print clean outlines and your budget is the whole decision, the P19 will print your lines. If shading work is how you earn — portraits, realism, black-and-grey — the printer that cannot prove it prints shadows is the expensive choice, no matter what the sticker says. Here is the full comparison, with every fact checked on 9 November 2026.
The Fact That Changes the Whole Comparison: the P19 Is a Rebrand
The P19 is the TAIDU P19 under a new name. TAIDU is the original Chinese factory brand for this printer, and it sells the identical machine direct on its own store, xhwstattoo.com, for $129.99 — with 20 sheets of paper included. The store selling it asks $138.88 with 10 sheets. So the "budget" P19 is not even the cheapest way to buy the P19: the original brand undercuts the rebrand by $9 and doubles the starter paper.
The branding does not stop at two names. The seller's own Instagram and Facebook demo videos brand the same device a third name, "InkForge P19" — one printer, three labels. That is what white-label stock with swapped logos looks like, and it matters for one practical reason: if anything goes wrong, you are dealing with a reseller of a resold printer, not the company that made it.
By contrast, the T08FD and T08FS are AIMO's own original models — the T08FD is the improved flagship with a touch screen and INKSOUL-exclusive colors, and the T08FS is the classic that built the line's reputation. They are not rebadged hardware, and INKSOUL has sold and supported them for years, with nearly 300 reviews on the T08FD alone in our store.
P19 vs T08FD: Specs Side by Side
P19 — $138.88
INKSOUL T08FD — $188.88
Resolution
Not stated by the seller
203 dpi, stated
Touch screen
No
Yes — fingertip control on the printer
Shadow / shading printing
Claimed ("Rich Shading"), one sample photo; TAIDU's own blog cautions this printer class on shading
Defining feature — real grayscale shading with dedicated SP100 shadow paper
Paper sizes
Not stated by the seller (roll mode implied)
A4, LTR, Legal, LTR+, plus 210 mm roll paper
Print speed
Not stated
13–15 mm/s
Weight
Not stated (TAIDU lists ~600 g for the identical hardware)
~745 g
Connectivity
Bluetooth (iOS/Android) + USB
Bluetooth + USB, plus on-device touch screen
App
"tattooprinter" app (resize, crop, line extraction, 3D preview)
Phone app for printing + touch screen on the machine
Sheets included
10
5
Warranty
1 year, replacement if unrepairable
1 year, whole machine — if it breaks, we send a new one
Subscription
Not stated
None for basic printing — only some optional AI features are paid, and printing does not depend on them
A deliberate omission: battery capacity is not in this table. The seller publishes no battery figure at all, and our own materials list conflicting figures for the T08FD. We would rather leave a row blank than compare on a number we cannot stand behind. Buy on what you can verify — resolution, screen, paper sizes, shading — and those rows are all above.
The Shading Question Is the Whole Decision
The seller's hero claim for the P19 is "Fine Lines. Rich Shading." It rests on a single sample photo on the product page and no stated DPI to back it. TAIDU's own blog for the same printer says the opposite in substance: "The P19 is well-suited for linework and simple designs. For highly detailed or shaded stencils, thermal printers in this class may not capture every nuance. Artists who specialise in photorealism or heavily shaded work may want to test the printer…"
That is the original manufacturer telling you, in its own words, that this class of printer struggles exactly where the seller's marketing says it shines. When the maker and the reseller disagree, believe the maker.
The T08FD's shading is not a slogan, it is the machine's defining feature: it renders realistic grayscale gradients exactly as they appear on screen, with SP100 shadow paper made for the job — what you see is what you get on skin, sharp and smudge-proof. And shading is not a T08FD exclusive in our line: the classic T08FS prints shadows too — it says so in its own product name — at $168.88, which is still $30 more than the P19 but $20 less than the T08FD if you want shading without the touch screen.
Here is the money angle. A stencil printer earns its keep by the work it lets you take on. Outlines are the entry ticket; shading is where realism and black-and-grey jobs — the higher-priced work — live. A printer that cannot prove it prints shadows does not just save you $50. It quietly caps the jobs you can say yes to.
The Real Price Math: $138.88 Is Not the Price You Pay
Three numbers change the $50 gap:
Shipping: The seller charges $10 shipping under $159, and the P19 at $138.88 sits just under that threshold — a standalone P19 costs $148.88 all-in. With the WELCOME10 first-order code it is $124.99 + $10 = $134.99. The T08FD ships free over $159, so $188.88 is the whole price.
The direct price: TAIDU sells the identical P19 for $129.99 with 20 sheets. If you have decided on this hardware, buying the rebrand is paying more for less paper.
Delivery time: The seller dispatches within 3 business days and delivers in 7–12 business days to the US — 10–15 business days door to door. The T08FD ships from stock in 48 hours in most cases.
After shipping, the real gap between the P19 and the T08FD is about $40, not $50 — and the gap between the P19 and the shading-capable T08FS ($168.88) is about $20. That is the price of one small tattoo. Ask whether the shading, the touch screen, the stated specs and the established seller are worth one small tattoo to you.
Trust: Who Are You Actually Buying From?
A printer is a working tool, and when it breaks you need a seller who answers. Here the two sides are not close:
Age: the store's domain was registered on 13 October 2026 — the store is about a month old. INKSOUL has sold stencil printers for years, and the T08FD alone carries nearly 300 reviews in our store.
Identity: The seller is a Wyoming company registered at 30 N Gould St, Ste R, Sheridan — a well-known registered-agent address, not a store or office; the site itself says not to send anything there. No founder or team member is named anywhere. Contact is a free Outlook address and a China (+86) WhatsApp number.
Storefront quality: the P19 product page's "Related Products" section still shows four items literally titled "Example Product Title" — an unfinished template on the store's hero product page.
Its own pages disagree: The seller's buying guide says the P19 includes five starter sheets; the product page says ten. When a store cannot agree with itself on what is in the box, take its other claims with the same caution.
Reviews: the P19 page shows 4.8/5 from 37 reviews — that figure is self-published on the seller's own site, with no independent verification anywhere (no independent review of the P19 was found on Trustpilot, Reddit, Amazon or YouTube). One reviewer claims "three months of daily use" of a printer from a store whose domain is 27 days old. Treat the count as the seller's own claim, not a fact.
None of this proves the P19 is a bad printer. It proves you are buying a rebranded machine from a one-month-old reseller with no track record to check — while the same hardware is cheaper from its maker and the established alternative costs one small tattoo more.
Who Should Buy Which?
Buy the P19 if: your budget is the entire decision, you only print clean outlines, and you are comfortable with 10–15 business-day delivery and no stated resolution or paper sizes. Even then, check TAIDU's own $129.99 direct price first — same printer, more paper.
Buy the T08FD if: you do realism, portraits or black-and-grey; you want real grayscale shading with SP100 paper, a touch screen, stated 203 dpi and A4/LTR/Legal sizes, and a seller who replaces a broken machine with a new one under a one-year warranty.
Buy the T08FS if: you want the shading at a lower price and can live without the touch screen — $168.88, and it prints shadows too.
The P19 is a real price threat at the budget end, and we would rather you know exactly what it is than discover the rebrand after you paid. But a stencil printer is not a price tag, it is the tool your shading work depends on. The $50 question is really this: does the printer prove it can do the work you get paid for? The T08FD proves it on the spec sheet. The P19 asks you to take its word for it — while its own maker says otherwise.
Keep Reading
7 Best Tattoo Stencil Printers for Professional Artists (2026) — our full ranking, with the T08FD as Our Pick.
T08FD vs Ozer vs EZ: Which Stencil Printer Actually Prints Shadows?
Cheap vs Expensive Tattoo Stencil Printer: What Are You Actually Paying For?
Tattoo Stencil Printer Buying Guide 2026: How to Choose the Best One
FAQ
Is the P19 the same printer as the TAIDU P19?
Yes. The P19 is the TAIDU P19 under a new brand name — the same hardware TAIDU sells direct for $129.99 with 20 sheets of paper, against the reseller's $138.88 with 10 sheets. The seller's own demo videos even brand it a third name, "InkForge P19".
Can the P19 print shaded stencils?
The seller claims "Fine Lines. Rich Shading." but publishes no DPI and offers one sample photo as evidence. TAIDU's own blog says this class of thermal printer "may not capture every nuance" of highly detailed or shaded stencils, and recommends photorealism artists test it first. The T08FD, by contrast, is built for real grayscale shading with dedicated SP100 shadow paper — and the T08FS prints shadows too.
How much does the P19 really cost after shipping?
A standalone P19 is $138.88 + $10 shipping = $148.88, since the seller's free-shipping threshold is $159. With the WELCOME10 first-order code it is $124.99 + $10 = $134.99. TAIDU direct is $129.99 with 20 sheets included.
Is the T08FD worth $50 more than the P19?
If you do realism or black-and-grey work, yes: you are paying for proven grayscale shading, a touch screen, stated 203 dpi, A4/LTR/Legal/LTR+ paper sizes, and a one-year warranty from an established seller that replaces a broken machine with a new one. If you only print outlines and budget is everything, the P19 is cheaper — but check TAIDU's $129.99 direct price before you buy the rebrand.
Does the T08FD need a subscription to print?
No. Basic printing on the T08FD needs no subscription. Only some optional AI features are paid, and printing does not depend on them.
ambition
What Is a Tattoo Grip Light and Should You Use One?
What Is a Tattoo Grip Light and Should You Use One?
A tattoo grip light is a small ring of LEDs that clips onto your disposable grip and shines light directly onto the needle tip, so you can see your lines without moving a lamp. The disposable kind costs about $3 a session, weighs 5 g, and runs a full working day. It is a task light, not a replacement for a studio lamp — worth it for fine linework, guest spots, or hand shadows; a waste of money if your only problem is glare.
What a Tattoo Grip Light Actually Does
A grip light sits at the bottom of your grip, above the cartridge, and throws a ring of light onto the few square centimetres where the needle meets the skin. Because it moves with the machine, the lit spot never drifts: tilt the machine, change your angle, stretch the skin — the light follows the needle.
The version most artists will meet is the disposable clip-on. Ambition's clips onto a standard disposable grip: install the grip, clip the light on, pull the power protector tab, and work. It is individually sealed, rated 10+ hours of flicker-free light, weighs 5 g, and uses high-CRI LEDs. When the session ends it goes in the bin with the grip. Nothing to charge, wipe down, or sterilise.
In 2026 Bishop built the light into the machine: the Power Wand XLUMEN puts LEDs and a diffuser inside the grip, four settings, at $1,299.99 for the full set. The clip-on is for everyone who likes the machine they already own.
The Problem: Your Own Hand Is the Shadow
Ask any artist what they do when they cannot see a line: lean in, tilt the lamp, lean in again. The real culprit is rarely the lamp — it is your own hand. The moment you lean over fine linework, your hand and the machine block the studio lamp, and the exact spot you need falls into shadow. You move the lamp; ten minutes later you have shifted and the shadow is back.
A light on the grip cannot be shadowed by your hand — it is on the same side of the shadow as the needle, the one thing no floor lamp or ceiling panel can do. It matters most for fine-line work, where the line is thinner than the shadow over it; for PMU, where you read hair-stroke depth; and for guest spots, where the lighting is whatever it is. There is a quieter benefit, too: lit from centimetres away, you stop making the "just to be sure" second pass over a line already laid. Overworked skin comes from passes that did not need to happen.
The Four Ways to Light the Needle
Option
Where it sits
Cost
Best for
Weakness
Disposable clip-on grip light
On the grip, at the needle
About $3 per session
Fine lines, PMU, guest spots
Single use; one colour temperature
Built-in machine light (Bishop XLUMEN)
Inside the grip
$1,299.99 full set
Artists buying a new flagship
Price; locked into one machine and battery system
Headlamp
On your forehead
From $48.88
Following your gaze
Follows your head, not the needle
Polarised studio light (TAIDU X5)
Off the machine, on a stand or wall
From $158.88
All-day setup, glare control, photos
Fixed; your hand can still shadow it
The grip light is the cheapest way to test needle-level light; the studio light is the only one that deals with glare. If you can only buy one light this year, buy the studio light.
How to Choose One: 6 Things to Check
1. Fit first — measure your grip, not your machine. Grip lights clip onto the grip, so grip diameter is what matters. Ambition makes two housings: a hard shell for larger disposable grips, and a soft body for smaller ones — if you are between sizes, the soft body is the forgiving pick — flexible housing conforms where a rigid shell needs an exact fit. A light that wobbles is worse than no light. One honest gap: the listing gives the ring diameter (about 26 mm) and overall length (about 105 mm) but no grip-diameter range — check the ring clears your cartridge twist-lock before buying a ten-pack. Note the fine print: it is not suitable for thinner tattoo pen machines.
2. Runtime has to cover a real day, not a demo. A light that dies at hour six of a ten-hour session is a liability — your eyes will have adapted to it by then. The Ambition unit is rated 10+ hours of flicker-free light: a full working day with margin. Flicker matters: a flickering light tires your eyes, and tired eyes miss lines.
3. Weight is a balance question, not a comfort slogan. Five grams sounds like marketing until you remember where it sits: at the front of the machine, ahead of your fingers. A 30–40 g clip-on lamp changes the balance point in a way you feel by hour three. Five grams does not.
4. Colour rendering decides whether you can trust what you see. Cheap white LEDs wash out reds and flatten fresh work — exactly the wrong error when judging saturation. Look for high-CRI LEDs, which the Ambition unit specifies, and be suspicious of any grip light that only says "bright". Bright is easy; accurate colour is what matters — but no CRI number, lumen figure, or Kelvin temperature is published, so judge by eye, not by numbers.
5. Disposable or rechargeable is a workflow decision, not a price decision. A rechargeable clip-on costs more up front and less per session, but it must be charged, wiped down, and tracked between clients. A disposable unit costs about $3 a session (soft 5-pack $14.99; 10-pack $25.99) and disappears with the grip.
6. Heat: check it on skin, not on paper. Any LED close to skin for hours warms up. The Ambition unit is specified as low-heat — but "low heat" is a claim, not a measurement. On first use, run it for an hour and touch the ring — warm is fine, hot means it goes back.
How to Use It
Setup takes seconds: install your grip, clip the light on, pull the power protector tab, and start working. The tab is the part most artists get wrong, because it looks like packaging. It is actually the on-switch: it keeps the battery fresh in the pack, and once it is out, the light is on and the 10-hour clock is running. Do not pull it while setting up or waiting for a late client — pull it when the client is in the chair. A tab pulled an hour early is an hour of light you will not get back. There is no switch to turn it off for a break, and no water-resistance rating is published — keep rinse spray off the ring.
Try it on a practice skin before a full-day client, and check the fit at full stretch with your usual grip tape and machine bag on — a light snug on a dry grip can loosen once your hand warms it up. It is single-use and cannot be recharged, so there is no point saving a half-used unit for tomorrow.
What a Grip Light Will Not Fix
Most listings skip this part. A grip light adds light; it does not control reflection. If petroleum jelly turns fresh work into a mirror and your lines vanish behind glare, more lumens will not help — you need polarisation, not brightness. A polarised light with matching glasses cuts the jelly reflection instead of adding to it. A grip light and a polarised lamp solve opposite problems.
It will not fix your photos, either: a ring of light at the needle is tuned for your eyes, not for a camera. Glare-free healed photos are a studio-light and polariser job — our guide to choosing a tattoo light covers the setup. And with one colour temperature and no dimmer, it will not tune warmth to skin tone.
Who Should Buy One — and Who Shouldn't
Buy it if: you do fine-line, single-needle, or PMU work and lose lines to your own shadow; you work guest spots where you cannot control the lighting; you want to test needle-level light for the price of a coffee; or your studio lamp is good but fixed, and you keep repositioning it.
Skip it if: your real problem is glare, not shadow — get a polarised setup first; you run a very slim pen machine the clip cannot grip; or you already own a machine with a built-in light.
For most working artists, buy the 5-pack and run it for a week. Five sessions is enough to know whether your hand shadow was costing you lines, and whether you reach for it on day six. If you do, the 10-pack at $25.99 is cheaper per session. If not, you spent $14.99 finding out. The Ambition Tattoo Grip Lights come in soft and hard housings, in 5- or 10-packs.
Frequently Asked Questions
Will a tattoo grip light fit my machine?
It depends on your grip, not your machine. The light clips onto a standard disposable grip: a hard shell for larger grips, a soft body for smaller ones. The ring is about 26 mm across, so check it against your grip diameter. It is not suitable for thinner tattoo pen machines.
How long does a disposable grip light last?
The Ambition unit is rated for 10+ hours of flicker-free light — a full working day. The clock starts when you pull the power protector tab, so pull it when the client is in the chair, not during setup. It cannot be recharged: when the session ends, it goes in the bin with the grip.
Can I reuse a grip light for another session?
No. It is a single-use, individually sealed disposable unit with a built-in battery that cannot be recharged. Reusing it would also mean reusing a non-sterile item across clients. At about $3 a session, it is a consumable, like the grip it clips onto.
Will a grip light change how my machine feels?
At 5 g, effectively no. The weight sits at the front of the machine, ahead of your fingers, and it will not shift the balance point the way a heavier clip-on lamp can. If you can feel 5 g by hour three, your machine has other balance problems.
Does a grip light replace my studio lamp?
No. A grip light solves hand shadow at the needle; a studio lamp lights the client, the station, and your photos. And neither one fixes glare — that takes a polarised light with matching glasses. Think of it as the last metre of your lighting setup.
Ambition
Best Tattoo Pen Machines 2026
Short answer: For most working artists in 2026, the best tattoo pen machine is the INKSOUL HV6 PRO at $298.88 — a 4.2mm stroke, two 2000mAh batteries and two autoclavable grips in the box. The best budget brand-name pen is the MAST Archer 2 at $189, and the most flexible adjustable-stroke option is the EZ P6 Turbo at $299, covering 1.0–5.0mm. All prices below were checked live on our store on 8 November 2026 — no inflated specs, no invented review counts.
How we compared the pens
Every machine below is a genuine tattoo pen sold by an authorized dealer on INKSOUL — no grey-market stock, no unbranded clones. We scored each pen on four things that actually change how a tattoo comes out: stroke length and whether it adjusts, battery setup (swappable packs beat sealed batteries on a long day), motor type where the maker publishes it, and price. Where a spec is not published by the maker, we say so instead of guessing. Prices are the store's live prices as of 8 November 2026; where a pen has several variants, we give the range.
Best tattoo pen machines 2026 at a glance
Machine
Stroke
Standout feature
Price
INKSOUL HV6 PRO — Our Pick
4.2mm
Two 2000mAh batteries + two grips, V-mode & HZ-mode
$298.88
MAST Archer 3 Ultra
4.2mm
Flagship MAST pen, proven daily workhorse
$339.00
MAST Archer 2
3.5mm
Brushless motor, color screen
$189.00
Dragonhawk Fold Pro
7 stroke lengths
Folding design, one pen for lining to packing
$249.00–$279.00
EZ P6 Turbo
1.0–5.0mm adjustable
Direct drive, widest stroke range here
$299.00–$389.00
EZ P3 Pro
Not published
Proven wireless workhorse
$249.00–$319.00
BRONC X2 NEO
2.5–5.0mm adjustable
7.1 mNm torque, Swiss DC motor, 7–9 h runtime
$498.00
Ambition Seher Plus
2.2–4.2mm (6 strokes)
Six stroke settings, lowest-priced adjustable pen here
$199.99–$249.99
Ambition Soldier 270
Not published
Budget wireless entry from Ambition
$199.99–$239.99
Our Pick: INKSOUL HV6 PRO — $298.88
The HV6 PRO is the pen we put our own name on, and it is the one we recommend first for a simple reason: nothing you need for a full working day is sold separately. The box includes two TRUE 2000mAh batteries, so one charges while the other runs, and two autoclavable aluminum grips — 33mm and 38mm — so you can switch diameter between sessions instead of buying a second grip. The 4.2mm stroke sits in the all-rounder zone: firm enough for lining, smooth enough for shading. Two working modes are built in: V-mode for standard voltage control and HZ-mode, which holds a fixed frequency. At $298.88 (list $399.00) it sits in the middle of this list on price and at the top on what comes in the box. If you want one pen that covers a whole day of mixed work without extra purchases, this is it.
Best value: MAST Archer 2 — $189.00
The Archer 2 is the cheapest genuine brand-name pen on this list, and it does not feel like a compromise. The 3.5mm stroke is the classic all-round length, the brushless motor runs quieter and cooler than the brushed motors in most budget pens, and the color screen shows voltage at a glance instead of making you count button presses. At $189.00 (list $499.00) it is the easiest recommendation for an artist buying their first serious pen, or for a second pen that lives as a backup. The trade-off is a fixed stroke: if you do a lot of bold traditional lining or heavy color packing, you will eventually want an adjustable-stroke pen alongside it.
Best all-rounder: MAST Archer 3 Ultra — $339.00
The Archer 3 Ultra is MAST's flagship pen, and the 4.2mm stroke makes it the do-everything option in their lineup: crisp lining, smooth shading and solid color packing without swapping machines mid-session. It costs $150 more than the Archer 2, and what that buys is the longer, harder-hitting stroke and the current-generation build. Artists who already know they like MAST's feel and want one pen for the whole day should start here. If you are still finding your style, the Archer 2 saves you $150 for the same brand reliability.
Best adjustable stroke: EZ P6 Turbo — $299.00–$389.00
Stroke length is the single biggest lever on how a pen behaves, and the P6 Turbo moves it further than anything else here: 1.0mm to 5.0mm on a direct-drive motor, adjustable without tools. That range covers fine-line work at the short end and bold traditional lining at the long end, so one machine genuinely replaces two or three fixed-stroke pens. Direct drive also means the needle responds instantly to voltage changes, with no dampening from a flexible drive. The price range ($299.00–$389.00) depends on variant. If your work jumps between styles in a single session, this is the pen that keeps up.
Best premium build: BRONC X2 NEO — $498.00
The X2 NEO is the most expensive pen on this list, and it is also the most thoroughly specified: a Swiss DC motor, 7.1 mNm of torque, 2.5–5.0mm adjustable stroke, two 2000mAh batteries, 7–9 hours of runtime, an IPS color display, 0.1V voltage steps and overload and short-circuit protection, all in a 255g body. Torque is the number that matters here — 7.1 mNm is what lets the pen push large mag groupings into saturated skin without bogging down. This is the pen for artists who already know exactly what they want and are paying for refinement and headroom, not for a first pen.
Best budget adjustable: Ambition Seher Plus — $199.99–$249.99
The Seher Plus gives you six stroke lengths from 2.2mm to 4.2mm for $199.99–$249.99 — the cheapest way onto this list to get a genuinely adjustable pen. That range covers PMU and fine shading at the short end and general lining and shading at the long end. Ambition is an authorized brand on our store, so the warranty and parts support are real, which is the difference between a cheap pen and a cheap pen you can keep using. If your budget is around $200 and you want stroke flexibility, start here rather than with a no-name pen at the same price.
Also worth a look
Dragonhawk Fold Pro ($249.00–$279.00). Seven stroke lengths in a folding body — the most versatile fixed-format pen here for artists who switch styles constantly. Read our wireless vs wired guide if you are still deciding whether to cut the cord at all.
EZ P3 Pro ($249.00–$319.00). The proven wireless workhorse in EZ's lineup — less stroke range than the P6 Turbo, but the same brand reliability at a lower price. A safe pick if you want EZ without paying for the Turbo's full 1.0–5.0mm range.
Ambition Soldier 270 ($199.99–$239.99). Ambition's budget wireless entry. Stroke length is not published by the maker, so we will not guess — but at this price it is a genuine brand-name starter pen with real warranty support, which is more than most pens at this price can say.
How to choose: the 7-point checklist
Stroke matches your style. Short strokes (2.5–3.2mm) for shading, black-and-grey and PMU; medium strokes (3.5–4.2mm) as all-rounders; long strokes (4.5mm+) for bold traditional lining and color packing. Adjustable-stroke pens cover all three in one machine.
Battery: swappable beats sealed. Two batteries minimum for a full day — one runs while the other charges. Ask whether the pen also runs wired via RCA, so a dead battery never ends a session.
Motor: brushless where you can get it. Brushless motors run quieter, cooler and longer than brushed ones. Direct drive gives the most immediate needle response.
Grip diameter and weight. You hold this for hours — 32–38mm grips fit most hands, and a pen over 250g with battery gets heavy by the end of a long session.
Voltage control. Fine steps (0.1V) and a readable display matter more than a big voltage range; you will live between 5V and 9V.
Warranty and parts. Buy from an authorized dealer. A pen with no spare parts and no one answering when it breaks is a disposable pen, whatever the price.
Price. $189–$500 covers every serious pen on this list. Below $100 you are usually buying a gamble; above $500 you are buying refinement, not better tattoos.
Still torn between cheap and expensive? Our cheap vs expensive tattoo pen machine guide breaks down exactly what the premium buys — and what it does not.
FAQ
What stroke length should I choose for lining vs. shading?Short strokes (2.5–3.2mm) cycle faster and shallower, which suits crisp lining, fine shading, black-and-grey and PMU. Medium strokes (3.5–4.2mm) are the all-rounders for lining and general work. Long strokes (4.5mm and up) hit harder and deeper, which suits bold traditional lining and color packing. An adjustable-stroke pen covers all three in one machine.
Is a wireless tattoo pen machine worth it?Yes, for most working artists. No cord dragging across the client means freer movement, and swappable battery packs mean a dead battery costs you thirty seconds instead of a session. Keep a wired backup or an RCA option for very long sessions, and carry a spare pack the way you carry spare needles.
How much should I spend on a good tattoo pen machine?Between $189 and $500 buys a genuine brand-name pen with a real warranty — the MAST Archer 2 at $189 is the floor of that range on our store, and the BRONC X2 NEO at $498 is the ceiling. Below $100 you are usually buying a pen with no warranty and no spare parts. Above $500 you are paying for refinement and headroom, not for better tattoos.
Which tattoo pen machine is best for beginners?The MAST Archer 2 at $189 or the Ambition Seher Plus from $199.99. Both are genuine brand-name pens with real warranty support, cheap enough to learn on and good enough to keep using once your work improves. Avoid no-name pens at the same price — when they break, there is nobody to call.
polarized light
What Is the Best Tattoo Light for Tattooing?
The best tattoo light is the one that kills glare first and brightness second. A polarized lamp with matching polarized glasses lets you see every needle mark through the petroleum-jelly shine — and our pick is the INKSOUL X5 wall-mounted lamp: 40W, three color temperatures, dimmable, with the glasses included at $158.88.
Ask any working artist what slows them down and the answer is rarely the machine. It is the light. Overhead room lights throw a shadow exactly where your hand is working, and the second you spread petroleum jelly over fresh work, the skin turns into a mirror. You cannot tell whether a line is in or a patch of shading is even, so you go over the same spot again "just to be sure" — and that is how overworked, traumatized skin happens.
This guide compares the lamps in our own tattoo light collection on the things that actually matter in a working studio: glare control, usable brightness, color temperature, and mounting that keeps both hands free. Prices are the current store prices, checked on the day of writing.
Why Glare Matters More Than Brightness
A brighter lamp does not fix glare. It usually makes it worse — more light bouncing off wet skin straight into your eyes. What fixes glare is polarization. A polarized lamp emits light that vibrates in a single plane, which cuts the harsh reflection at the source instead of adding to it. Put on a matching pair of polarized glasses and the remaining reflection gets filtered a second time. The combination is the closest thing to seeing the actual skin instead of its shine.
The test is simple: lamp on, glasses on — can you see your needle marks in fresh shading without leaning in and squinting? If yes, the light is doing its job. If you are still going over spots twice, it is not, no matter how many watts the box claims. That is why every lamp here is judged on glare control first.
What to Look for in a Tattoo Light
Before the shortlist, here is the checklist we use in the studio. A lamp that ticks all five is a safe buy; one that misses glare control is a bad buy at any price.
Glare control: polarized light output, ideally with matching polarized glasses included. This is the single most important feature.
Real brightness: around 40W of well-directed LED is the sweet spot for fine detail work — bright enough for fine linework without cooking your client. Dimmable is better than fixed.
Color temperature options: 6500K daylight for the most accurate color judgment, 4500K neutral for everyday work, 2700K warm for a softer feel. One fixed temperature is a compromise you will notice.
Mounting that stays put: wall-mounted or clamp-mounted keeps both hands free and the floor clear. A lamp you keep nudging with your elbow is not a tool, it is a hazard.
Coverage: a wide head or an articulated arm that actually reaches across the bed without you repositioning the whole lamp mid-session.
The Best Tattoo Lights Compared
Lamp
Best for
Power
Color temperatures
Polarized
Mount
Price
INKSOUL X5 Wall-Mounted Lamp ★ Our Pick
All-round studio work
40W
3 (2700K / 4500K / 6500K)
Yes, glasses included
Wall, folding arm
$158.88
INKSOUL X5 Desk Clamp Lamp
Small studios, tight spaces
unknown
unknown
Yes
Desk clamp
$118.80
INKSOUL X5 Floor Stand Light
Photography + guest spots
unknown
unknown
Yes
Floor stand
$188.88
INKSOUL Polarized Headlight & Magic Glasses Kit
Close detail work, PMU
USB-C rechargeable
unknown
Yes, glasses included
Head-mounted
$68.88
Anti-3.0 Glare Kit (120 LED, 12W)
Tattoo photography
12W
unknown
Anti-glare kit
Portable
$58.88
PL-48 Large Panel Telescoping Wall Light
Big-panel flood coverage
unknown
unknown
No
Wall, telescoping
$129.99
Prices are the current store prices. Where a spec is marked unknown, the manufacturer listing does not state it — we would rather leave it blank than guess.
Our Pick: INKSOUL X5 Wall-Mounted Lamp — $158.88
The INKSOUL X5 wall-mounted lamp is the one we would buy first, because it is the only lamp in the lineup that nails all five checklist items at once. The 40W half-moon head puts out polarized light, and the matching polarized glasses come in the box — no separate purchase, no guessing whether the glasses match the lamp. With both on, petroleum-jelly glare drops out and your needle marks stay visible, so you stop reworking spots you already finished.
The head is a 180° half-moon arc, which spreads light across the skin from several angles instead of a single hard point — fewer shadows where your hand blocks the beam. Three color temperatures (2700K warm, 4500K neutral, 6500K daylight) cover lining, everyday work and color judgment, and brightness is stepless dimmable rather than stepped. The articulated wall arm extends to about 210 cm and folds back against the wall when you are done, with a maximum illumination coverage of about 2.4 metres — enough to cover a full bed without a floor stand eating space. It is rated 5.0 out of 5 from 35 reviews on the store.
The honest limitation is the obvious one: it needs a wall to mount on. If your station moves between guest spots, look at the desk clamp or floor stand versions of the same X5 head below — same polarized half-moon, different mount.
INKSOUL X5 Desk Clamp Lamp — $118.80
The INKSOUL X5 desk clamp lamp is the same polarized half-moon head on a clamp instead of a wall arm. It is the pick for a small studio or a station that shares a table with other gear: clamp it to the bed frame or a side table, aim it, and it stays where you put it. At $118.80 it is the cheapest way into the X5 polarized system, and it takes up no floor space at all. The trade-off is reach — a clamp mount cannot cover as wide an area as the wall arm, so it suits single-bed stations rather than big multi-bed rooms.
INKSOUL X5 Floor Stand Light — $188.88
The INKSOUL X5 floor stand light is the portable member of the family, built as a work and photography kit. If you do guest spots, conventions, or you shoot a lot of healed-work photos for your portfolio, this is the version that travels with you and sets up anywhere. Same anti-glare polarized head as the wall lamp, on a stand instead of a wall. It is the most expensive of the three X5 mounts at $188.88, which buys you the freedom not to drill anything — worth it if your studio is rented or your setup moves.
INKSOUL Polarized Headlight & Magic Glasses Kit — $68.88
The INKSOUL polarized headlight and Magic Glasses kit solves a different problem: light exactly where you are looking. For fine detail work, PMU, or any session where you lean in close, a head-mounted light follows your eyes instead of your bed. The polarized CPL glasses cut the glare off the skin, the headlight is USB-C rechargeable with multiple brightness modes, and the whole kit is $68.88 — or $18.88 for the glasses alone if you already own a lamp and just want the second layer of glare defense. It is not a replacement for a main studio lamp, but as a second light it is the cheapest upgrade in this guide. Rated 5.0 out of 5 from 1 review on the store.
Anti-3.0 Glare Kit for Tattoo Photography — $58.88
The Anti-3.0 glare kit is a photography tool, not a tattooing lamp — 120 LED beads at 12W, built to light fresh work evenly for phone photos and video. If your portfolio photos keep coming out washed out or grainy, this is the fix: even, glare-controlled light made for a camera, at $58.88. Our full guide to shooting without glare is How Do You Photograph a Tattoo Without Glare? — the lamp and the technique go together.
PL-48 Large Panel Telescoping Wall Light — $129.99
The PL-48 large panel wall light is the flood option: a big telescoping panel that washes a wide area in even light, for $129.99. It is a good choice if your priority is raw coverage over a large station and you already handle glare another way — note it is not a polarized lamp, so it does not cut petroleum-jelly reflection at the source the way the X5 does. Buy it for brightness and coverage; buy the X5 if glare is your actual problem.
How to Set Up Your Tattoo Light
Mount the lamp so light comes from the side of your working hand, not from behind your head — light from behind casts your own shadow onto the work. Set the temperature before you start: 6500K daylight for color judgment, 4500K neutral for most of the session, 2700K warm for a softer feel. Dim to the lowest level where you can still see your needle marks; more than that just adds glare and eye fatigue. Put the polarized glasses on once the stencil is down and keep them on through shading. For a deeper walkthrough, see our Tattoo Studio Lighting Guide.
FAQ
What is the best tattoo light for tattooing?
The best tattoo light controls glare first and brightness second. Look for polarized light output with matching polarized glasses, around 40W of directed LED, three color temperatures, and a wall or clamp mount that keeps both hands free. Our pick is the INKSOUL X5 wall-mounted lamp at $158.88.
Is polarized light worth it for tattooing?
Yes. Polarized light cuts the harsh reflection from petroleum jelly and fluids at the source, and matching polarized glasses filter what is left. Together they let you see your needle marks clearly instead of going over the same spot twice and traumatizing the skin.
How bright should a tattoo light be?
Around 40W of well-directed LED is the sweet spot for fine detail work — bright enough for fine linework without harsh heat or blinding your client. Dimmable control is a plus for adjusting to different skin tones and ambient conditions.
What color temperature is best for tattooing?
There is no single answer, which is why adjustable lamps win. Use 6500K daylight for the most accurate color judgment, 4500K neutral for all-around work, and 2700K warm when you want a softer look for lining or client comfort.
Do I need anti-glare glasses as well?
Not strictly, but they complete the system. The lamp cuts glare at the source and the glasses filter what remains, so you see the actual work instead of guessing. The INKSOUL X5 wall-mounted lamp includes a matched pair of polarized glasses in the box, and the glasses are also sold separately for $18.88.
bluetooth tattoo stencil printer
What Is the Best Bluetooth Tattoo Stencil Printer?
The short answer
The best Bluetooth tattoo stencil printer for a working artist is the INKSOUL T08FD — our pick. It prints A4 sheets and continuous 210mm roll paper, renders real shading and shadow gradients instead of flat outlines, with density control on a touch screen. If you mostly travel light and print small designs, the Phomemo TP31 at $78.99 is the pocket option.
Bluetooth is a feature, not a printer
Every stencil printer on this list connects over Bluetooth. That tells you almost nothing about whether it will survive a Saturday. What matters shows up after the first week: print width, shading vs. outlines only, whose paper it accepts, app charges, and how it behaves when it gets hot. A printer locked to one brand's paper can cost you more in a year than the price gap between machines — and one that jams on a shaded back piece can cost you a client.
Best Bluetooth tattoo stencil printers compared
Printer
Price
Print width
Shadow printing
Battery
Weight
Best for
INKSOUL T08FD — Our Pick
$188.88
A4 + 210mm roll
Yes
Built-in rechargeable
Not published
Daily studio work, realism
INKSOUL T08FS — Classic
$168.88
Up to 216mm (A4 / LTR / Legal / LTR+)
Yes
1200mAh
0.75 kg
Shadow printing on a budget
MHT-P8008
$168.88
210mm (A4)
Line work (no shadow printing stated)
2500mAh
810 g
Long sessions, PC + phone workflow
Phomemo TP31
$78.99
80mm
Yes, with mini roll paper
Rated up to 70 m per charge
450 g
Travel, guest spots, small designs
AIMO MR3
$78.88
80mm roll / long paper
Not stated
2200mAh (dealer listing)
Approx. 1 lb
Long-image mode on a budget
INKSOUL T08FD — Our Pick: the one that does the whole job
The T08FD is the improved successor to the classic T08FS, and the only printer here that covers a working artist's whole week. It prints A4 sheets and takes 210mm roll paper, so a sleeve or back piece prints in one continuous run instead of taped-together sheets. It renders realistic shading and shadow gradients — the thing that separates it from most stencil printers, which only do clean outlines. For realism or black-and-grey, that is the difference between a stencil you trust and one you redraw by hand.
The touch screen is the practical difference day to day: density sits on the printer itself — slide it with a fingertip instead of digging through app menus while a client waits. It connects wirelessly to phones and computers, on a built-in rechargeable battery. Thermal transfer means no ink cartridges or ribbons — the only consumable is stencil paper. One-year warranty on the whole machine — if it breaks, it gets replaced with a new one. At $188.88, with 294 reviews at 5.0, it is the pick for artists who print every day.
INKSOUL T08FS — Classic: shadow printing for $20 less
The T08FS is the classic version of the same machine, and it still prints shadows — the same "what you see is what you get" rendering of shading gradients. It takes A4, Letter, Legal and LTR+ sizes, prints at 203 dpi, and runs on a 1200mAh battery. The trade-offs are concrete: no touch screen, so settings live in the app, and the PC connection is USB cable only — Bluetooth is for phone and tablet. At $168.88, with 1,000 reviews at 5.0, it is the right call if you want real shadow printing and are happy to drive it from your phone — the $20 saving is a screen saving, not a quality saving.
MHT-P8008: the battery king for long days
If your sessions run long and you hate watching a battery icon, the MHT-P8008 has the biggest battery on this list at 2500mAh, in a 203 dpi machine printing full 210mm A4 width. It connects over Bluetooth and USB-C, works with Android, iOS and Windows, and at 810 g it is still portable for a guest spot. The honest caveat: no shadow printing is stated, so if your work lives in grey wash, this is line work only. At $168.88 it is the pick for bold-line and traditional artists who print a lot of sheets.
Phomemo TP31: the pocket printer that actually fits in your kit
The TP31 is 145 × 70 × 54 mm and weighs 450 g — genuinely pocket-sized, not "portable" in the marketing sense. It prints 80mm paper at 203 dpi, connects over Bluetooth to the Phomemo app, and Phomemo rates it for up to 70 metres of printing per charge. It is the right printer for small designs, fine-line work, conventions and guest spots — anywhere bag space matters more than sheet size. Two things to know: it takes 80mm paper, so a full sleeve will not fit on one print, and it is built for Phomemo paper — budget for that lock-in. The mini roll and long paper variants can print shadows, unusual at this size and price. At $78.99 with 33 reviews at 5.0, it is a second printer or a travel printer, not a studio workhorse.
AIMO MR3: the budget pick with long-image mode
The MR3 is the other 80mm pocket printer, at $78.88, and its selling point is a dedicated long-image mode — useful when a design is taller than it is wide. It takes 80mm roll paper (80mm × 3m) or long paper (80mm × 300mm), connects by Bluetooth through a phone app, and is listed at 2200mAh with up to 330 sheets per charge — a dealer figure, treat it as a guide, not a guarantee. Buy it for small-to-medium line designs and the cheapest way into wireless printing; buy the T08FD if you print full-size designs or shadows every day.
Buying checklist: six things to check before you pay
Print width vs. your biggest design. 80mm pocket printers cap out at small designs. A4 or 210mm covers full sleeves; roll paper removes the length limit.
Shadow printing, not just outlines. Most cheap thermal printers only do clean lines. If you do realism or black-and-grey, confirm the printer renders gradients — and buy the matching paper: SP100 for grey wash, LP100 for crisp lines.
Paper freedom. Some pocket printers only accept their own brand's paper — a subscription by another name. Check the per-sheet cost before the printer price. Thermal printers need thermal paper — heat turns its reactive coating purple-blue — so hand-drawn carbon sheets will not work in them.
App cost. Basic printing is usually free. AI design tools, pattern extraction and premium filters often sit behind a paid Pro subscription — check what is paywalled before you need it.
Battery in sheets, not mAh. Milliamp-hours do not tell you how many stencils you get. Look for a sheets- or metres-per-charge figure, and keep a cable in the kit either way.
Cooling behaviour. Thermal heads overheat on long, heavily shaded runs and jam. A printer that tells you to pause and cool down is being honest; one that never mentions it will still jam — mid-session.
Three things nobody tells you before buying
Pair inside the app, not in your phone's settings. The most common Bluetooth complaint in the category — Phomemo lists it first in its own FAQ — is a printer that will not connect. The cause is usually pairing in the phone's system Bluetooth menu first. Pair from inside the printer's app and it connects; pair in system settings and it often will not. If it cannot be found, forget it in system Bluetooth and start over from the app.
Overheating is a jam, not a defect. On the T08FS, the manual is blunt: a very complex or heavily shaded pattern makes the machine work hard, overheat, and jam the paper. The fix: stop between complex prints, open the lid, let it cool, and touch the thermal print head to check it is cold before the next run. Treat that pause as part of the job — a jam halfway through a back piece costs more than a two-minute cool-down. And clean the head now and then: transfer paper leaves a waxy residue that builds up into streaks and faded lines — a cotton swab with isopropyl alcohol takes it off.
Faint lines are usually a settings problem, not a printer problem. On the T08FD, fix a faint stencil in this order: check the paper faces the right way and the backing sheet is removed, then raise the density on the touch screen. Fine lines that break or vanish are usually thinner than the 203 dpi thermal head can resolve — thicken hairlines in the artwork before reprinting. Match the paper to the job: shadow paper for grey wash, line paper for crisp outlines.
For the full picture — how printers, paper and transfer gel work as one workflow — see our ultimate 2026 guide to choosing a tattoo stencil printer.
FAQ
Do Bluetooth tattoo stencil printers need Wi-Fi?
No. Bluetooth printers talk directly to your phone or tablet — no Wi-Fi, no router, no studio internet. That is the point for guest spots and conventions. You only need internet to download the app, not to print.
Can I print a stencil from my iPad or Procreate?
Yes. Bluetooth models like the T08FD, T08FS and TP31 all accept designs from a phone or tablet through their app, so a Procreate export prints the same as a computer file. One exception: the T08FS connects to a PC by USB cable only, while phone and tablet stay wireless. Mac users should confirm macOS support in the app listing first: the MHT-P8008 lists Android, iOS and Windows, and the T08FD/T08FS pages do not name macOS.
Will a Bluetooth stencil printer work with any stencil paper?
Not always. Full-width printers like the T08FD and T08FS take A4 thermal stencil paper and 210mm roll paper from any brand. Some 80mm pocket printers only take their own brand's paper, so check compatibility before you buy — the per-sheet cost can outweigh the printer's price difference.
How many stencils will a Bluetooth printer print on one charge?
It varies more than the mAh number suggests. Phomemo rates the TP31 for up to 70 metres per charge, the MR3 is listed at up to 330 sheets. Heavy shaded designs drain the battery faster than line work, and cold rooms shorten it further. If you print all day, keep the charging cable in your kit.
Do I need a paid subscription to use a Bluetooth stencil printer?
No — basic printing is free on every printer here. What sometimes sits behind a paywall is the extras: AI design generation, pattern extraction and premium filters in the manufacturer's app. Check which features are subscription-only before you buy, so the one you wanted is not the one that costs extra every month.
stencil printer review
Is the INKSOUL T08FD Worth It? An Honest Review for Working Artists
Short Answer: Yes — If You Print Shadows or Black-and-Grey Every Day
If your work lives in realism, portraits, or black-and-grey, the INKSOUL T08FD is worth its $188.88 price. It renders true shadow gradients — a trick most printers in its price class cannot do — and its touch screen lets you preview density before you commit paper. If you only print clean line work a few times a month, a budget line-only printer around $138 will do the job; save the T08FD for work that actually needs it.
What the T08FD Actually Is
The T08FD is INKSOUL's flagship wireless tattoo stencil printer and the improved successor to the classic T08FS. It is a thermal printer, which means there is no ink, no toner, and no cartridges — heat activates the carbon layer on thermal stencil paper. You send a design from your phone or computer, and the printer lays it onto A4 stencil paper or 210 mm roll paper in seconds.
Three things separate it from the budget printers crowding this category. First, a 2-inch smart touch screen replaces button-guessing: you slide print parameters with a fingertip and see the density change before you print. Second, it prints realistic shading and shadow gradients, not just outlines — a capability it shares with the classic T08FS, but one most budget stencil printers cannot reproduce. Third, INKSOUL builds it in exclusive custom colors with a much lower failure rate than the older generation, which is why it is our pick for a machine your bookings depend on.
One thing to know before you buy: like the T08FS, the T08FD prints through a phone app — the app is effectively the printer's driver. Basic printing is included with no subscription; only some optional AI generation features ask for one. It connects to your phone or tablet over Bluetooth and to a computer by USB. If you design in Procreate on an iPad, export the finished design and send it from the tablet over Bluetooth — the workflow most working artists actually use. Printing goes through the app, not your device's system print menu, and if your phone cannot find the printer, forget the device in your phone's Bluetooth settings and reconnect.
The 5 Differences That Actually Matter in Daily Use
1. You can preview density instead of gambling paper
Almost every thermal stencil printer on the market gives you two heat levels — usually labeled Deepness I and Deepness II — and you find out which one was right after the sheet comes out. On the T08FD you see the density change on the screen before you commit. For fine-line artists, that is the difference between a usable stencil and a wasted sheet. Our full guide to choosing a tattoo stencil printer walks through density settings in detail.
2. Shadow printing is real, not a marketing word
Most budget stencil printers reproduce outlines and flatten everything else into solid black. The T08FD renders gradients, which is what makes it viable for portraits and realism. Use SP100 shadow paper for greywash and shaded work, and LP100 line paper for crisp outlines. Using the wrong paper is the single most common reason artists tell us their stencils look wrong — and it has nothing to do with the printer.
3. Roll paper support ends the tape-and-pray routine
The T08FD takes A4 sheets and 210 mm roll paper. A full sleeve or back piece prints as one continuous stencil instead of two A4 sheets taped together with a registration line you hope lines up. If you do large work even once a month, this alone justifies the upgrade over pocket printers.
4. It is built to survive being a production tool, not a gadget
A stencil printer is not a desk toy — when it dies on a booked day, you lose the session. The T08FD's failure rate is far below the older generation, and it carries a one-year whole-machine warranty: if it breaks within the year, you get a new machine. That warranty is worth more than any spec-sheet number, because a printer that cannot be fixed quickly is a printer that costs you bookings.
5. The insider detail: keep the thermal head clean
Here is the maintenance point most reviews skip. A dirty thermal head is the usual cause of faint patches and broken lines that artists blame on paper or settings. Power the printer off, let the head cool, then wipe it gently with a lint-free cloth lightly dampened with isopropyl alcohol (70% or higher). Never use water, abrasive pads, or household solvents, and never touch the head while it is hot. Do this on a regular schedule — especially if you print daily — and check two things before you declare a stencil dead: the paper is facing the right way with the separator sheet removed, and hairline-thin lines in your artwork are not finer than the thermal head can resolve. If a line disappears, thicken it slightly in your design file and reprint; no printer in this class can reproduce a line thinner than its own print head.
Once the stencil is on skin, how long it survives the session is mostly about drying and wiping, not the printer. Let it dry 5–10 minutes before you start, and until the outline is finished, wipe with a dry towel or lubricant only — green soap will lift the transfer straight off.
T08FD vs. the Alternatives: A Straight Comparison
Printer
Price
Screen
Shadow printing
Paper
Best for
INKSOUL T08FD — Our Pick
$188.88
2-inch touch screen
Yes — true gradients
A4 + 210 mm roll
Realism, black-and-grey, daily studio use
INKSOUL T08FS (classic)
$168.88
No — buttons
Yes — true gradients
A4, LTR, Legal, LTR+
Proven workhorse, shadow printing, tighter budget
Phomemo M08F
About $138
No
No — outlines only
A4 thermal
Occasional printing, lowest spend
One new name is missing from the table on purpose: Ambition launched an A4 stencil printer at $78.55 in November 2026, the cheapest in the category — but with no failure-rate history or long-term artist feedback yet, it is a wait-and-see, not a recommendation. The honest read on the rest: the T08FD costs $20 more than the T08FS and roughly $50 more than the Phomemo M08F. What that money buys is the screen, roll-paper support, and the lower failure rate. If your income depends on the printer working tomorrow, proven reliability beats a launch price.
Buying Checklist: Should You Buy the T08FD?
Buy it if you print stencils daily, do realism or black-and-grey, print large pieces, or have lost a booked session to a dead printer before. High-volume line-work artists need the same reliability — the screen and roll paper save time on every job, not just shaded ones.
Buy the T08FS instead if you want shadow capability and the deepest bench of artist reviews behind your machine, and would rather keep the $20.
Buy a budget line-only printer instead if you print fewer than five stencils a month and only ever need outlines — a printer only pays for itself once tracing time starts costing you bookings.
Check before ordering: you have a phone or tablet to run the printing app; you have the right paper (SP100 for shadows, LP100 for lines); and you have a 210 mm roll on hand if you plan to print sleeves or back pieces — the AIMO roll ships with its bracket.
What It Costs to Own for a Year
The printer itself is $188.88. There are no ink or ribbon costs — ever. Your running costs are paper and gel: A4 stencil paper in 100-sheet packs (SP100 for shadows, LP100 for lines), a 210 mm × 30 m roll if you print large work, and stencil gel to apply the transfer. Most working artists spend more on paper in a year than on the printer — which is why reliability matters more than saving $20 or $50 upfront. If you want the whole workflow in one box, the INKSOUL Transfer Workflow bundle pairs the T08FD with paper and gel for $288.88.
At 745 g, with a 1,200 mAh battery good for dozens of stencils per charge, it travels: a detailed A4 design prints at 10–15 mm/s, done in seconds.
The Honest Downsides
No machine is perfect, and the T08FD has three real limitations. First, it prints through a phone app — if you want a printer with zero software involvement, buy an old thermal copier instead. Second, the screen and reliability cost money: if you only print outlines, you are paying for shadow capability you will never use. Third, the battery covers dozens of stencils per charge, not hundreds — for a full convention day, bring the charger. None of these are deal-breakers for a working studio, but they are the reasons a hobbyist should think twice.
FAQ
Can the T08FD print shadows and shading?
Yes — that is its defining strength. It renders realistic shading and shadow gradients exactly as they appear on your screen. Use SP100 shadow paper for greywash work and LP100 line paper for crisp outlines.
Do I need a subscription to print with the T08FD?
No. Basic printing is included with no subscription — the app is the printer's driver. Only some optional AI generation features require a subscription, and you can ignore them entirely.
What paper does the T08FD use?
A4 thermal stencil paper (SP100 for shadows, LP100 for lines) and 210 mm roll paper for large pieces. Standard office paper will not work — thermal stencil paper has a carbon layer that heat activates.
Can the T08FD print a full sleeve or back piece stencil?
Yes, on 210 mm roll paper it prints large designs as one continuous stencil, with no taping sheets together. On A4 sheets, large designs print across two sheets.
Should I buy the T08FD or the T08FS?
Buy the T08FD if you want the touch screen, roll-paper support, and the lowest failure rate — it is our pick. Buy the T08FS if you want shadow capability with the deepest bench of artist reviews, for $20 less. Both print true shadows; the difference is control, paper range, and reliability.
What if the T08FD breaks?
It carries a one-year whole-machine warranty. If it breaks within the year, you get a new machine — no repair limbo while your bookings wait. For warranty help, contact after-sales on WhatsApp or at inksoultattoosupply@outlook.com.
Which app does the T08FD use, and what comes in the box?
The current app is named in the product manual — check there for the latest version rather than trusting a review that may be out of date. Box contents vary by listing, so confirm the cable and sample sheets on the product page before ordering.
HV6 Pro
How Do I Choose a Wireless Rotary Tattoo Machine?
How Do I Choose a Wireless Rotary Tattoo Machine?
Buy for the way you actually tattoo, not the spec sheet. A good wireless rotary pen holds its stroke when the needle meets skin, runs a full session on one battery — or swaps to a spare in seconds — and changes stroke length without a second machine. The rest is comfort and convenience.
Every listing claims the same three things — long battery, powerful motor, smooth shading. Here are seven checks separating a pen you will still use in a year from one in a drawer by Christmas.
First, untangle the words: wireless, rotary, pen
Listings mash three words together. Rotary is how the machine moves the needle: a small motor drives it up and down. Wireless is how it gets power: a rechargeable battery instead of a cord. Pen is the shape: a straight body gripped like a marker.
Almost every modern wireless pen is a wireless rotary machine: the battery just replaces the cable. So "wireless rotary" on a listing is mostly the default, not a special technology. The real question is which rotary, which battery, and which stroke range.
The 7-point checklist
1. Stroke consistency under load, not RPM on a box
Every listing quotes a motor speed — 6,500, 10,000, 10,500 RPM — measured with no needle and no skin pushing back. It says almost nothing about the line you will pull. What matters is what happens when the needle meets resistance: a weak drive slows the moment you push a 25-magnum into tough skin, showing up as patchy packing and second passes. A strong coreless motor holds its speed — which is why motor type beats the RPM figure: coreless motors like the MCore-C1 in the Fold 2 Pro stay consistent, while cheap brushed motors fade fast and wear out. Look for reviews mentioning large groupings: a pen handling big mags without hesitation passes the load test.
2. Stroke length: adjustable beats fixed unless you know your number
Stroke length — how far the needle travels each cycle — decides what the machine is good at. Short strokes around 2.4–3.0mm suit soft shading, fine detail, and PMU work; longer strokes around 3.5–4.2mm hit harder for bold lining and solid color packing, and 3.5mm is the forgiving all-rounder most artists learn on. If you only ever tattoo at one stroke, a fixed-stroke pen is cheaper. But most artists' work changes week to week, so an adjustable pen covers both without a second purchase: seven settings from 2.4mm to 4.2mm in 0.3mm steps on the Fold Pro and Fold 2 Pro cover lining, shading, and color packing.
3. Battery life: read the hours as a range, and plan for the low end
Battery claims are the most inflated numbers in this category: "8–10 hours" usually means one battery, at low voltage, with a small grouping, on a fresh battery — not your session. Read battery life as three numbers: capacity — the Fold Pro's 1500mAh battery is rated 4 to 6 hours, the Fold 2 Pro's 2000mAh pack 5 to 7 hours; charge time — USB-C in about 1.5 to 2 hours; and the hidden one, whether the battery is replaceable and what a spare costs. Batteries age: after months of daily charging, a pack holds less charge and eventually will not take a full charge. Then a swappable battery needs a $60 spare, not a new machine; a sealed one is done. Two batteries in rotation never stop a session — the INKSOUL HV6 Pro ships with two true 2000mAh batteries in the box.
4. Weight and balance: count the whole setup, not the bare pen
Listings quote the lightest weight — pen only, no battery, no grip. You never tattoo that way. The Fold Pro weighs 200g with its battery fitted, 199g with the RCA connector, on a 32mm grip — heavy for a wireless pen, and you feel it on a long lining session. Some artists like the extra weight; others get wrist fatigue by hour four. The mistake is discovering which one you are after you have paid. Balance matters too: a battery pack on the back shifts the center of gravity toward your palm, so compare the complete setup with a pen you own — 30g or more is noticeable.
5. The grip: check you can take it off and clean it
This is the check that saves machines from the bin. A wireless pen lives in ink, blood, and green soap — the grip has to come off for proper cleaning. On cheap pens it often does not, or it does until the tiny screw holding it strips and it never comes off again. Artists have thrown away three machines for exactly this: the screw wore out, the grip would not come off, the machine could not be cleaned. Before you buy, confirm the grip is removable and replacements are sold. The HV6 Pro ships with two autoclavable aluminum grips, 33mm and 38mm — one to sterilize, one spare. All three pens take standard cartridge needles. Check the membrane inside each cartridge before loading: a torn one lets ink flow back into the drive bar. Maintenance on a sealed pen is external only: wipe the grip, keep the battery contacts and RCA dock clean, and never open the pen to oil it — the motor is factory-lubricated and opening it voids the warranty. One grip and no spares is a countdown, not a purchase.
6. A wired fallback: the RCA connector is cheap insurance
The best wireless pen still works when the battery dies mid-session: pens with an interchangeable RCA connector — the Fold Pro and Fold 2 Pro both have one — plug into a standard power supply and keep going while the battery charges. Wireless-only with no fallback is a gamble: fine for short sessions, risky as your only machine. Bluetooth pedals are separate: the Archer S bundle pairs its pen with a Bluetooth foot pedal.
7. Support, parts, and the real total cost
Add up everything first: pen, spare battery, spare grip, charger. A $249 pen with a $60 spare is a $309 setup; a cheaper pen with no spares is a pen you replace whole. Also ask who answers when something breaks — a dead pen is a cancelled day of appointments. Ask what the warranty covers before you pay — motor and battery cover matters most. Get it in writing. A seller stocking spares and answering support the same day beats a $30 saving from a listing that goes quiet after the sale.
Three pens, three answers
Specs side by side:
Spec
Fold Pro
Fold 2 Pro
HV6 Pro
Stroke
7 settings, 2.4–4.2mm
7 settings, 2.4–4.2mm
Fixed 4.2mm
Motor
Coreless, 8V / 6500 RPM
MCore-C1 coreless, 8V / 6500 RPM
Not published
Voltage
4 to 12V
4 to 12V
Not published
Battery
1500mAh, 4 to 6 hours
2000mAh, 5 to 7 hours
Two 2000mAh batteries
Charging
USB-C, ~1.5 hours
USB-C, ~2 hours
Not published
Screen
LED: battery, time, voltage
Color display
Not published
Weight / size
200g, 128mm, 32mm
~250g, 140mm, 32mm
Not published
Wired fallback
RCA connector
RCA connector
Not published
Standout
Widest stroke range, lightest body
Bigger battery, color screen, MCore-C1
Two batteries, two autoclavable grips
For one pen covering lining, shading, and color packing, the Fold Pro's seven strokes are the argument — buy the two-battery version for full days, since 4 to 6 hours per battery is honest but not generous. Want longer runtime and a color screen? The Fold 2 Pro is the same idea with a bigger battery. If 4.2mm is already your stroke, the HV6 Pro's two-battery, two-grip box is the most complete box of the three — INKSOUL's own machine, so parts and support come from the same place as the rest of your order.
One warning on the Fold Pro: not every pen sold under that name is the same configuration. Check three numbers before you pay — battery capacity, length, and weight. The classic version is 1500mAh, 128mm, 200g; a listing showing 3000mAh or 245g is a different edition, even though the name matches.
Three mistakes buyers keep making
Buying on headline hours. "8–10 hours" is a lab number. Plan on the low end, keep a charged spare, and you will never apologize to a client at hour five.
Ignoring the grip screw. A two-dollar part decides whether a $250 machine is cleanable in a year. Removable grip, replaceable grip, spare in stock — check all three.
Buying a fixed stroke, then outgrowing it. A 3.5mm pen is the right first machine for most artists — and the one most replace within a year, when work splits into fine lining and heavy packing. Adjustable now beats a second pen later.
Related reading
Still deciding between drive types? Start with What Is a Rotary Tattoo Machine? (Buyer's Guide). Battery anxiety your main worry? How to Choose a Battery Tattoo Pen Machine That Won't Die Mid-Session goes deeper on runtime planning.
Frequently asked questions
Are wireless rotary tattoo machines as powerful as wired ones?
Yes, for most work. A modern coreless motor holds its speed under load, battery or wall supply. Wired still wins at the very top end: all-day sessions with large mags at high voltage, where a battery's output sags as it drains. If that is your daily work, buy a pen with an RCA fallback.
How long does a wireless tattoo machine battery actually last?
Less than the listing says. The Fold Pro's 1500mAh battery is rated 4 to 6 hours, the Fold 2 Pro's 2000mAh pack 5 to 7 hours — plan on the low end, since voltage, grouping, and battery age all pull the number down. A spare on rotation turns "about five hours" into "the whole day."
Can I use a wireless tattoo machine while it charges?
Usually not — most pens cannot run and charge at the same time. That is why the RCA fallback matters: the Fold Pro and Fold 2 Pro swap the battery for an RCA connector and run off a standard power supply while the battery charges. Check for that connector before you buy, not after the battery dies mid-appointment.
What stroke length should I start with?
3.5mm if you are buying one fixed-stroke pen: the forgiving middle for lining and shading, without forcing stroke decisions before you understand them. If you buy adjustable, start at 3.0mm for shading and 3.5–3.6mm for lining, then move in 0.3mm steps until the machine stops fighting you.
Do wireless rotary machines work with standard cartridge needles?
Yes. Modern wireless pens accept standard cartridge needles — check the pen takes the cartridges you stock, and that the grip comes off for cleaning. Cartridge fit is boring until it is wrong.