News
12 Compass Tattoo Ideas for Guys 2026: The Ultimate Design & Execution Guide
From our experience in the professional tattoo industry, few motifs carry the enduring commercial popularity and deep personal resonance of the compass. Whether a client is commemorating a life-pivoting journey, honoring a military career, or simply seeking a visual anchor for personal direction, a compass ink design offers an ideal balance of geometric structure and artistic versatility. However, executing a flawless compass piece is one of the toughest tests a tattoo artist faces. A slightly warped circle or a shaky dial needle will instantly ruin the aesthetic symmetry.
In 2026, the trends surrounding compass tattoo ideas for guys have evolved dramatically beyond basic black-and-grey traditional pieces. Today’s collectors demand hyper-detailed realism, bold Nordic Vegvisir iconography, integrated mechanical elements, and sharp geometric linework. In this comprehensive industry guide, we break down the 12 best compass tattoo concepts for men, detail the technical secrets to pulling off clean geometric rings, and highlight the exact equipment professional tattooers rely on to guarantee crisp, lasting results.
Quick Answer: How to Choose the Right Compass Tattoo
If you are seeking a high-impact compass tattoo ideas for guys concept in 2026, focus heavily on structural placement and style synergy. For a strong, masculine statement piece, choose a Nautical Compass & Anchor Sleeve or a 3D Micro-Realism Pocket Watch Compass placed on the outer forearm or upper bicep. If you prefer symbolic minimalism, opt for a Viking Vegvisir (Nordic Compass) or a Geometric Fine-Line Compass. To prevent the intricate dial lines from blurring into a dark smudge after five years, ensure the artwork is scaled to at least 3.5 inches in diameter and executed with dedicated round liner needles.
Table of Contents
What It Is: The Anatomy of a Compass Tattoo
How It Works: Technical Execution & Linework Precision
The 12 Best Compass Tattoo Ideas for Guys in 2026
Key Benefits of Getting a Compass Tattoo
Limitations and Aging Concerns
Who Should Get It vs. Who Should Skip It
Common Mistakes Buyers & Artists Make
Placement and Sizing Decisions
Expert Recommendation & INKSOUL® Product Spotlight
Comparison & Selection Tables
Frequently Asked Questions
What It Is: The Anatomy of a Compass Tattoo
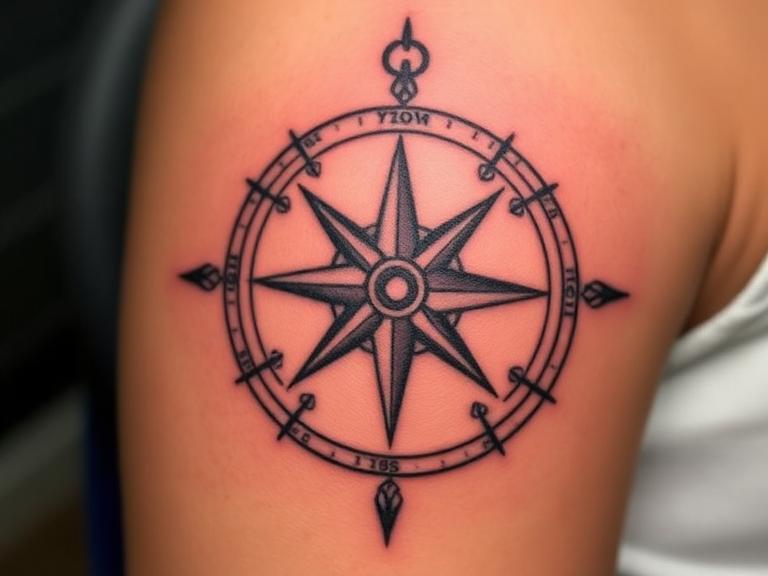
A compass tattoo is a symbolic figurative design modeled after navigational magnetic instruments. At its core, the piece consists of a circular dial, cardinal directions (North, South, East, West), a central pivot star or arrow needle, and optional background embellishments such as maps, ropes, roses, or nautical ships.
From a design structure standpoint, compasses fall into four main artistic categories: Traditional/Nautical, Geometric/Minimalist, Realism/3D, and Cultural/Runiic (such as the Icelandic Vegvisir). Each style places unique technical demands on the artist. While a traditional compass relies on heavy black outlines and solid color packing, a realism compass requires soft black-and-grey shading gradients and precise light-reflection highlights.
How It Works: Technical Execution & Linework Precision
For a compass tattoo to look exceptional, the geometry must be flawless. Human skin is a dynamic, stretching canvas, meaning applying a perfect circle requires advanced preparation and precise machine operation.
In most professional situations, artists begin by laying down a high-fidelity stencil. Understanding how to use tattoo transfer paper correctly ensures that the concentric circles of the compass dial do not distort when the client stands up. If an artist attempts to apply a complex geometric compass without verifying stencil alignment across muscle movement lines, the finished tattoo will look warped whenever the forearm twists. Many shop owners wonder can a normal printer print tattoo stencils; while dedicated thermal stencil printers are the industry standard, crisp transfer execution is what guarantees clean linework.
During the lining phase, needle selection is critical. When executing the sharp cardinal lettering and fine compass needle points, artists rely on tight round liners. Reviewing a detailed tattoo needle sizes guide helps artists select between 3RL for micro-details and 9RL for prominent outer rings. Understanding the differences between rs vs rl tattoo needles ensures smooth shading within the compass dial without chewing up the skin.
The 12 Best Compass Tattoo Ideas for Guys in 2026
Here are the premier compass tattoo ideas for guys dominating shop requests this year, complete with placement guidance and style commentary.
1. Nautical Compass & Anchor (Classic Sailor Style)
A perennial favorite among men with maritime ties or military backgrounds. The anchor symbolizes stability and grounding, while the compass provides directional guidance. We recommend bold American Traditional or Neo-Traditional styling with deep navy blues, rich reds, and heavy black outlines on the bicep or forearm.
2. Geometric Fine-Line Compass
Leading the 2026 trend charts, this style strips away bulky shading in favor of razor-sharp concentric circles, delicate arrow shafts, and subtle dotwork (stippling). It looks stunning on the inner forearm or upper spine. In our testing, executing this requires a rock-steady stroke and low-vibration wireless pen machines.
3. Viking Vegvisir (Nordic Runiic Compass)
Technically a magical stave from Icelandic grimoires meant to guide travelers through bad weather, the Vegvisir is a fierce choice for men who resonate with Norse mythology. Featuring eight distinct runic staves radiating from a central point, it looks powerful centered on the chest, upper back, or calf.
4. Realism Vintage Pocket Watch Compass
Combining a brass pocket watch housing with an internal compass dial creates a powerful visual metaphor for time and direction. This style demands heavy contrast, crisp glass reflection highlights, and smooth shading. It is an ideal anchor piece for a full forearm or outer bicep sleeve.
5. Compass with Map Background
For avid travelers, pairing a central compass with an antique, faded nautical map backdrop adds tremendous depth and scale. The map can depict meaningful geographic locations or a stylized treasure map layout. This design requires a larger canvas, making the shoulder blade, full back, or thigh the best placement.
6. Arrow & Compass Combination
An arrow shooting through the center of a compass rose adds linear momentum and dynamic movement to the artwork. Symbolically, it represents forward focus and targeted purpose. A long, slender arrow-compass fits the anatomical structure of the forearm or outer tricep perfectly.
7. Trash Polka Compass
Originated in Germany, Trash Polka mixes hyper-realistic motifs with bold black brushstrokes, geometric splatters, and striking crimson red ink accents. A Trash Polka compass looks intensely modern, chaotic, and aggressive, making it a favorite for guys who want a bold, non-traditional piece on their chest or shoulder.
8. Compass Rose & World Globe
Superimposing a compass rose over a detailed outline of world continents showcases a global mindset and wanderlust spirit. For optimal clarity, keep the globe lines soft and clean, allowing the compass star to take primary visual focus in the foreground.
9. Watercolor Splatter Compass
For guys wanting a touch of color without committing to traditional shading, a sharp black compass outline layered over abstract splashes of blue, teal, or charcoal watercolor creates a dynamic contrast. It works exceptionally well on the shoulder or upper chest.
10. 3D Shredded Skin Compass
A classic biomechanical-adjacent concept where the skin appears torn or shredded, revealing an intricate, brass compass mechanism ticking underneath. This style requires elite 3D shading techniques to render realistic skin shadows and metallic sheen.
11. Celestial & Star Compass
Integrating constellations, moon phases, or astrolabe dials into the compass outer rings appeals to guys interested in astronomy, navigation, and cosmic balance. It lends itself beautifully to detailed fine-line black-and-grey execution on the inner forearm.
12. Mountain & Wilderness Compass
Combining rugged pine tree silhouettes, jagged mountain peaks, and a compass rose speaks directly to outdoorsmen, hikers, and hunters. The natural landscape anchors the bottom of the piece while the compass sits prominently above the horizon.
Key Benefits of Getting a Compass Tattoo
Timeless Aesthetic: Unlike short-lived trend tattoos, compass motifs have remained relevant in body art for over two centuries.
High Composition Versatility: Compasses scale seamlessly from small 3-inch forearm accents to full-back centerpiece compositions.
Ease of Sleeve Integration: Because of its circular geometry, a compass acts as a perfect structural junction point to connect surrounding sleeve elements like skulls, roses, or ships.
Limitations and Aging Concerns
We must apply commercial and practical judgment: geometric compasses are unforgiving. As human skin ages, ink naturally diffuses slightly over time. If a client insists on a 2-inch micro-compass packed with minute degree markings and miniature lettering, those tight details will blur into a dark smudge within a few years.
Furthermore, placements over high-friction areas (like wrists, knuckles, or elbows) experience accelerated ink fading. We recommend sizing compass pieces large enough to allow breathing room between concentric line circles.
Who Should Get It vs. Who Should Skip It
For commercial clients and tattoo enthusiasts: If you are seeking a structured, deeply meaningful design that naturally complements muscle anatomy, a compass piece is a top-tier choice.
Who should skip it: If you prefer highly fluid, organic, asymmetric art (like Japanese wave sleeves or bio-organic art), forcing a rigid, circular compass into the design can clash visually with the surrounding flow.
Common Mistakes Buyers & Artists Make
From our shop observations, here are the most frequent errors encountered during compass tattoo projects:
Placing a Circular Stencil on a Twisted Limb: If an artist places a circular stencil while the client’s arm is bent or turned, the compass will look elliptical when the arm returns to a natural resting position. Always stencil with the client standing neutral.
Using Uncalibrated Machine Stroke Lengths: Running a short 2.5mm or 3.0mm stroke machine when pulling long, thick outer-ring lines often results in faint, patchy lines that require rework. A solid 4.2mm stroke machine provides the punch needed to deposit clean lines in a single pass.
Overcrowding the Dial: Trying to squeeze every degree notch from 0 to 360 onto a small forearm piece. Less is more; simplify the inner dial markings for long-term clarity.
Placement and Sizing Decisions
When selecting your placement, keep anatomical flow in mind. Flat, broad surfaces (chest, back, upper outer arm) are easiest for the artist to maintain true geometric symmetry. Forearms are fantastic, but you must accept that twisting your wrist will temporarily distort the circular shape of the compass—which is natural for human anatomy.
Expert Recommendation & INKSOUL® Product Spotlight
In most professional situations, the perfection of a geometric compass tattoo depends entirely on the stability, power delivery, and stroke length of the artist’s rotary machine. Shaky voltage or motor lag results in line blowouts and uneven circle depth. For tattoo artists looking to execute flawless geometric and realism compasses, upgrading to a high-performance machine is essential.
We recommend inspecting the INKSOUL® Tattoo Machine Wireless Pen HV6 PRO. Engineered specifically for professional artists who demand absolute line precision and versatile shading power, the HV6 PRO is built to handle the rigorous demands of technical geometric tattooing.
INKSOUL® Tattoo Machine Wireless Pen | HV6 PRO
The ultimate professional tool for pulling rock-solid lines and smooth shading gradients on complex compass designs.
4.2MM Golden Stroke: Delivers maximum precision control in a single stroke for clean outer rings.
Dual-Mode Free Switching: Seamlessly adapts between linework and soft shading styles.
Dual Batteries + Dual Grips: Fully loaded configuration ensuring zero downtime during long sessions.
2-in-1 Flexibility: Operates effortlessly in both wired RCA and wireless battery modes.
Explore the INKSOUL® HV6 PRO
Comparison & Selection Tables
Quick Summary Table: 12 Compass Tattoo Styles for Guys
Style Name
Primary Aesthetic
Ideal Body Placement
Recommended Size
Nautical Anchor Compass
Bold, Sea-faring, Traditional
Forearm / Bicep
Medium to Large (4"+)
Geometric Fine-Line
Minimalist, Modern, Precise
Inner Forearm / Spine
Small to Medium (3"-5")
Viking Vegvisir
Nordic, Tribal, Symbolic
Chest / Shoulder / Calf
Medium to Large (4"-8")
Vintage Pocket Watch
3D Realism, Detailed
Outer Bicep / Forearm
Large (5"+)
Map Background Compass
Explorer, Large Scale
Full Back / Upper Arm
Extra Large (Sleeve / Back)
Arrow & Compass
Dynamic, Directional
Forearm / Tricep
Medium (4"-6" tall)
Trash Polka
High-Contrast, Aggressive
Chest / Full Shoulder
Large (6"+)
World Globe Compass
Travel, Geographic
Upper Arm / Thigh
Medium to Large (4"+)
Watercolor Splatter
Artistic, Vibrant
Shoulder / Upper Chest
Medium (4"-6")
3D Shredded Skin
Illusion, Biomechanical
Forearm / Ribs
Medium to Large (5"+)
Celestial Star Compass
Astronomy, Fine-Line
Inner Forearm / Wrist
Small to Medium (3"-5")
Wilderness Mountain
Nature, Outdoors
Calf / Forearm
Medium to Large (4"-6")
Comparison Table: Wireless vs. Wired Machines for Geometric Linework
Feature
Wireless Pen (e.g. INKSOUL® HV6 PRO)
Traditional Wired Coil / RCA Setup
Maneuverability
Superior (No cord drag disrupting circular motion)
Moderate (Cord tension can warp freehand curves)
Stroke Consistency
High (Digital voltage control & fixed 4.2mm stroke)
Varies based on spring tuning and power supply
Vibration Level
Ultra-Low (Crucial for crisp geometric details)
High (Increases hand fatigue on multi-hour lines)
Setup Speed
Instant (Plug-and-play battery pack)
Slower (Clip cords, foot pedals, power boxes)
Pros and Cons Table: Getting a Compass Tattoo
Pros (Advantages)
Cons (Limitations)
Rich, universal symbolism that rarely loses personal meaning.
Unforgiving geometry; minor line wiggles are easily noticed.
Highly adaptable to almost any anatomical placement.
Requires larger sizing to prevent small inner dials from blurring.
Pairs effortlessly with other popular tattoo motifs (maps, roses, anchors).
Requires an experienced artist skilled in true circle execution.
Buying Guide: Choosing the Right Setup for Artists
Needle / Technical Requirement
Recommended Spec
Why It Matters
Outer Dial Linework
7RL or 9RL (0.35mm Bugpin)
Pulls strong, solid outer rings in a single clean pass.
Inner Dial Details
3RL or 5RL Tight Liner
Prevents micro-lettering and degree marks from bleeding.
Machine Stroke Length
4.0mm to 4.2mm Long Stroke
Provides enough mechanical punch to push tight liners through tough skin.
Battery Backup
Dual Battery Pack (Wireless Gun Battery Life)
Guarantees steady power across 6+ hour complex sleeve sessions.
Frequently Asked Questions
What does a compass tattoo symbolize for men?
A compass tattoo primarily symbolizes direction, moral guidance, protection during journeying, resilience through life's storms, and a commitment to staying true to one's personal path.
What is the best placement for a compass tattoo on a guy?
The forearm, upper arm/shoulder, and chest are the premier placements for men. The outer forearm offers a wide, flat canvas that keeps geometric rings symmetrical, while the chest provides a flat area over the heart for deeply personal symbolism.
How small can a detailed compass tattoo be without blurring over time?
In most professional situations, a detailed compass tattoo should be no smaller than 3 to 4 inches in diameter. Micro-details on compass dials packed smaller than this run a high risk of spreading and bleeding together as skin ages over time.
Authoritative References & Industry Standards
To ensure total accuracy and safety compliance in our guides, we align with guidelines established by these authoritative industry bodies:
Alliance of Professional Tattooists (APT) - Industry body establishing international sanitation, needle depth safety, and professional tattooing standards.
ASTM International - Committee F04 on Medical and Surgical Materials - Governing specifications for surgical-grade stainless steel tattoo needles and equipment safety.
U.S. Food and Drug Administration (FDA) Tattoo Inks & Safety Guidelines - Federal safety benchmarks regarding pigment safety and skin barrier protection.
6 Fashionable Snake Tattoo Ideas for 2026 (Expert Curated)
🐍 Curated by INKSOUL – premium tattoo supplies for professionals
🐍 Quick Answer: What are the best snake tattoo ideas for 2026?
The most fashionable snake tattoo ideas for 2026 combine bold symbolism with contemporary aesthetics. Our top picks include: minimalist single-line serpents for a sleek, modern look; neotraditional snakes with floral elements for vibrant, illustrative designs; geometric snake patterns for a futuristic edge; and blackwork ouroboros for timeless meaning. For those wanting something edgy, cyber-snake (cybersigilism) and watercolor snake styles are rising fast. In our experience, the best snake tattoos are those that match your body's flow and personal narrative – not just a random flash design.
📑 ContentsWhy Snakes Are a Timeless Tattoo Motif 6 Fashionable Snake Tattoo Ideas Style Comparison Table Pros & Cons Artist & Equipment Guide FAQ
Snake tattoos have been a staple of body art for centuries – from ancient tribal markings to modern high-end realism. In 2026, snakes are more popular than ever, but the styles have evolved dramatically. The days of generic coiled vipers are over; today's trends are all about personalisation, composition, and technical execution.
From our experience at INKSOUL, where we supply professional tattoo equipment and stencil printers to artists worldwide, we've seen the snake trend reinvent itself season after season. In this guide, we'll share 6 of the most fashionable snake tattoo ideas for 2026 – and we'll give you the practical advice you need to make the right choice for your next piece.
Before you get inked, make sure your artist uses high-quality stencils. Learn about tattoo stencil printers for crisp transfers.
Why Snakes Are a Timeless Tattoo Motif
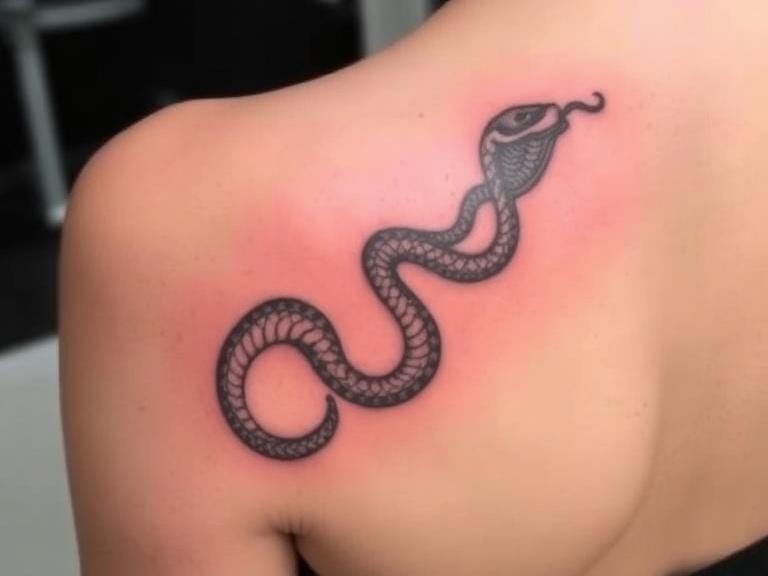
Snakes carry rich symbolism across cultures – transformation, rebirth, wisdom, protection, and temptation. They're also incredibly versatile anatomically, curving naturally with the body's contours. Whether coiled around an arm, slithering down a spine, or wrapping around a forearm, the snake's shape follows muscle groups, making it one of the most flattering motifs you can choose.
What Makes a Great Snake Tattoo?
Flow – The snake should follow your body's natural lines, not fight against them.
Scale detail – Realistic or stylised, the texture of the scales adds depth and visual interest.
Composition – Whether minimalist or ornate, the design should feel balanced and intentional.
Placement – Forearms, thighs, ribs, and spines are classic spots that highlight the snake's curvature.
Who Should Get a Snake Tattoo?
Beginners – Snakes are a great entry point; they can be as simple or as complex as you like.
Commercial users – Tattoo artists should keep snake designs in their portfolios – they're consistently in demand.
Heavy-duty applications – For those wanting a large, bold piece, snakes cover large areas beautifully.
Who might skip it? If you're uncomfortable with reptilian imagery or prefer purely abstract designs, snakes may not be for you. But for most people, they're a safe, stylish bet.
For precise stencil transfers, check out the INKSOUL AIMo T08FS wireless stencil printer.
6 Fashionable Snake Tattoo Ideas for 2026
Minimalist 1. Single-Line Serpent
This is the ultimate modern, refined snake. It's created using a single, continuous line, often with no shading. The result is elegant, understated, and works perfectly on wrists, ankles, or behind the ear. In our experience, single-line designs are growing in popularity because they're less intimidating, heal faster, and age gracefully.
Neotraditional 2. Snakes & Flowers (Neotraditional)
Neotraditional combines bold lines, rich colours, and illustrative detailing. A snake intertwined with roses, peonies, or lotus flowers is a classic choice. This style is great for larger pieces – thigh, upper arm, or ribs – and allows for a lot of artistic expression. The contrast between the snake's smooth texture and the floral elements creates a striking visual.
Geometric 3. Geometric Snake Pattern
Geometric snake tattoos use triangles, dots, and straight lines to form a stylised snake. This style is perfect for those who want something abstract, futuristic, or culturally inspired (think Aztec or Mayan motifs). It's also a great way to incorporate symmetry and precision into your design.
Blackwork 4. Ouroboros – The Eternal Cycle
The ouroboros – a snake eating its own tail – is one of the oldest symbols in the world, representing infinity and the cycle of life. In blackwork (solid black ink, often with dotwork shading), it becomes a powerful, bold statement piece. Placement on the back of the neck or inner forearm is especially impactful.
Cyber-Sigil 5. Cybersigilism Snake
Cybersigilism is the fusion of cyberpunk aesthetics with occult symbolism. Think of a snake made of circuit-like lines, digital glitch effects, or even "holographic" colour techniques. This is the edgy, contemporary choice for 2026 and appeals to a younger, tech-savvy audience.
Watercolor 6. Watercolour Serpent
Watercolour tattoos use vibrant, brushstroke-like colour washes without heavy black outlines. A snake done in watercolour feels ethereal and artistic – but it's also the most challenging to execute and the most likely to fade over time. We recommend this only if you're willing to commit to touch-ups.
Need high-quality needles for fine detail? Explore the INKSOUL tattoo needle range.
Comparison Table: Snake Tattoo Styles
Style
Best Placement
Complexity
Healing Time
Longevity
Single-Line
Wrist, ankle, ear
Low
Fast (7-10 days)
Excellent
Neotraditional
Thigh, upper arm
High
Standard (10-14 days)
Good
Geometric
Forearm, calf
Moderate
Standard
Very Good
Blackwork Ouroboros
Back of neck, inner arm
Moderate
Standard
Excellent
Cybersigilism
Ribs, shoulder
High
Standard
Moderate
Watercolour
Forearm, calf
Very High
Standard
Poor (needs touch-ups)
Pros & Cons of Snake Tattoos (by Style)
Flattering anatomy – Snakes follow curves naturally.
Versatile meaning – rebirth, protection, wisdom.
Range of styles – from minimalist to full colour.
Timeless – never goes out of fashion.
Great for cover-ups – the scales can hide imperfections.
Watercolour fades quickly – needs regular touch-ups.
Fine details blur over time – single-line can spread.
Requires skilled artist – poor execution looks amateur.
Some styles (cybersigil) may not age well – trend-dependent.
Artist & Equipment Guide: How to Bring Your Snake Idea to Life
Choosing the right artist and equipment is critical. From our experience, even the best design will fail if the execution is sloppy.
Find a Specialist – Look for artists with a portfolio of reptile or snake work. Check their Instagram and healed photos.
Stencil Quality – A crisp stencil is the foundation. Artists using INKSOUL tattoo transfer printers (like the T08FS) can produce ultra-fine, smudge-resistant stencils.
Needle Selection – For scales and fine lines, use round liners (RL) 7–9. For shading, magnums (M1) work well. INKSOUL offers a full range.
Ink Quality – Use high-pigment, vegan inks to ensure colour stays vibrant. Blackwork requires deep, carbon-based blacks.
Lighting – Proper studio lighting prevents shadows and ensures colour accuracy. INKSOUL provides flicker-free LED studio lights.
Aftercare – A good tattoo is only as good as the healing process. Follow the healing guide to preserve your design.
Ready to start? Browse tattoo stencil paper for professional transfers.
Our Expert Recommendation: Which Snake Tattoo Should You Choose?
After years of observing trends and working with top artists, here's our advice for different priorities:
For a first tattoo: Choose the single-line serpent. It's subtle, heals quickly, and easy to maintain.
For maximum impact: Go for neotraditional snake with flowers. It's bold, colourful, and a true art piece.
For symbolism: The blackwork ouroboros is timeless and deeply meaningful.
For trendsetters: Cybersigilism will make you stand out – just be aware it may look dated in 10 years.
For colour lovers: Watercolour is beautiful but be ready for touch-ups every 3–5 years.
Ensure your artist uses the best tools – check out INKSOUL tattoo machines for professional results.
Common Mistakes When Getting a Snake Tattoo
Choosing a design that doesn't flow with your body – A rigid, straight snake looks awkward. Always ask the artist to adjust the flow.
Overcomplicating small spaces – Don't try to fit a detailed snake on a tiny wrist. Scale down the details or choose a simpler style.
Ignoring skin tone – Darker skin tones need bold lines and contrast. Watercolour and pale colours may not show up well.
Not researching the artist's snake work – Snakes require a specific skill set – line control, shading, and scale texture.
Skimping on aftercare – Snakes with fine lines and details need careful healing. Use only recommended products.
About INKSOUL Tattoo Supply –
Complete Product Range
Beyond needles and pens, INKSOUL provides a one-stop inventory for tattoo studios. Each product is chosen for quality, compliance, and performance.
Tattoo Machines
High-performance rotary and coil machines for every style — lining, shading, and color work.
Tattoo Needles
Full selection: round liners, round shaders, magnums, curved magnums and cartridges.
Tattoo Transfer Printers
Reliable thermal and wireless printers for crisp stencil transfers (INKSOUL T08FS, Phomemo TP31, XIRU XR3).
Tattoo Stencil Paper
High-contrast, smudge-resistant transfer paper compatible with thermal and ink-based systems.
Tattoo Lighting Supply
Adjustable, flicker-free LED lights tailored for studio visibility and color accuracy.
Tattoo Toys & Accessories
Workspace upgrades, grips, foot pedals, power supplies, and studio essentials.
Frequently Asked Questions
Are snake tattoos painful?
It depends on placement. Areas with thin skin (ribs, spine, inner arm) are more painful, while fleshy areas (thigh, upper arm) are milder. The design complexity also affects pain – shading takes longer.
How much does a snake tattoo cost?
Prices vary widely by artist location and reputation. A small single-line snake may cost $150–300, while a large neotraditional piece can run $800–2,000+.
What is the best placement for a snake tattoo?
Forearms, thighs, ribs, and the spine are classic choices because they complement the snake's natural curve. The placement should match your lifestyle and comfort.
Can I get a temporary version to test before committing?
Yes – many artists offer temporary stencil applications, or you can use DIY temporary tattoo techniques to test placement.
📚 References & Trusted Sources
1. INKSOUL – Tattoo Industry Trend Report 2026.
2. Tattoo Artist Magazine – Best Snake Tattoos of the Year.
3. Dermatology Times – Tattoo Healing and Aging Guidelines.
Explore more: glitter tattoo guide | tattoo healing stages | tattoo pricing guide | tattoo transfer printer guide | thermal tattoo printer guide

12 Popular Skull Tattoo Design Ideas & Inspiration for 2026
The skull is the undisputed king of tattoo motifs. Since the inception of modern electric tattooing, the human skull has served as a canvas for artists to demonstrate their mastery of contrast, anatomy, and line weight. As we move through 2026, the industry is seeing a massive evolution in how these macabre symbols are executed. Gone are the days of generic, flat flash art. Today's clients demand high-concept fusions, blending hyper-realism with geometric abstraction, or reviving bold traditional styles with modern rotary precision.
From our experience working alongside elite tattoo artists and supplying the world's best studios at INKSOUL, the execution of a great skull tattoo relies entirely on two things: a flawless design concept and uncompromising equipment. Whether you are a collector looking for your next centerpiece or an artist researching the latest trends, you need to understand not just what looks good on paper, but what actually survives the healing process. We have compiled the definitive guide to the best Skull Tattoo Design Ideas for 2026, complete with technical insights on why certain styles outperform others.
Quick Answer: The State of Skull Tattoos in 2026
The most popular Skull Tattoo Design Ideas currently dominating the industry include Neo-Traditional fusions (skulls paired with heavy botanicals), Trash Polka (realistic skulls with aggressive red brushstrokes), and Micro-Realism. If you want a tattoo that will age perfectly over the next 20 years, we recommend bold Blackwork or Traditional styles. For commercial users and studio owners, executing these designs requires high-torque rotary machines and premium needle cartridges capable of packing dense black pigment without overworking the skin.
Table of Contents
What It Is: The Anatomy of a Skull Tattoo
How It Works: Technical Execution
12 Popular Skull Tattoo Design Ideas for 2026
Benefits and Limitations of Skull Tattoos
Who Should Use It & Who Does Not Need It
Common Mistakes in Skull Tattoos
Buying Considerations: Artist & Equipment
Expert Recommendation
INKSOUL Tattoo Supply
Frequently Asked Questions
What It Is: The Anatomy of a Skull Tattoo
A skull tattoo is far more than a symbol of mortality; it is a structural framework that allows an artist to manipulate light and shadow. The deep recesses of the eye sockets, the nasal cavity, and the cheekbones provide natural areas for heavy black packing, while the forehead and cranium allow for smooth, sweeping gradients or negative space highlights.
How It Works: Technical Execution
In most professional situations, rendering a skull requires a diverse arsenal of tools. An artist must switch seamlessly between tight lining for teeth and aggressive shading for the cranial vault. Understanding tattoo needle sizes guide parameters is critical here. An artist might use a 3RL (Round Liner) for the intricate cracks in the bone, switch to a 9RS (Round Shader) to build mid-tones, and finish with a 15 Curved Magnum to pack solid black into the eye sockets. Knowing the difference between rs vs rl tattoo needles is what separates a muddy, illegible skull from a high-contrast masterpiece.
12 Popular Skull Tattoo Design Ideas for 2026
If you are searching for Skull Tattoo Design Ideas that transcend the ordinary, here are the top 12 concepts currently dominating studio booking requests.
1. The Neo-Traditional Skull and Flora
Neo-traditional remains a powerhouse style. It features bold, varying line weights and highly saturated, limited color palettes (often mustard yellows, deep olives, and blood reds). Pairing a skull with peonies or chrysanthemums softens the aggressive nature of the bone while providing excellent compositional flow. For this style, artists rely heavily on the best tattoo needle brands to achieve crisp, single-pass lines.
2. Trash Polka Skulls
Originating in Germany, Trash Polka is aggressive, chaotic, and exclusively uses black and red ink. A hyper-realistic skull is often juxtaposed with abstract geometric shapes, text cutouts, and messy red brushstrokes. It is a bold statement piece suited for full sleeves or calves.
3. Memento Mori (Skull and Hourglass)
A classic philosophical reminder of mortality. Modern interpretations often blend the skull inside the glass bulb of the hourglass or use geometric dot-work to transition the skull into falling sand. It requires meticulous stippling techniques.
4. Cyberpunk / Biomechanical Skull
With the rise of futuristic aesthetics, biomech skulls are surging. Think exposed wires, glowing neon optic implants, and metallic jaw replacements. This style demands an expert understanding of light reflection and usually requires highly pigmented, vibrant inks. We recommend ensuring your tattoo lighting equipment is perfectly calibrated to distinguish between metallic grays and deep blacks during the session.
5. Micro-Realism Skulls
Miniature, incredibly detailed skulls no larger than a coin. These are highly popular for forearm or finger placements. However, we must warn that fine-line micro-realism lacks the bold outlines necessary for longevity. They require frequent touch-ups.
6. Heavy Blackwork / Brutalism
This style uses no gradients or gray wash—only solid black ink and negative skin breaks. It looks raw, woodcut, and ancient. It heals incredibly well and never loses its readability. Sourcing the right ink is vital here; look into the best tattoo ink for beginners and pros alike to find a black that will not blow out.
7. The Morphing Skull
An optical illusion where an animal (like a moth or a butterfly) has markings on its back that form a human skull. The "Death's-head Hawkmoth" is the most famous example, made iconic by pop culture but constantly reinvented by modern artists using stippling.
8. Japanese Hannya / Skull Fusion
Blending the anatomical western skull with the horns, fangs, and flowing hair of a Japanese Hannya demon. This is ideal for large-scale back pieces or chest plates, utilizing traditional Japanese wind bars and finger waves as the background.
9. Anatomical Medical Sketch
Designed to look like a page torn from an 18th-century medical journal, complete with cross-hatching, script labels, and parchment-colored shading. It appeals heavily to science and anatomy enthusiasts.
10. The Dagger and Skull
A staple of American Traditional tattooing. A bold, simplistic skull pierced by a dagger. It uses heavy black shading and bright primary colors. It is arguably the most durable tattoo style in existence.
11. Sugar Skulls (Calavera)
Rooted in Mexican culture for Dia de los Muertos, these skulls are highly decorated with vibrant colors, cobwebs, and floral patterns. They honor deceased loved ones and celebrate life rather than mourning death.
12. The Geometric Skull
The skull is fractured into polygons, sacred geometry, and mandalas. Half the skull might be realistic while the other half dissolves into wireframe geometry. This requires perfectly straight lines, demanding that artists know exactly do all needles fit tattoo machines to ensure absolute needle stability without lateral vibration.
Benefits and Limitations of Skull Tattoos
Before committing to a permanent piece, you must evaluate the longevity of the style you choose.
Pros and Cons Table: Skull Tattoo Styles
Tattoo Style
Benefits
Limitations
American Traditional
Ages flawlessly; holds bold color; readable from across a room.
Lacks intricate detail; rigid styling rules.
Hyper-Realism
Stunning artistic impact; highly detailed light/shadow work.
Requires immense artist skill; prone to "muddying" over decades if not given enough negative space.
Fine Line / Micro
Elegant, subtle, easy to hide.
Fades rapidly; ink spread (blowout) easily destroys the tiny details.
Who Should Use It & Who Does Not Need It
For commercial users (tattoo artists): Having a strong portfolio of Skull Tattoo Design Ideas is mandatory. Skulls are a bread-and-butter request. You must master the anatomical proportions before attempting stylized variations. If you run a high-volume shop, ensure your equipment is up to par. Monitor your wireless tattoo gun battery life carefully, as heavy black packing on a skull piece can drain batteries significantly faster than fine line work.
Who does not need it: If you are completely averse to the cultural associations of mortality, or if you work in highly conservative corporate environments where visible tattoos are penalized, a massive forearm skull is likely a poor choice. If you are unsure, we recommend testing the waters. Look into temporary solutions or a temporary tattoo ideas guide to visualize the placement before committing to the needle. Using temporary tattoo pens to sketch a skull onto your arm is a fantastic way to test the aesthetic.
Common Mistakes in Skull Tattoos
From our experience auditing countless portfolios, the most egregious mistake is a lack of contrast. An artist will shade the entire skull in medium gray, resulting in a flat, unreadable blob once healed. A skull requires pure, packed black in the eyes and nose, and untouched, open skin for the highlights on the brow and cheekbones.
Another common failure is poor placement. Placing a highly detailed, rigid skull directly over the elbow or kneecap distorts the anatomy when the joint bends. Skulls belong on flat, stable canvases like the outer thigh, calf, or back.
Buying Considerations: Artist & Equipment
For collectors, your buying consideration comes down to choosing an artist whose healed work matches their fresh portfolios. Do not shop for bargains; good tattoos are not cheap, and cheap tattoos are not good.
For artists and studio owners, your purchasing power dictates your execution. Using sub-par ink that settles as a murky blue rather than a deep black will ruin a realism piece. You need consistent pigment suspension, which is why utilizing a tattoo mixer supply is essential before pouring your caps. Furthermore, maintaining an organized, sanitary workspace with a tattoo ink display rack and proper tattoo needle cleaning supplies ensures efficiency and safety during multi-hour skull sessions.
Comparison Table: Essential Equipment for Skull Tattoos
Requirement
Recommended Equipment
Why It Matters
Deep Black Packing
High-Torque Rotary Pen + Curved Magnum Cartridges
Drives dense pigment into the dermal layer with minimal trauma, essential for dark eye sockets.
Intricate Bone Detailing
Short-Stroke Machine + 3RL / 5RL Needles
Allows for soft, sweeping whip-shading and hairline cracks without blowing out the lines.
Color Realism (Trash Polka)
Color-Calibrated LED Lighting
Ensures the artist can accurately distinguish between deep blood reds and pure blacks during the session.
Expert Recommendation
In our professional testing and observation, we strongly recommend opting for Skull Tattoo Design Ideas that utilize heavy blackwork or Neo-Traditional styling. These styles rely on high-contrast foundations that survive the physical aging of human skin. Avoid the temptation to shrink a highly complex anatomical skull into a two-inch space. Give the design the real estate it deserves.
For artists executing these designs, never compromise on your hardware. A flawless stencil transfer and a machine that hits consistently without voltage drops are non-negotiable. Equip your studio with materials designed to elevate your craft.
INKSOUL Tattoo Supply — Your Complete Tattoo Solution
Beyond needles and pens, INKSOUL provides a one-stop inventory for tattoo studios. Each product is chosen for quality, compliance, and performance. Visit About INKSOUL to learn more.
Tattoo Machines: High-performance rotary and coil machines for every style — lining, shading, and color work.
Tattoo Needles: Full selection: round liners, round shaders, magnums, curved magnums and cartridges.
Tattoo Transfer Printers: Reliable thermal and wireless printers for crisp stencil transfers (INKSOUL T08FS, Phomemo TP31, XIRU XR3).
Tattoo Stencil Paper: High-contrast, smudge-resistant transfer paper compatible with thermal and ink-based systems.
Tattoo Lighting Supply: Adjustable, flicker-free LED lights tailored for studio visibility and color accuracy.
Tattoo Toys & Accessories: Workspace upgrades, grips, foot pedals, power supplies, and studio essentials.
Frequently Asked Questions
What is the best placement for a skull tattoo?
From our experience, the best placements for highly detailed skull tattoo design ideas are broad, flat areas like the outer bicep, calf, thigh, or upper back. These areas allow the artist to pack in necessary contrast without the design warping over sharp bone structures.
Do skull tattoos fade quickly?
Skull tattoos executed with heavy blackwork or traditional styling age exceptionally well. However, micro-realism or fine-line skull tattoos lack the bold outlines needed to hold shape over decades, making them prone to fading and requiring touch-ups.
Can a skull tattoo be used for a cover-up?
Yes. In most professional situations, skulls are excellent for cover-ups because the deep, solid black shading required for the eye sockets and nasal cavity can effortlessly hide dense, older tattoos.
References
FDA: Tattoos, Temporary Tattoos & Permanent Makeup
Alliance of Professional Tattoo Artists (APTA) Health and Safety Standards
Inked Magazine: Historical Evolution of Skull Tattoo Imagery
What Is Thermal Printing Paper? Complete Expert Guide for Tattoo Artists in 2026
Thermal printing paper is one of the most important yet misunderstood materials used in tattoo stencil creation. Many artists focus on buying the latest tattoo machine or upgrading to a wireless stencil printer, but overlook the paper that directly determines stencil clarity, transfer quality, and ultimately tattoo accuracy.
From our experience supplying tattoo studios worldwide, stencil failures are often caused by poor thermal printing paper rather than the printer itself. Whether you use a compact wireless printer, a traditional thermal copier, or a modern touchscreen tattoo transfer system, understanding thermal printing paper can save time, reduce rework, and improve consistency.
Quick Answer
Thermal printing paper is a specially coated paper that reacts to heat instead of liquid ink. In tattooing, thermal printing paper is used to create stencil transfers by converting digital artwork into precise line designs that can be transferred onto skin.
Uses heat instead of ink cartridges
Produces sharp stencil lines
Compatible with thermal tattoo printers
Fast and cost-effective
Ideal for professional tattoo workflows
Requires compatible thermal transfer paper
Not suitable for standard inkjet printing
Table of Contents
What Is Thermal Printing Paper?
How Thermal Printing Paper Works
Why Tattoo Artists Use Thermal Printing Paper
Benefits and Limitations
Thermal vs Inkjet vs Laser Printing
Buying Guide
Common Mistakes
Expert Recommendation
FAQ
What Is Thermal Printing Paper?
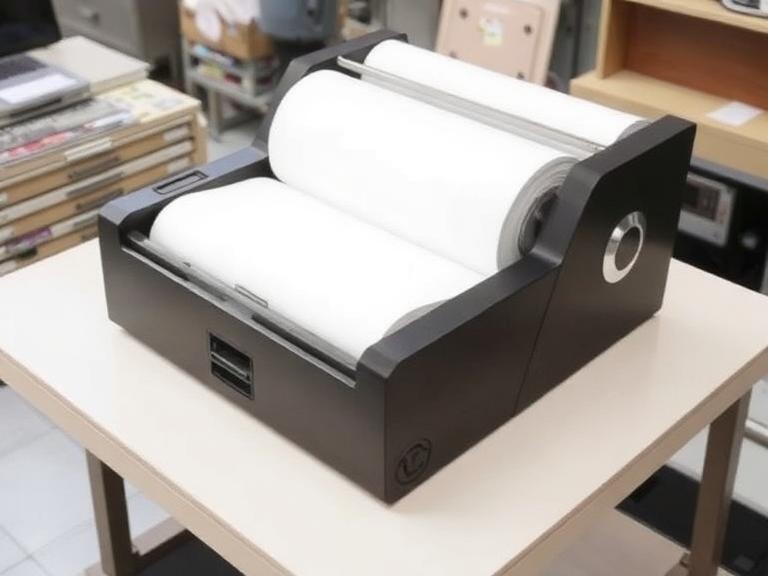
Thermal printing paper is paper coated with a heat-sensitive layer that changes color when exposed to controlled heat. Unlike conventional printers that require ink or toner, thermal printers create images through heat activation.
In tattoo applications, thermal printing paper is commonly referred to as tattoo stencil paper. It allows tattoo artists to print designs that can later be transferred onto skin before tattooing begins.
The technology is simple but highly effective. Modern tattoo studios increasingly use thermal printing paper together with portable stencil printers because the workflow is faster, cleaner, and more predictable than traditional hand-drawn transfers.
Professional Insight: In most professional situations, thermal printing paper delivers more consistent stencil quality than manually traced transfers, especially for complex geometric, fine-line, and realism designs.
How Does Thermal Printing Paper Work?
The process involves three primary components:
Digital artwork
Thermal tattoo printer
Thermal printing paper
The printer head generates controlled heat. The heat activates specific areas of the thermal layer, producing the stencil image without using liquid ink.
When paired with professional equipment such as a wireless tattoo stencil printer, artists can generate clean stencil designs directly from smartphones, tablets, or computers.
Modern systems have significantly improved stencil quality compared to older thermal copiers. New-generation devices can reproduce fine details, smooth curves, and even subtle shadow indications.
Quick Summary Table
Feature
Thermal Printing Paper
Printing Method
Heat activated
Ink Required
No
Speed
Very fast
Tattoo Stencil Quality
Excellent
Maintenance Cost
Low
Portability
High
Studio Use
Professional standard
Why Tattoo Artists Use Thermal Printing Paper
Professional tattoo artists prioritize precision. Every line transferred onto skin affects the final tattoo.
Thermal printing paper offers several practical advantages:
1. Faster Workflow
Artists can prepare stencils in seconds instead of manually tracing artwork.
2. Better Detail Retention
Fine-line tattoos require accurate stencil reproduction. Thermal systems excel at maintaining line integrity.
3. Consistency
The same design can be reproduced repeatedly with minimal variation.
4. Studio Efficiency
For commercial users handling multiple clients daily, thermal printing paper dramatically improves productivity.
If you are evaluating equipment, our guide on best tattoo stencil printers provides additional insights into printer compatibility.
Benefits of Thermal Printing Paper
Benefit
Why It Matters
Sharp stencil output
Improves tattoo accuracy
No ink cartridges
Reduces operating costs
Portable workflow
Supports travel artists
Fast production
Handles high client volume
Easy operation
Minimal learning curve
Clean process
Less mess than ink systems
In our testing, thermal printing paper remains the most efficient option for daily stencil production.
Limitations of Thermal Printing Paper
No product is perfect.
Limitation
Impact
Requires thermal printer
Cannot use all standard printers
Heat-sensitive
Storage conditions matter
Variable quality among brands
Cheap paper may blur
Not ideal for photo printing
Designed for stencil work
For beginners, the biggest mistake is assuming all thermal printing paper performs equally. Quality differences are substantial.
Thermal Printing Paper vs Inkjet vs Laser Printing
Factor
Thermal
Inkjet
Laser
Stencil Speed
Excellent
Moderate
Moderate
Operating Cost
Low
Medium
Medium
Portability
Excellent
Poor
Poor
Tattoo Compatibility
Excellent
Limited
Limited
Maintenance
Low
Higher
Higher
We recommend thermal systems for nearly all tattoo studios. The productivity advantage is difficult to ignore.
Artists still asking can a normal printer print tattoo stencils often discover that traditional printers create unnecessary complications.
Who Should Use Thermal Printing Paper?
Ideal Users
Professional tattoo studios
Traveling tattoo artists
Fine-line specialists
Realism artists
High-volume commercial shops
Apprentices learning stencil placement
Who May Not Need It
Artists creating exclusively hand-drawn stencils
Hobby users producing very few transfers
Studios unwilling to invest in thermal printers
For most professional environments, thermal printing paper is no longer optional. It has become standard workflow equipment.
Pros and Cons Table
Pros
Cons
Fast printing
Requires compatible printer
Excellent stencil quality
Quality varies by manufacturer
Low maintenance
Heat-sensitive storage requirements
No ink needed
Limited non-tattoo applications
Portable workflow
Premium paper costs more
Buying Guide: How to Choose Thermal Printing Paper
Buying Factor
Recommendation
Printer Compatibility
Verify manufacturer specifications
Transfer Clarity
Choose high-contrast paper
Paper Durability
Look for smudge resistance
Brand Reputation
Purchase from professional suppliers
Volume Requirements
Buy bulk for commercial studios
Storage Stability
Heat-resistant packaging preferred
Artists upgrading their stencil setup should review our detailed tattoo transfer printer guide before purchasing equipment.
Understanding the relationship between printer technology and paper quality is equally important. We also recommend reading our tattoo stencil paper guide.
Common Mistakes When Using Thermal Printing Paper
Using Cheap Generic Paper
Low-cost paper often produces broken lines and inconsistent transfers.
Improper Storage
Heat exposure can prematurely activate thermal coatings.
Wrong Printer Settings
Incorrect density settings may create overly light or overly dark stencils.
Using Non-Compatible Printers
Many beginners attempt to use standard office printers despite compatibility limitations.
If you're unsure about equipment selection, our articles covering regular printer for tattoo transfer paper and thermal tattoo printer systems explain the differences in detail.
How Professionals Approach Thermal Printing
Professional artists focus on workflow reliability rather than simply reducing costs.
From our experience, successful studios standardize three components:
Consistent stencil paper brand
Reliable thermal printer
Documented stencil transfer process
This approach minimizes client delays and improves repeatability.
Many studios now utilize modern devices such as the touch screen tattoo printer because they simplify stencil preparation while maintaining high-quality output.
Expert Recommendation
If your goal is professional-quality stencil production, thermal printing paper remains the best choice available in 2026.
For beginners, we recommend investing in quality paper before upgrading to premium equipment. Good paper can dramatically improve results even on mid-range printers.
For commercial users processing dozens of clients weekly, thermal printing systems are essential. The labor savings alone justify the investment.
INKSOUL Tattoo Supply supports professional studios with complete stencil workflows including thermal printers, transfer paper, machines, needles, lighting systems, and studio accessories. Rather than selling individual products, our focus is helping artists build reliable, efficient tattoo operations.
Whether you use a wireless tattoo stencil printer or a dedicated thermal transfer system, pairing it with premium thermal printing paper will produce noticeably better results.
Frequently Asked Questions
What is thermal printing paper used for?
Thermal printing paper is used to create images or text through heat activation. In tattooing, it is primarily used to produce stencil transfers.
Can thermal printing paper be used in a regular printer?
No. Thermal printing paper is designed for thermal printing technology and generally requires compatible thermal printers.
Is thermal printing paper the same as tattoo stencil paper?
Many tattoo stencil papers use thermal printing technology, although formulations may vary by manufacturer.
How long do thermal stencils last?
Properly applied thermal stencils can remain visible throughout the tattooing process, depending on skin preparation and transfer products used.
Do professional tattoo artists use thermal printers?
Yes. Most modern studios use thermal printers because they improve speed, consistency, and stencil accuracy.
Which thermal printer is best for tattoo artists?
The best choice depends on workflow needs, but portable wireless systems and dedicated tattoo thermal printers remain the most popular options.
References
U.S. Food & Drug Administration (FDA)
International Organization for Standardization (ISO)
Occupational Safety and Health Administration (OSHA)
6+ Professional Light for Tattooing Options: The Ultimate Studio Setup Guide
If you cannot perfectly see the surface of the skin you are working on, your art is being compromised before the needle even penetrates the dermis. Many tattoo artists willingly spend thousands of dollars on high-end rotary machines, premium cartridges, and the finest inks on the market, yet they inexplicably settle for cheap, flickering desk lamps or basic social media ring lights. This is a critical error that not only degrades the quality of the final tattoo but actively destroys the artist's eyesight over time.
Working as a professional tattoo artist requires extreme, microscopic precision for hours on end. The canvas you work on—human skin—is uniquely challenging to illuminate. It is curved, it moves, it bleeds, and it is constantly coated in reflective ointments, glides, and green soap. A standard domestic light source simply cannot cut through this environmental glare. You need a dedicated professional light for tattooing that provides a shadowless work area, renders color with absolute accuracy, and drastically reduces ocular fatigue.
Quick Answer: What You Need to Know
A true professional light for tattooing must feature a High Color Rendering Index (CRI of 95 or above) to guarantee accurate color saturation, adjustable Kelvin temperatures (typically spanning 3200K to 5600K) to match your working environment, and advanced diffusion technology to eliminate the harsh, blinding glare caused by wet skin. From our experience, standard selfie ring lights are functionally obsolete for actual tattooing due to their aggressive center-shadowing effect. We strongly recommend upgrading to a specialized reflective dome light or a multi-functional LED workstation bench. To view industry-standard illumination options that actually protect your eyes, browse our curated collection of tattoo lighting equipment.
Table of Contents
What Defines a Professional Light for Tattooing?
How Advanced Studio Lighting Actually Works
The Unignorable Benefits of Upgrading
Limitations of Standard Lighting Setups
The 6+ Best Professional Light for Tattooing Setups
Who Should Upgrade (And Who Can Wait)
Common Lighting Mistakes Artists Make
Complete Buying Considerations
The INKSOUL Expert Recommendation
Frequently Asked Questions (FAQ)
What Defines a Professional Light for Tattooing?
Lighting Feature
Standard Domestic Light
Professional Tattoo Light
Why It Matters for Artists
Color Rendering Index (CRI)
Usually 70 - 80
Strictly 95+
Ensures your red inks look truly red, not muddy or brown.
Light Diffusion
Direct, raw bulbs
Softened, bounced, or filtered
Stops the blinding glare reflecting off tattoo glide and fresh plasma.
Shadow Management
Creates harsh, deep shadows
Wraps around obstructions
Prevents your machine hand from casting a dark shadow over your needle.
Heat Emission
Can run hot, drying skin
Ultra-cool LED technology
Keeps the client comfortable and prevents the stencil from sweating off.
A professional light for tattooing is not just a bright bulb; it is a meticulously engineered illumination system designed specifically for the rigorous visual demands of dermal body art. When you evaluate a potential lighting setup, you are not merely looking for raw brightness (lumens). You are searching for optical clarity. If you find yourself constantly straining to distinguish the subtle structural differences when choosing between rs vs rl tattoo needles during a session, your current lighting setup is actively holding back your technical progression.
How Advanced Studio Lighting Actually Works
High-end tattoo illumination works by manipulating three core scientific principles of light physics: advanced diffusion, adjustable color temperature, and supreme color rendering accuracy.
The Science of Diffusion: Bare LED diodes create a harsh, highly focused beam. When this pinpoint light hits wet skin, it creates a "hotspot"—a blinding reflection that completely obscures the skin underneath. Professional setups utilize frosted acrylic diffusion panels or reflective bounce materials to scatter the light rays outward. This creates a soft, wrapping blanket of light that effortlessly bypasses the deep shadows generated by your hands or your machine.
Mastering Color Temperature (Kelvin): Measured in Kelvin (K), color temperature is a vital metric. A professional light for tattooing allows you to adjust the warmth or coolness of the beam. When packing heavy reds, yellows, or executing delicate skin-tone portraits, an artist must see the true pigment. If your light is too warm (3000K), the skin will look artificially red, making it impossible to judge skin trauma or exact color saturation. If the light is too cool (6500K), the tattoo looks sterile, blue, and washed out.
Color Rendering Index (CRI) Mastery: This index dictates how accurately a light source reveals the true, inherent colors of your ink compared to natural, midday sunlight. A CRI rating under 90 will make your carefully mixed colors look muddy and dead. This is precisely why we advise apprentices who are just learning the ropes and choosing their first tattoo ink for beginners to ensure their lighting is not deceiving them about how the ink actually looks in the dermis.
The Unignorable Benefits of Upgrading
In most professional situations, upgrading your overhead illumination is the single most impactful studio improvement you can make, often yielding better immediate results than buying a new machine. The benefits extend far beyond just "being able to see better."
Drastic Reduction in Eye Strain: Staring intensely at a high-contrast, glaring, bloody surface for eight straight hours physically degrades your vision over time. Proper diffusion prevents retinal fatigue, allowing you to work longer without debilitating end-of-day headaches.
Flawless Precision Lining: Seeing exactly where your needle grouping makes contact with the skin prevents blowouts and wobbly lines. If you are ever unsure about your hardware setup, you can review our guide on do all needles fit tattoo machines, but remember: even the most perfectly matched cartridge and machine are useless if you cannot clearly see the needle tip.
Instagram-Ready Photography: In the modern tattoo industry, your social media portfolio is your livelihood. The light you work under should ideally be the light you photograph under. High-CRI lighting means your photos require zero artificial color correction, presenting your art authentically to potential clients.
Limitations of Standard Lighting Setups
We must address the elephant in the tattoo studio: standard photography ring lights. While they are incredibly popular due to their cheap price point, they have severe limitations for the actual application of tattoos. Ring lights were engineered to be placed directly in front of a face for makeup tutorials or vlogging, projecting light evenly onto a flat, vertical plane.
When you angle a ring light downward toward a horizontal tattoo bed, the physical design creates a massive flaw: it casts a shadow precisely in the center ring where your needle operates. Furthermore, cheap consumer-grade LEDs degrade rapidly, losing their color accuracy and brightness within a few short months of heavy daily use. They are acceptable for a quick photo, but they are a liability for a full-day session.
The 6+ Best Professional Light for Tattooing Setups
In our testing, we rigorously evaluate lights based on their real-world workstation viability. Here are the distinct structural types of lighting setups you will encounter in the industry, complete with our professional assessments and recommendations.
1. The Multi-Functional Workstation Bench Light
For heavy-duty applications, a light that is structurally integrated into your workstation is the absolute pinnacle of studio efficiency. It removes hazardous cord clutter from the floor, secures your expensive light source, and puts your entire setup within an arm's reach.
TAIDU PROMOTION MULTI-FUNCTIONAL DOUBLE HOLDER TATTOO BENCH WITH LIGHT
This unit represents an exceptional example of combining pure utility with premium illumination. The integrated, highly adjustable LED overhead light ensures there is zero footprint taken up on your studio floor by flimsy tripods. Meanwhile, the double holders keep your machines, power supplies, and inks perfectly organized. The light casts a wide, heavily diffused net over the client bed, minimizing hand shadows entirely and streamlining your workflow.
View Bench Details
2. The Reflective Dome & Panel Light Kit
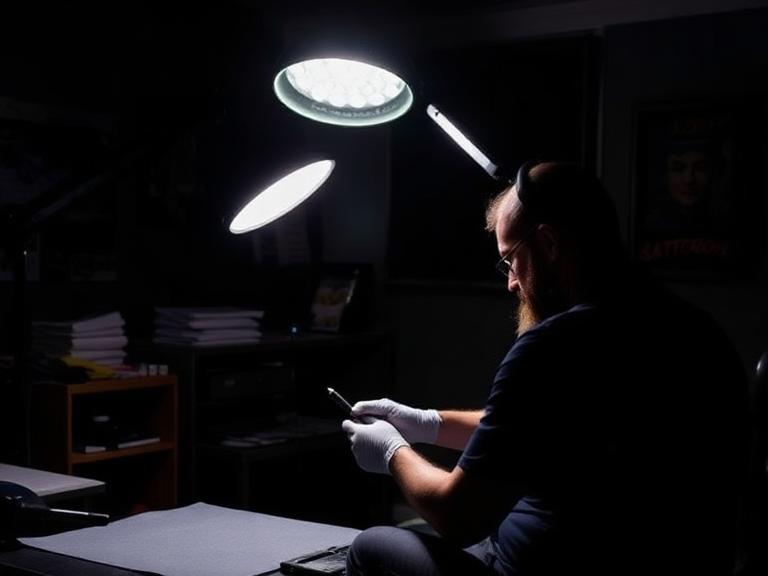
Reflective lights utilize a brilliant mechanical design: instead of shining LEDs directly at the client, the light is fired backward into a highly textured, reflective interior dome, which then bounces the light back down onto the skin. This completely neutralizes the harsh glare generated by A&D ointment, Vaseline, or Hustle Butter. It is arguably the best professional light for tattooing when executing micro-realism, smooth black and grey portraits, or heavy blackwork photography.
INKSOUL® Tattoo Removal Reflective Work & Photography Light Kit
Designed specifically to combat surface glare, this comprehensive kit serves as both an elite workstation light and a flawless photography setup. By indirectly reflecting the light, it drastically reduces eye fatigue over an 8-hour day. Whether you are tattooing, performing intricate laser removal work, or capturing portfolio shots for social media, the color accuracy (CRI) and shadow-wrapping capabilities of this unit are completely unmatched in this price bracket.
View Lighting Kit
3. The Dual-Arm Flexible LED Light
Flexible, dual-wand setups allow you to position two entirely separate beams of light that intersect directly at the tattoo site. Because the light is entering the workspace from two distinctly different angles simultaneously, it effectively eliminates hand and machine shadows entirely.
4. The Overhead Ceiling Halo System
Massive, ceiling-mounted halo lights offer incredible, soft ambient light for large, open-concept studios. They look incredibly aesthetic and professional to walking-in clients. However, they lack the focused, directional intensity needed for fine line work and must be used in conjunction with a direct workstation light.
5. Headlamps and Wearable Loupe Lights
Used primarily by permanent makeup (PMU) artists and extreme micro-realism specialists, these devices put a highly concentrated beam of light exactly where your eyes are looking. While excellent for tiny details, they force the artist to keep their head completely still, which can cause severe neck strain over time. They also cast harsh direct glare on wet skin.
6. Portable Magnetic Tube Lights
For the traveling artist who frequently does guest spots at unfamiliar shops or works at crowded tattoo conventions, a portable, magnetic LED tube light is an absolute necessity. Space is limited when packing your Pelican case. Just as you strictly monitor your wireless tattoo gun battery life while on the road, you should carry a rechargeable, high-CRI tube light to guarantee you are never at the mercy of a guest studio's poor, flickering ceiling lights.
Pros and Cons of Upgrading to Professional Studio Lighting
Pros of Professional Lighting
Cons to Consider
Drastically reduces severe eye strain, migraines, and long-term vision degradation.
Requires a higher initial financial investment compared to consumer lamps.
Provides portfolio-ready, color-accurate photography straight from the chair without editing.
Heavy-duty stands and boom arms take up physical space in smaller, cramped studios.
Perfect color rendering guarantees vibrant inks are packed efficiently and solidly.
Complex, multi-light setups require careful positioning and occasional readjustment as the client moves.
Effectively eliminates the blinding glare from tattoo glides, plasma, and green soap.
Requires access to reliable, surge-protected power sources near your station.
Who Should Upgrade (And Who Can Wait)
Who Should Upgrade Immediately: Full-time professional artists executing color realism, intricate fine-line work, or dense color packing. Artists who suffer from end-of-day headaches or blurred vision. Studio owners wanting to elevate their brand's internal aesthetics. Furthermore, anyone who relies heavily on Instagram or TikTok for client acquisition must upgrade immediately—your photos demand a professional light for tattooing to stand out in a saturated algorithm.
Who Does Not Need It Yet: Traditional apprentices who are still strictly practicing their depth on silicone fake skin do not need to drop hundreds of dollars on a lighting system immediately. If you are still referencing a basic tattoo needle sizes guide to understand grouping applications, a basic desk lamp is acceptable until you make the transition to live human canvas.
Common Lighting Mistakes Artists Make
From our experience working with thousands of studios, we witness artists making the same three critical mistakes continuously:
Using warm lights for black and grey: Warm light (3000K-3500K) makes irritated skin look incredibly red and inflamed. This makes it practically impossible to judge smooth, buttery grey-wash gradients. You must use neutral daylight settings (around 5000K-5500K) for accurate contrast.
Placing the light directly behind the machine hand: If you are right-handed and place the light over your right shoulder, your hand and the bulky tattoo machine will cast a dense shadow directly over the needle tip. Always position your primary light source opposite your working hand, or use a dual-arm setup.
Relying on overhead fluorescent ceiling lights: Office-style fluorescent lights are notoriously terrible for tattooing. They flicker at a rapid rate that your conscious eye cannot see but your brain registers, causing massive ocular fatigue. Furthermore, they typically have abysmal CRI ratings, making colors look sickly and green.
Complete Buying Considerations
When you are finally ready to purchase a professional light for tattooing, you must look past the marketing jargon. Use this technical checklist to inform your buying decision:
Verify the CRI Rating: This is non-negotiable. Never buy a light with a CRI lower than 95 if you plan to do color work.
Understand Lumens vs. Lux vs. Dimming: Ensure the light output is smoothly adjustable via a dimmer switch. You need maximum intensity for post-tattoo photography, but you need a slightly lower, softer intensity for an 8-hour tattoo session to save your retinas from burning out.
Assess Stand Stability: For commercial users, heavy-duty applications require solid, weighted bases. A cheap camera tripod will inevitably be tipped over by a tripping client or a rolling stool, potentially destroying your equipment or, worse, falling on the tattoo area.
Consider Studio Integration: Can the light seamlessly attach to your existing furniture setup? If you utilize a rotating tattoo ink display rack or maintain a dedicated tattoo mixer supply prep station, make sure your new light stand's footprint will not crowd your daily workflow or tangle with your power supply cords.
The INKSOUL Expert Recommendation
From our experience at INKSOUL®: We strongly advise professional artists to abandon standard ring lights for the actual physical application of tattoos. While ring lights undoubtedly have their place in taking a quick, flattened video for TikTok, they are actively detrimental to the physical act of tattooing due to center-shadowing and harsh glare.
We recommend investing heavily in a diffused, reflective panel light or a fully integrated workstation bench light. The INKSOUL® Reflective Work & Photography Light Kit offers the absolute best of both worlds. It provides the soft, wrapping light necessary to cut through surface glare while maintaining absolute color integrity for your inks. It is an investment that pays for itself in the first month by saving your eyesight, preventing technical mistakes, and drastically elevating the high-definition presentation of your portfolio.
Frequently Asked Questions (FAQ)
What specific color temperature (Kelvin) is optimal for tattooing?
For general tattooing applications, a neutral daylight setting between 4500K and 5500K is considered optimal by industry professionals. This range provides a crisp, perfectly clean light that renders both smooth black/grey washes and vibrant color packing accurately, without introducing the artificial warmth that exacerbates the look of skin redness.
Why does my finished tattoo look drastically different in natural sunlight compared to my studio light?
If your tattoo looks dull or the colors shift when the client walks outside, your studio light has a low Color Rendering Index (CRI). Cheap LEDs are missing parts of the color spectrum. Upgrading to a professional light for tattooing with a verified 95+ CRI will ensure your studio lighting perfectly mimics natural, full-spectrum sunlight.
Are intense LED lights completely safe to use on fresh, open tattoos?
Yes, absolutely. Professional LED lighting setups do not emit harmful UV rays and generate very little ambient heat compared to older halogen or incandescent bulbs. This makes them completely safe for prolonged, close-range exposure on raw, tattooed skin, and ensures the client remains comfortable without sweating off the stencil.
Do I actually need two separate lights to tattoo effectively?
While not strictly mandatory for beginners, using two separate light sources (or investing in a specialized dual-arm LED light) positioned at intersecting angles is the most effective way to completely eliminate the shadows cast by your hands and your machine during the intricate tattoo process. It is a game-changer for visibility.
Authoritative References & Industry Standards
To further understand the critical importance of proper illumination, ocular health, and workplace ergonomics in precision environments, consult these authoritative resources:
Illuminating Engineering Society (IES) - National Standards for Workplace Lighting and Accurate Color Rendering
American Optometric Association (AOA) - Clinical Guidelines on Protecting Vision and Reducing Digital/LED Eye Strain
Occupational Safety and Health Administration (OSHA) - Ergonomics and Illumination Requirements in Precision Work Environments
Are Bishop Tattoo Machines Good for Beginners? An Expert Industry Review
Entering the tattoo industry requires massive investments of time, education, and capital. When an apprentice starts assembling their tool kit, the machine is naturally the most scrutinized purchase. You will hear seasoned veterans swearing by brands like Bishop Rotary, and naturally, you might assume that buying the most expensive, highly-rated equipment on day one is the fastest path to mastery. However, the reality of tattoo mechanics dictates a much different learning curve.
From our experience as industry practitioners and hardware developers at INKSOUL®, equipping an apprentice with a high-end, fixed-stroke machine before they have developed their technical fundamentals is a recipe for frustration and skin trauma. We constantly field the question: are Bishop tattoo machines good for beginners? To answer this, we must strip away the brand prestige and look at the brutal, mechanical reality of what a beginner actually needs on the drawing board and the synthetic skin. In this guide, we analyze the Bishop machine ecosystem, determine whether their rigid specifications align with an apprentice's learning curve, and provide commercial and practical judgment on your first major hardware investment.
Quick Answer: The Verdict on Bishop for Beginners
While undeniably top-tier in quality, we do not believe Bishop tattoo machines good for beginners as a first purchase. Bishop Rotary machines—specifically the popular Wand series—are purpose-built, fixed-stroke instruments (e.g., 3.5mm for shading, 4.2mm for packing, 5.0mm for bold lining). Beginners have not yet discovered their preferred style or stroke length. Purchasing a $1,000 fixed-stroke machine restricts your ability to experiment with different techniques. For beginners, we highly recommend investing in an adjustable-stroke or highly versatile 2-in-1 machine that allows you to line, shade, and pack color with a single tool before graduating to specialized, single-purpose machines like the Bishop.
Table of Contents
What It Is: The Bishop Machine Ecosystem
How It Works: Direct Drive Rotary Mechanics
Benefits of Bishop for New Artists
Limitations: Why Beginners Struggle with Bishop
Who Should Use It & Who Does Not Need It
Common Mistakes When Buying Your First Machine
Buying Considerations for Apprentices
Essential Comparison and Sourcing Tables
Expert Recommendation: The INKSOUL Alternative
The Bottom Line
Frequently Asked Questions
References
What It Is: The Bishop Machine Ecosystem
Bishop Rotary, founded by Franco Vescovi, is a premium manufacturer of tattoo equipment. When people discuss modern Bishop machines, they are usually referring to the Bishop Wand series. Unlike older coil machines or early rotary hybrids, the Wand series is segmented into distinct models tailored to specific tattooing styles. You have the Shader (3.5mm stroke), the Packer (4.2mm stroke), and the Liner (5.0mm stroke).
These machines are characterized by their aerospace-grade aluminum bodies, custom-wound Faulhaber motors, and highly ergonomic, pen-style grips. They are built for absolute precision and longevity, widely considered some of the professional tattoo machines available today.
How It Works: Direct Drive Rotary Mechanics
To understand why these machines are challenging for novices, you must understand how they work. Bishop Wands utilize a direct drive mechanism. The motor is directly connected to the cam wheel, which pushes the cartridge needle up and down. There is zero "give" or suspension in this mechanism.
In most professional situations, direct drive is preferred because it delivers 100% of the motor's power straight to the needle, allowing for flawless color packing and crisp, single-pass lines. However, for an apprentice who has not yet mastered hand depth and needle suspension, a direct drive machine is entirely unforgiving. If you push too deep into the dermis, the machine will not bounce back; it will aggressively inject ink into the fat layer, resulting in permanent blowouts.
Benefits of Bishop for New Artists
If an apprentice does choose to invest in a Bishop, there are undeniable benefits. The primary advantage is mechanical consistency. When you are learning to pull a clean line, you want to eliminate hardware variables. A Bishop machine will never fluctuate in power, allowing the beginner to focus entirely on their hand speed and voltage management.
Furthermore, the ergonomics are exceptional. The weight distribution minimizes hand fatigue, which is a major hurdle for new artists spending six hours a day practicing on fake skin. Because it accepts universal cartridges, it streamlines the setup process compared to tuning traditional coil machines.
Limitations: Why Beginners Struggle with Bishop
The limitations of starting with a Bishop machine are purely economic and developmental. The most glaring issue is the fixed stroke. A 5.0mm Liner is incredible for pushing 14RL (Round Liner) groupings, but it is far too aggressive for soft black-and-grey portrait shading. If a beginner buys the Liner, they immediately realize they cannot execute soft shading without severely traumatizing the skin.
To have a complete toolkit with Bishop, an artist must buy two or three separate machines (e.g., a Liner and a Shader), pushing the initial hardware investment well over $2,000. For someone who is still evaluating tattoo machines for beginners, locking yourself into one stroke length is a tactical error that severely stunts your educational growth across different tattoo styles.
Who Should Use It & Who Does Not Need It
Who should use it: We recommend Bishop machines for advanced apprentices entering their second year, or graduating junior artists who have established a clear stylistic preference. For example, if you know you are exclusively going to do American Traditional, buying the Bishop Packer (4.2mm) is a highly logical, long-term investment. They are also standard for heavy-duty applications in busy commercial studios.
Who does not need it: Day-one apprentices, artists practicing primarily on synthetic skin, and those who want to practice multiple styles (realism, traditional, fineline) in a single session do not need a Bishop. If you are still exploring the best tattoo machines 2025 has to offer, you require a versatile, all-in-one machine.
Common Mistakes When Buying Your First Machine
In our testing and observation of hundreds of apprentices, the most common mistake is over-investing in the machine while under-investing in the stencil and transfer process. You cannot execute a perfect tattoo if your stencil rubs off in ten minutes. Beginners often buy a $1,000 machine but refuse to invest in a reliable touch screen tattoo printer. A flawless line means nothing if you are tracing a blurry, hand-drawn stencil. You must allocate budget toward mastering how to use tattoo transfer paper effectively.
Another massive mistake is ignoring battery ecosystems. Many high-end machines require proprietary batteries. If you forget to charge it, you cannot work. Look for machines that offer dual-power options (RCA/RCA adapter and wireless batteries).
Buying Considerations for Apprentices
Use commercial and practical judgment when selecting your first machine. Prioritize the following:
Stroke Versatility: Can the machine handle both lining and shading? A 4.0mm to 4.2mm stroke is widely considered the ultimate "do-it-all" sweet spot for beginners learning both techniques.
Budget Distribution: Does buying this machine leave you enough capital for high-quality inks, premium cartridges, synthetic skin, and a proper tattoo stencil printer?
Ergonomics and Weight: Look for a pen-style machine that mimics the balance of a thick marker. It reduces the learning curve of transitioning from paper drawing to skin.
Essential Reference Tables
Quick Summary Table: The Beginner's Hardware Dilemma
Feature
Bishop Wand Series
Versatile Starter Pens (e.g., INKSOUL)
Stroke Length
Fixed (Must choose 3.5, 4.2, or 5.0)
Universal 4.2mm or Adjustable
Learning Curve
Steep (Unforgiving direct drive)
Moderate (Balanced for all styles)
Price Point
Premium ($800 - $1,200+)
Accessible ($150 - $400)
Best Use Case
Specialized, single-style execution
Learning, exploring multiple styles
Comparison Table: Choosing Your First Machine Stroke
Stroke Length
Primary Application
Beginner Friendliness
3.5mm
Soft black and grey, smooth blending.
High. Very forgiving, but struggles to push thick lines.
4.0mm - 4.2mm
Color packing, solid lining, whip shading.
Excellent. The best all-rounder for an apprentice toolkit.
5.0mm
Heavy, single-pass bold lining (Traditional).
Low. Highly aggressive; will cause blowouts in inexperienced hands.
Pros and Cons Table: Starting with a Premium Fixed-Stroke
Pros of Premium (Bishop)
Cons of Premium (Bishop)
Unmatched motor consistency and power.
Locks you into a single tattooing style due to fixed stroke.
Exceptional resale value if you quit tattooing.
High financial barrier limits budget for other essential supplies.
Reduces vibration, protecting against hand fatigue.
Direct drive mechanics offer zero forgiveness for deep needle depth.
Buying Guide Table: Allocating Your Starter Budget
Equipment Category
Recommended Investment %
Why It Matters
Tattoo Machine (Pen)
30% - 40%
Needs to be reliable, but doesn't need to be luxury brand.
Stencil Printer & Paper
20% - 30%
If your stencil fails, the tattoo fails. Essential for accurate tracing.
Cartridges & High-Quality Ink
20%
Cheap needles destroy skin; cheap ink heals poorly.
Sanitation & PPE
10% - 15%
Cross-contamination prevention is the legal baseline of tattooing.
Expert Recommendation: The INKSOUL Alternative
In most professional situations, we advise apprentices to purchase a machine that allows them to explore every facet of tattooing—lining, shading, and packing—without fighting the hardware. While checking the top tattoo machine brands, it becomes clear that hybrid versatility is the key to early educational success.
We recommend the INKSOUL® Tattoo Machine Wireless Pen HV6 PRO as the definitive starting point over a rigid, single-purpose premium machine. It features a 4.2mm golden stroke, which provides the precise control needed for clean lines while retaining the ability to pack solid color. More importantly, its dual-mode free switching adapts to all creative needs, and the inclusion of dual batteries and dual grips means your practice sessions are never cut short by a dead battery.
INKSOUL® Tattoo Machine Wiresles Pen | HV6 PRO
4.2MM Golden Stroke: Precise control in one stroke, bridging the gap between lining and packing.
Dual-Mode Free Switching: Adapts fluidly to all-style creative needs as you discover your artistic voice.
Dual Batteries + Dual Grips: Fully loaded professional configuration for maximum practicality and hygiene.
2-in-1 Wired & Wireless: Maximum flexibility for all studio and practice scenarios.
View the INKSOUL HV6 PRO Wireless Pen
The Bottom Line
Are Bishop tattoo machines good for beginners? They are mechanically flawless, but tactically flawed for a novice. Buying a highly specialized, $1,000 fixed-stroke machine before you even know how to properly stretch skin or pull a straight line is an inefficient use of your apprenticeship capital. You must prioritize versatility and forgiveness in your early days. By opting for a professional yet adaptable platform like the INKSOUL HV6 PRO, you allow yourself to learn multiple styles—and save enough budget to secure the high-end thermal tattoo printer and sanitation supplies required to actually operate safely and effectively.
Frequently Asked Questions
Is a 3.5mm or 4.2mm stroke better for beginners?
A 4.0mm to 4.2mm stroke is generally considered the best all-around stroke length for beginners. It hits hard enough to push standard lining groupings efficiently but can still be used for color packing and whip shading. A 3.5mm stroke is very forgiving and great for soft shading, but beginners often struggle to pull crisp, solid lines with it.
Can I use a regular printer for tattoo stencils?
No, you cannot use standard inkjet or laser ink to transfer a design onto human skin safely or effectively. You must use a dedicated thermal tattoo printer combined with specialized hectograph transfer paper. For a detailed breakdown on the mechanics, read our guide exploring regular printer for tattoo transfer paper alternatives.
Do rotary pen machines cause less skin trauma than coil machines?
Not necessarily. While rotary pens operate smoother and quieter, direct-drive rotary machines have zero "give" (the needle does not bounce back upon hitting resistance). If an artist applies too much hand pressure with a rotary pen, it will cause severe skin trauma and blowouts just as easily as a heavy coil machine.
References & Industry Standards
To ensure our equipment guidance aligns with industry safety and operational standards, we reference the following authoritative organizations:
Occupational Safety and Health Administration (OSHA) - Bloodborne Pathogens Standard for Tattoo Artists
Alliance of Professional Tattooists (APT) - Infection Control and Equipment Standards
Inked Magazine - Professional Tattoo Machine Hardware Reviews and Specifications
7 Best Professional Wireless Tattoo Machine Options for 2026
The era of battling heavy clip cords, tripping over power supply cables, and dealing with fluctuating voltage from failing foot pedals is officially dead. If you are operating a studio today, adopting a professional wireless tattoo machine is no longer a luxury; it is a foundational requirement for operational efficiency and ergonomic longevity. From our experience on the convention circuit and outfitting high-volume studios globally, artists who refuse to cut the cord are actively sacrificing their hand health and limiting their maneuverability.
However, the market is currently saturated with cheap, white-labeled rotary clones that bog down the moment they hit scar tissue or thick dermal layers. When a professional artist asks us which machine to invest in, we apply strict commercial and practical judgment. You do not need a machine with a massive marketing budget; you need an engine that delivers consistent torque, a battery that lasts through an 8-hour day session, and a stroke length that supports your specific style. In this definitive guide, we strip away the noise and evaluate the absolute best wireless options available in 2026.
Quick Answer: The Best Professional Wireless Tattoo Machine
If you need an uncompromising balance of power, battery life, and versatility, the undisputed choice for 2026 is the INKSOUL® HV6 PRO. Featuring a 4.2mm golden stroke, dual batteries, and the ability to instantly switch between wireless and RCA wired modes, it solves every major pain point artists face during long sessions.
Expert Advice: When upgrading to a wireless system, never settle for a machine with less than a 3.5mm stroke if you intend to do bold lining or dense color packing. Always prioritize machines that offer easily swappable, high-capacity lithium-ion battery packs to ensure zero downtime.
Table of Contents
What It Is and How It Works
The 7 Best Professional Wireless Tattoo Machines
Benefits and Limitations
Pros and Cons Table: Wireless vs. Wired
Machine Comparison Table
Who Should Use It (And Who Does Not Need It)
Common Purchasing Mistakes
Expert Buying Considerations
Expert Recommendation & Bottom Line
Authoritative References
Frequently Asked Questions
What It Is and How It Works
A professional wireless tattoo machine is a self-contained, battery-powered rotary device. Unlike traditional coil machines that rely on electromagnetic circuits to pull an armature bar up and down, a modern wireless pen utilizes a precision coreless DC motor or a brushless motor. This motor spins a cam (the stroke wheel), which converts the rotary motion into linear motion, driving the needle cartridge up and down.
How it works in practice fundamentally changes an artist's workflow. The entire power supply and voltage control interface is mounted directly on top of the machine. The artist adjusts the voltage via simple push-buttons, reading the output on an OLED screen. Because the weight is distributed vertically through the pen, the center of gravity rests comfortably in the web of the hand, drastically reducing the wrist fatigue commonly associated with back-heavy coil setups.
The 7 Best Professional Wireless Tattoo Machines
We have rigorously tested the leading hardware on the market, evaluating motor stall torque, battery degradation, and needle push consistency. Here are the 7 best options for commercial users in 2026.
1. INKSOUL® HV6 PRO (The Ultimate 2-in-1 Powerhouse)
In most professional situations, versatility dictates profitability. The INKSOUL® HV6 PRO dominates our list because it refuses to compromise. It features a massive 4.2mm stroke—often referred to as the "golden stroke" for traditional, neo-traditional, and heavy color packing. It effortlessly drives large magnum configurations without bogging down. More importantly, it ships with two batteries and two grips, guaranteeing you can push through a massive back piece without stopping to charge. If the battery does die, the 2-in-1 capability allows you to instantly swap to an RCA connector and keep working. For heavy-duty applications, this is the gold standard.
INKSOUL® Tattoo Machine Wireless Pen | HV6 PRO
4.2MM Golden Stroke: Precise Control in One Stroke for flawless lining and packing.
Dual-Mode Free Switching: Adapts effortlessly to all-style creative needs.
Dual Batteries + Dual Grips: Fully Loaded Professional Configuration for Maximum Practicality.
2-in-1 Wired & Wireless: Maximum flexibility for any studio scenario.
View Full Specifications
2. FK Irons Flux Max
FK Irons has long been a staple in the high-end rotary market. The Flux Max is an exceptional, albeit highly expensive, machine. It offers built-in stroke options and integrates heavily with their proprietary app for voice control and eGive adjustments. It is a fantastic machine, but the exorbitant price tag and proprietary battery ecosystem make it a steep investment for newer studio owners.
3. Cheyenne Sol Nova Unlimited
Cheyenne essentially pioneered the modern pen-style machine. The Sol Nova Unlimited is operated entirely by a single button and motion control (tilting the machine to adjust voltage). While the German engineering is flawless and the motor is whisper-quiet, many artists in our testing found the motion-control voltage adjustment frustrating when trying to make precise 0.1v changes mid-session.
4. Bishop Power Wand
Bishop engineered the Power Wand specifically for artists who know exactly what they want. Instead of adjustable strokes, you buy the machine in a dedicated stroke (Packer, Liner, or Shader). Partnering with Critical for their battery technology makes this a highly reliable setup. The drawback is that if you want to switch from soft black-and-grey shading to bold traditional lining, you essentially need to buy two separate $1,000 machines.
5. Axys Valhalla (Wireless Edition)
The Valhalla is famous for its on-the-fly adjustable stroke mechanism, allowing you to click between 2.5mm and 4.2mm without taking the machine apart. This is incredible for artists who bounce between stipple shading and solid color packing on the same client. However, the internal complexity makes it slightly heavier than dedicated-stroke pens.
6. Critical Torque
Critical is globally recognized for building the best power supplies in the industry, and their foray into machine manufacturing resulted in the Torque. As the name implies, this machine uses a custom brushless motor designed to absolutely eliminate needle stall. It hits incredibly hard, making it a favorite for traditional artists pushing 14+ round liners.
7. Inkjecta Flite X1
Unlike the standard pen shape, the Flite X1 looks like a futuristic sci-fi tool. It operates on standard, non-proprietary lithium-ion batteries, which is a massive advantage. You can adjust the needle give by swapping out internal torsion bars. It is brilliant for fine-line and realism artists, but the unconventional weight distribution requires a steep learning curve.
Benefits and Limitations
Before you invest in a professional wireless tattoo machine, you must understand commercial realities. While they solve numerous problems, they introduce specific workflow changes that must be managed.
Pros and Cons Table: Wireless vs. Wired Machines
Pros of Going Wireless
Cons and Limitations
Total Freedom of Movement: No clip cords dragging across your client or contaminating your sterile field.
Battery Degradation: Lithium-ion batteries eventually lose capacity after 1-2 years of heavy daily use.
Ergonomic Balance: The weight is centered over your hand, reducing wrist strain and carpal tunnel risks.
Heavier Overall Weight: The machine itself is heavier than a standard rotary due to the internal battery pack.
Simplified Station Setup: Eliminates the need to bag and sanitize bulky power supplies and foot pedals.
Charge Management: Forgetting to charge your batteries overnight can completely derail your morning appointments.
Travel Efficiency: Essential for convention artists. You can set up and start tattooing anywhere in under two minutes.
Proprietary Ecosystems: Many high-end brands force you to buy their specific $200 replacement batteries.
Machine Comparison Table
To assist in your buying decision, we have mapped out the core specifications of our top recommended platforms.
Machine Model
Ideal Stroke Length
Battery System
Best Application
INKSOUL® HV6 PRO
4.2mm (Golden)
Dual Included (Removable)
All-around workhorse; heavy color packing & bold lining.
Bishop Power Wand
3.5mm, 4.2mm, or 5.0mm (Fixed)
Critical Pack (Proprietary)
Specialized tasks (requires buying specific stroke models).
Cheyenne Sol Nova
3.5mm or 4.0mm (Fixed)
Built-in
Black & grey realism; soft shading.
Axys Valhalla
2.5mm to 4.2mm (Adjustable)
External Pack
Artists requiring mid-session stroke adjustments.
Who Should Use It (And Who Does Not Need It)
For commercial users and high-volume artists: If you are billing premium rates and working 6-to-8-hour sessions, you must use a professional wireless tattoo machine. The elimination of cord drag alone will drastically improve your line work at the end of a long day. If you refer to any modern tattoo pricing guide, clients paying premium rates expect you to use modern, sterile, and efficient equipment.
Who does not need it: If you are a traditional purist who exclusively tattoos flash with 8-wrap coil machines because you rely on the electromagnetic "give" of a spring, a rigid rotary pen will feel entirely foreign to you. Furthermore, apprentices who are just learning the fundamentals of needle depth on pig skin may benefit from the tactile feedback of a heavy coil machine before transitioning to a silent rotary.
Common Mistakes When Buying and Operating
We see artists make the same costly errors year after year. Avoid these pitfalls to protect your investment and your clients:
Ignoring the Stroke Length: Buying a 3.0mm stroke machine and wondering why you cannot push a 14RL into the skin is a user error, not a machine error. You need a 4.0mm+ stroke for bold lining.
Poor Cross-Contamination Protocols: A wireless pen requires meticulous bagging. Because you are touching the voltage buttons with gloved hands mid-tattoo, you must barrier-wrap the entire machine and use proper tattoo needle cleaning supplies to maintain an aseptic environment.
Running Voltage Too High: Because coreless motors are silent, artists often crank the voltage to 10v+ because it "sounds" slow. This causes massive skin trauma and destroys the tattoo healing stages. Let the torque of the motor do the work, not raw speed.
Buying Cheap Clones: Purchasing a $50 unbranded machine from a generic marketplace will result in motor failure during a tattoo. The inconsistent needle hang will chew out the client's skin. Stick to reputable brands.
Buying Considerations
When evaluating a professional wireless tattoo machine, your purchasing checklist should prioritize the following practical metrics:
Battery Interchangeability: The ability to hot-swap batteries is critical. Machines with permanently enclosed batteries must be placed on a charger, forcing you to stop working.
RCA Backup: Electronics fail. Batteries die. If your wireless machine does not have an RCA adapter attachment (like the INKSOUL HV6 PRO), a dead battery means a canceled appointment.
Motor Stall Torque: You want a machine that does not drop RPMs when you press the needle into thick skin. Brushless motors excel at maintaining consistent speed under heavy resistance.
Workspace Integration: A wireless machine frees up space, allowing you to better organize your tattoo ink for beginners, utilize proper tattoo lighting equipment, and keep your tattoo ink display rack and tattoo mixer supply within immediate, unhindered reach.
Expert Insight: "Many artists complain that rotary pens do not 'hit hard enough' for traditional style work. In our testing, this is almost always a stroke issue. Upgrading to a 4.2mm stroke machine completely changes the physics of the needle impact, giving you the definitive punch of a coil machine with the silence and reliability of a rotary."
Expert Recommendation & The Bottom Line
Transitioning to a wireless setup is the single best investment you can make for your physical health and studio efficiency. You cut setup time, eliminate trip hazards, and achieve perfect ergonomic balance.
The Bottom Line: We definitively recommend the INKSOUL® HV6 PRO. It bypasses the exorbitant pricing of boutique brands while delivering a devastatingly effective 4.2mm stroke. The inclusion of two batteries, two grips, and the 2-in-1 RCA conversion capability ensures you are prepared for absolutely any commercial scenario. Do not let an outdated power supply hold back your artistic progression—upgrade your hardware and take total control of your craft.
Authoritative References
To ensure our equipment recommendations align with industry safety and dermatological standards, we reference the following authorities:
Occupational Safety and Health Administration (OSHA) - Guidelines on bloodborne pathogens, cross-contamination, and the safe handling of motorized equipment in body art facilities.
Alliance of Professional Tattooists (APT) - The leading international non-profit organization dictating safety, infection control, and equipment standards for commercial tattoo artists.
Journal of Clinical and Aesthetic Dermatology - Peer-reviewed clinical studies evaluating the impact of mechanical needle trauma (stroke and voltage factors) on epidermal healing and ink retention.
Frequently Asked Questions
Are wireless tattoo machines better than coil machines?
In most professional situations, yes. Wireless rotary machines offer vastly superior ergonomic balance, eliminate cord drag, and run almost silently. While coil machines offer specific tactile feedback loved by traditional artists, wireless pens reduce hand fatigue and streamline cross-contamination protocols.
How long does a wireless tattoo machine battery last?
A premium professional wireless tattoo machine will typically last between 6 to 10 hours on a single charge, depending on the voltage used and the needle cartridge configuration. Pushing large magnum groupings at high voltage will drain the battery faster than lining with a small grouping.
What stroke length is best for a wireless tattoo pen?
The ideal stroke length depends on your style. A 3.0mm to 3.5mm stroke is excellent for soft black-and-grey shading and fine-line work. A 4.0mm to 4.2mm stroke is considered the "golden stroke" for solid color packing and bold, single-pass lining because it allows the needle to retract fully and load more ink.
Can I use a wireless tattoo machine while it is charging?
Most high-end machines do not support pass-through charging, as it damages the lithium-ion cell. Instead, machines like the INKSOUL HV6 PRO provide a 2-in-1 system. You can simply remove the dead battery, attach the included RCA adapter, plug it into a standard power supply, and continue tattooing immediately.
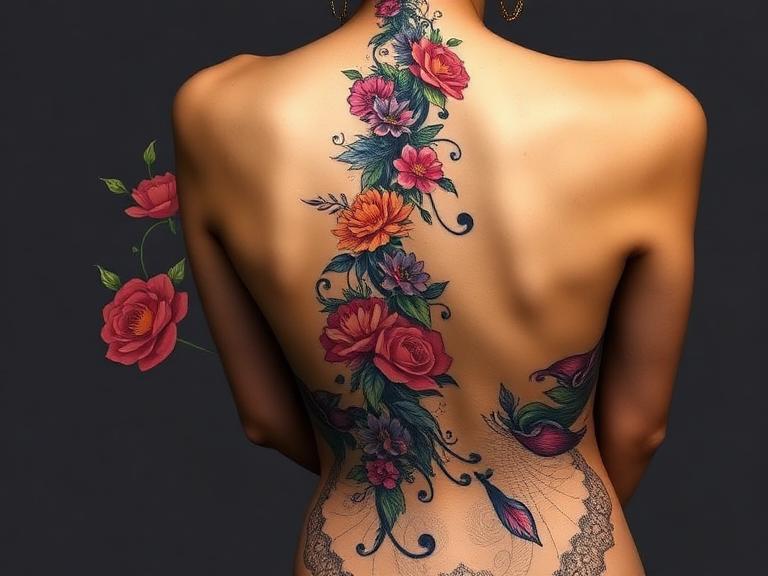
8 Creative Spine Tattoo Designs for Women in 2026
Spine tattoos represent one of the most elegant, highly visible, yet easily concealable placements in modern body art. However, from our experience as industry professionals, executing a flawless spine tattoo is an absolute logistical nightmare for an unprepared artist. The human spine is not a flat canvas; it curves, twists, and stretches with every breath. If the initial stencil is misaligned by a fraction of a millimeter, the entire design will look crooked for the rest of the client's life.
In 2026, we are seeing a massive shift away from the heavy, blocky tribal back-pieces of the past. Today's clients demand fine-line precision, fluid botanical motifs, and intricate geometric symmetry. Whether you are a commercial studio owner preparing your artists for the upcoming summer rush, or a collector deciding on your next major piece, you must approach Spine Tattoo Designs for Women with commercial and practical judgment. In this guide, we break down the most striking design trends of the year, the severe biomechanical realities of getting tattooed over the vertebrae, and the exact equipment needed to prevent a permanent mistake.
Quick Answer
The top Spine Tattoo Designs for Women in 2026 feature designs that complement the natural S-curve of the back rather than fighting it. The 8 most popular styles are: Fine-Line Botanical Vines, Moon Phase Progressions, Unalome/Spiritual Symbols, Serpentine/Snake Motifs, Abstract Brush Strokes, Micro-Realism Script, Geometric Mandalas, and Watercolor Splashes. For clients, we recommend choosing fluid designs (like vines or snakes) over rigid geometric shapes, as fluid designs mask natural bodily asymmetry. For commercial users and artists, executing these designs requires flawless stencil application. In our testing, attempting a spine tattoo without a professional-grade tattoo stencil printer guarantees misalignment. You must use high-fidelity thermal printers to ensure dead-center placement.
Table of Contents
What It Is: The Anatomy of a Spine Tattoo
How It Works: Mechanics and Pain
The 8 Creative Spine Tattoo Designs for 2026
The Benefits of Spine Placement
Limitations and Harsh Realities
Who Should Get One (And Who Should Not)
Common Mistakes in Spine Tattoos
Buying Considerations for Artists
Expert Recommendation
Essential Comparison Tables
The Bottom Line
Frequently Asked Questions
What It Is: The Anatomy of a Spine Tattoo
A spine tattoo is a vertical design placed directly over the spinous processes of the vertebral column, typically spanning from the cervical vertebrae (base of the neck) down to the lumbar or sacral region. From an anatomical perspective, this area presents unique challenges. The skin over the spine is notoriously thin, with very little subcutaneous fat cushioning the bone. When executing fine-line Spine Tattoo Designs for Women, the artist is essentially running a vibrating needle mere millimeters above the central nervous system framework.
How It Works: Mechanics and Pain
How a spine tattoo works in practice is entirely different from a standard thigh or bicep piece. Because the client must sit or lie in a hunched position to stretch the skin, the stencil will inherently warp when they stand up straight. This is why alignment is the single most critical factor. The pain level is universally rated as severe. The vibration of a rotary or coil machine resonates through the bone, creating a jarring, deeply uncomfortable sensation that tests the endurance of even veteran tattoo collectors.
The 8 Creative Spine Tattoo Designs for Women in 2026
In most professional situations, we see clients gravitate toward designs that elongate the torso. Here are the 8 designs defining the 2026 aesthetic:
Fine-Line Botanical Vines: The most forgiving and elegant design. A delicate vine of leaves crawling up the spine works beautifully because organic, asymmetrical nature designs hide any slight bodily curvature or posture shifts.
Moon Phase Progressions: A vertical stack of lunar phases transitioning from new moon to full moon. This requires absolute dead-center alignment. If the stencil is off by one degree, the entire sequence looks tilted.
Unalome & Spiritual Symbols: Buddhist and Hindu-inspired Unalome symbols represent the path to enlightenment. Their sweeping curves and terminating straight lines make them a staple for spine placements.
Serpentine / Snake Motifs: A snake weaving back and forth across the vertebrae utilizes the body's natural S-curve. This design is highly recommended for heavy-duty applications where a client wants a larger, bolder back piece.
Geometric Line Work & Mandalas: Symmetrical geometric patterns running down the back are visually stunning but carry massive execution risk. Artists must use a thermal tattoo printer to generate a stencil with zero distortion before even touching the skin.
Micro-Realism Script: A single, continuous line of tiny, elegant calligraphy flowing down the spine. This requires an incredibly steady hand and a fine-liner needle grouping (usually a 3RL or 1RL).
Abstract Brush Strokes: Inspired by East Asian ink wash painting, these tattoos mimic the sweep of a calligraphy brush. They are fluid, fast to execute, and highly artistic.
Watercolor Splashes: While black and grey dominates, watercolor spine tattoos introduce vibrant, borderless color that bleeds organically down the back. Note that watercolor requires dense pigment packing, which increases the pain factor over the bone.
The Benefits of Spine Placement
Why subject yourself to the pain? The aesthetic payoff is unmatched. A well-executed spine tattoo elongates the back, drawing the eye vertically and accentuating the natural posture. Furthermore, it is a highly controllable placement. It can be easily hidden beneath professional attire, yet instantly showcased in open-back dresses or swimwear. For commercial users (tattoo artists), mastering the spine tattoo is a lucrative skill that allows you to charge premium day rates, as clients will seek out specialists for this high-risk placement.
Limitations and Harsh Realities
Do not romanticize the process. The limitations are severe. First, the healing process is brutal. You cannot sleep on your back for at least a week, and wearing a traditional bra with a back-clasp will cause agonizing friction that can rip the healing scabs and pull out ink. Secondly, if you have severe scoliosis (curvature of the spine), a perfectly straight line tattoo will highlight the asymmetry of your back. In these cases, we strongly recommend organic, fluid designs rather than rigid geometric lines.
Who Should Get One (And Who Should Not)
Who should get it: Veterans of tattoo culture who understand their pain tolerance, clients willing to commit to rigorous aftercare, and women looking for an elegant, easily concealable statement piece.
Who does not need it: For beginners getting their very first tattoo, the spine is a terrible starting point. The intense pain often causes first-timers to twitch or flinch, resulting in blown-out lines. Additionally, those who suffer from chronic back pain or severe spinal misalignments should avoid drawing visual attention to the area with linear tattoos.
Common Mistakes in Spine Tattoos
The most catastrophic mistake is freehanding a symmetrical design or using a degraded stencil. When working on a spine, the client must stand perfectly straight, with their weight evenly distributed on both feet, while the artist applies the stencil. You cannot apply a 15-inch spine stencil while the client is sitting down; their skin will stretch, and when they stand, the tattoo will warp.
This is why understanding how to use tattoo transfer paper perfectly is mandatory. Furthermore, many amateur artists try to cut costs on equipment. We are often asked, can a normal printer print tattoo stencils? The answer is a resounding no. Using an inkjet printer for a complex spine mandala will result in a blurry, smudged mess that rubs off halfway through the session. You must use a dedicated thermal unit.
Buying Considerations for Artists
If you are a commercial studio owner booking these elaborate back pieces, your equipment dictates your success. You cannot execute these designs without a flawless transfer. You must invest in the best tattoo stencil printers available on the market.
For long spine pieces, the stencil often exceeds standard paper sizes. We recommend utilizing a wireless tattoo stencil printer so you can print multiple segments precisely from your iPad right at your station. Additionally, knowing what tattoo stencil paper is made of helps you choose the right thermal paper that won't wipe away when wiping blood and plasma off the spine during a long 6-hour session.
INKSOUL Tattoo Supply — Your Complete Tattoo Solution
Premium tattoo needles, pens, machines, stencil printers, stencil paper and studio lighting — crafted for professional artists and enthusiasts alike. Elevate your craft and ensure flawless execution on every spine, rib, and fine-line piece.
Expert Recommendation
For clients: We recommend choosing botanical or serpentine designs that flow with your body, and vetting your artist's portfolio specifically for straight-line back work. For artists: Upgrade your transfer game. In our testing, relying on cheap, hand-traced stencils for a 20-inch spine tattoo is professional suicide. Invest in a high-fidelity touch screen tattoo printer to capture every micro-detail of the design. A perfect tattoo begins with a perfect stencil.
Essential Data and Comparison Tables
Quick Summary Table: Top 8 Spine Tattoo Designs
Design Style
Visual Impact
Risk of Misalignment
Best Suited For
Botanical Vines
Organic, Soft
Low (Highly Forgiving)
Clients with slight scoliosis
Geometric Mandala
Striking, Bold
Extreme (Zero Margin for Error)
Perfectly symmetrical backs
Micro-Realism Script
Elegant, Subtle
High
Fine-line enthusiasts
Serpentine (Snake)
Edgy, Elongating
Low
Large-scale back pieces
Comparison Table: Spine Tattoos vs. Rib Tattoos
Factor
Spine Tattoo
Rib Tattoo
Pain Level
Severe (Bone vibration)
Severe (Thin skin, breathing movement)
Healing Difficulty
High (Sleeping and bra friction)
Moderate (Bra friction, torso twisting)
Stencil Application
Must stand perfectly straight
Must relax arms to sides
Aging & Stretching
Ages well, minimal weight-gain stretching
Prone to stretching from pregnancy/weight gain
Pros and Cons Table: Spine Tattoos
Pros (Advantages)
Cons (Limitations)
Visually elongates and flatters the torso.
One of the most painful areas to get tattooed.
Easily hidden for professional environments.
Requires an artist with elite technical precision.
Minimal skin stretching as the body ages.
Brutal healing process; restricts back-sleeping.
Symmetrical placement creates a striking focal point.
Any natural spinal curvature will make straight lines look crooked.
Buying Guide Table: Essential Stencil Gear for Artists
Equipment Need
Why It's Critical for Spine Tattoos
Our INKSOUL Recommendation
Thermal Printing
Requires crisp, smudge-proof lines for precise symmetry.
tattoo transfer printer guide
Mobility
Artist must maneuver around the client standing up.
AIMO T08FS Wireless Printer
Detail Retention
Micro-realism and mandalas require high-DPI output.
regular printer for tattoo transfer paper (Why to avoid it)
The Bottom Line
Spine Tattoo Designs for Women are not just a fleeting trend for 2026; they are a timeless assertion of elegance and pain tolerance. However, they demand absolute respect from both the client and the artist. If you are a client, choose a design that harmonizes with your unique anatomy rather than forcing rigid lines onto a curving spine. If you are an artist, your commercial survival depends on flawless execution. Ditch the hand-drawn stencils and standard office printers. Invest in a dedicated thermal transfer system from INKSOUL, master your stencil application, and ensure every line you lay down over those vertebrae is permanently perfect.
Frequently Asked Questions
How bad do spine tattoos actually hurt?
From our experience, spine tattoos are consistently rated as an 8 or 9 out of 10 on the pain scale. The skin is incredibly thin, and the tattoo needle vibrates directly against the spinous processes of the vertebrae. This vibration travels through the central nervous system, creating a deep, jarring ache rather than a standard surface scratch.
Can I wear a bra while my spine tattoo is healing?
In most professional situations, we recommend absolutely no traditional back-clasp bras for at least 7 to 10 days. The friction of the strap rubbing against fresh ink will cause premature scabbing, ink fallout, and potentially severe infections. You must rely on loose clothing, backless garments, or adhesive silicone covers during the initial healing phase.
Will a spine tattoo look crooked if my back isn't perfectly straight?
Yes. If you have any degree of scoliosis or natural posture deviation, a rigid, straight-line tattoo (like a sword or a geometric line) will follow the curve of your spine and appear visibly crooked to an observer. To mitigate this, we highly recommend choosing fluid designs like botanical vines or snakes that rely on organic asymmetry.
Authoritative Industry References
U.S. Food and Drug Administration (FDA): Guidelines on tattoo ink safety, adverse reactions, and the medical realities of inserting pigments into the dermal layer. Review FDA Tattoo Safety Data
Mayo Clinic: Medical insights into the central nervous system, dermatomes, and why tattoos over the spinal column trigger heightened pain responses. Explore Mayo Clinic Anatomy Resources
Allure Magazine: Editorial analysis on 2026 body art trends, the rise of fine-line micro-realism, and the cultural shift toward elegant, hidden tattoo placements for women. Read Allure's Tattoo Trend Report
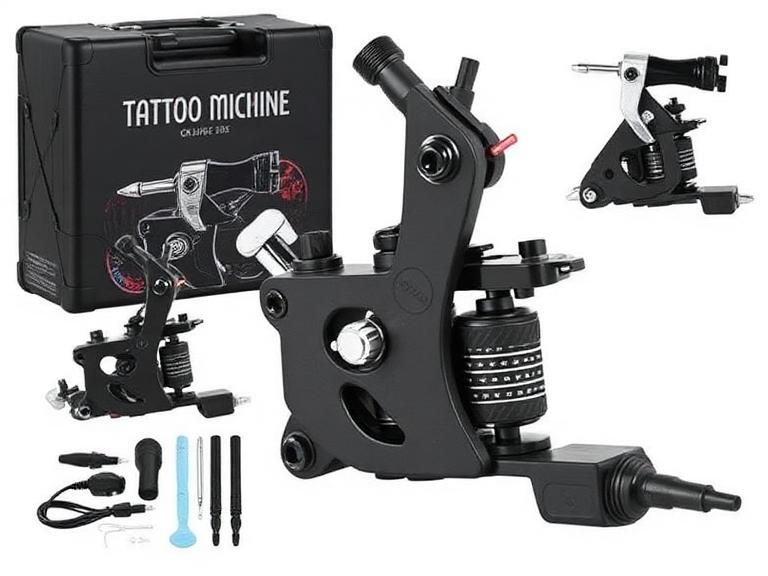
10 Best Tattoo Machine Starter Kits and Machines for Beginners in 2026
Choosing the best tattoo machine starter in 2026 is easier than it was a few years ago, but it is also easier to waste money. The market is flooded with low-cost wireless tattoo pens that look professional online but lack consistency, battery life, and needle stability when you actually start tattooing skin.
From our experience working with tattoo artists, apprentices, and studio owners, beginners often focus on price instead of learning efficiency. The right starter machine should help you build proper technique, line control, and confidence. The wrong machine can slow your progress and create bad habits that are difficult to correct later.
If you are searching for the best tattoo machine starter, this guide will help you make a practical buying decision based on real-world performance rather than marketing claims.
Quick Answer
The best tattoo machine starter in 2026 is a reliable wireless tattoo pen with stable voltage output, comfortable ergonomics, adjustable stroke options, and sufficient battery life for practice sessions.
Best Overall Starter Machine: INKSOUL® HV6 PRO
Best Adjustable Stroke Machine: Dragonhawk Fold Pro
Best Budget Option: Dragonhawk Mast Tour
Best for Apprentices: FK Irons EXO
Best for Future Professionals: Bishop Power Wand
For most beginners, we recommend starting with a quality wireless pen rather than a traditional coil machine. The learning curve is shorter, maintenance is easier, and machine control is significantly better.
Table of Contents
Quick Summary Table
What Is a Tattoo Machine Starter?
How It Works
10 Best Tattoo Machine Starter Picks
Pros and Cons
Comparison Table
Buying Guide
Common Beginner Mistakes
Expert Recommendation
Bottom Line
FAQs
References
Quick Summary Table
Rank
Machine
Best For
Value Score
1
INKSOUL® HV6 PRO
Overall Beginner Value
9.8/10
2
Dragonhawk Fold Pro
Stroke Versatility
9.6/10
3
Bishop Power Wand
Professional Growth
9.4/10
4
FK Irons EXO
Apprentices
9.3/10
5
Dragonhawk Mast Tour
Budget Learning
9.1/10
6
Cheyenne Sol Nova
Premium Users
9.0/10
7
Mast Archer
Wireless Practice
8.9/10
8
Ambition Soldier
Budget Wireless
8.8/10
9
Stigma Force
Smooth Shading
8.7/10
10
CNC Q2
Entry-Level Artists
8.6/10
What Is a Tattoo Machine Starter?
A tattoo machine starter is a beginner-friendly tattoo machine designed to help new artists learn line work, shading, packing, and machine handling without requiring advanced setup knowledge.
In 2026, most tattoo machine starter options are rotary wireless tattoo pens. These machines offer smoother operation, reduced vibration, and simpler maintenance than traditional coil machines.
For beginners, a starter machine should prioritize consistency over raw power. The goal is learning proper tattooing fundamentals rather than maximizing speed.
How a Modern Tattoo Machine Works
Modern tattoo pens use a motor-driven rotary system that converts rotational motion into a linear needle movement.
This movement pushes tattoo cartridges into the skin at a controlled speed and depth. High-quality machines maintain consistent power throughout the session, resulting in cleaner lines and more predictable healing.
Understanding machine performance is only part of the equation. Beginners should also learn proper pigment selection using quality tattoo ink for beginners before working on actual skin.
10 Best Tattoo Machine Starter Options for 2026
1. INKSOUL® HV6 PRO – Best Overall Tattoo Machine Starter
INKSOUL® HV6 PRO Wireless Tattoo Pen
4.2mm stroke, dual grips, dual batteries, two operating modes, and professional-level performance in a beginner-friendly platform.
View Product
From our experience, the HV6 PRO delivers one of the best value-to-performance ratios available today. The included spare battery and dual grip setup make it suitable for long practice sessions and eventual professional work.
2. Dragonhawk Fold Pro – Best Adjustable Stroke Machine
Dragonhawk Fold Pro
Seven adjustable stroke lengths make this one of the most versatile starter machines available.
View Product
For beginners who want to experiment with lining, shading, and color packing using one machine, the Fold Pro is an excellent choice.
3. Bishop Power Wand
A premium machine with exceptional balance and precision. Expensive but capable of supporting a full professional career.
4. FK Irons EXO
Popular among apprentices because of its reliable motor system and professional reputation.
5. Dragonhawk Mast Tour
One of the most affordable machines capable of producing respectable beginner results.
6. Cheyenne Sol Nova
German engineering and outstanding reliability make it a favorite among experienced artists.
7. Mast Archer
A practical wireless solution for artists transitioning from practice skins to real clients.
8. Ambition Soldier
Strong battery performance at a competitive price point.
9. Stigma Force
Smooth operation and comfortable ergonomics for long sessions.
10. CNC Q2
Entry-level affordability without sacrificing essential functionality.
Who Should Use a Tattoo Machine Starter?
Beginning tattoo artists
Tattoo apprentices
Artists practicing on synthetic skin
Permanent makeup trainees
Artists transitioning from coil machines
Who Does Not Need a Starter Machine?
Established professional tattoo artists
Studio owners upgrading premium equipment
Artists already comfortable with multiple stroke configurations
Pros and Cons of Beginner Tattoo Machines
Pros
Cons
Easy to learn
Limited advanced features
Affordable investment
Some budget models lack power
Low maintenance
Battery quality varies
Lightweight design
May require future upgrades
Wireless convenience
Premium models cost more
Comparison Table
Machine
Wireless
Stroke Options
Best User Type
HV6 PRO
Yes
4.2mm
Most Beginners
Fold Pro
Yes
7 Options
Learning Multiple Styles
Bishop Power Wand
Yes
Multiple Versions
Professionals
FK EXO
Yes
Multiple Versions
Apprentices
Mast Tour
No
Fixed
Budget Users
Buying Considerations
Factor
Recommendation
Importance
Battery Life
6+ Hours
High
Weight
Under 220g
High
Stroke Length
3.5mm-4.2mm
High
Voltage Stability
Consistent Output
Critical
Grip Comfort
Ergonomic Design
High
In most professional situations, machine performance alone does not determine results. Supporting equipment also matters. Proper tattoo lighting equipment can dramatically improve visibility and line precision.
Artists should also organize pigments efficiently using a dedicated tattoo ink display rack and maintain proper color consistency with professional tattoo mixer supply equipment.
Common Beginner Mistakes
Buying the Cheapest Machine Available
Cheap machines often create inconsistent needle depth and unstable voltage output.
Ignoring Hygiene Equipment
Many beginners spend their entire budget on a machine and forget essential sanitation products like tattoo needle cleaning supplies.
Starting on Real Skin Too Early
Practice skins exist for a reason. Build muscle memory first.
Focusing Only on Machine Specs
Technique matters more than having the newest machine.
Expert Recommendation
For beginners, we recommend selecting a machine that you can realistically use for at least one to two years. Constantly upgrading equipment slows skill development.
From our experience, the INKSOUL® HV6 PRO offers the strongest combination of reliability, value, comfort, and long-term usability for new artists.
For users who want maximum flexibility, the Dragonhawk Fold Pro remains one of the best tattoo machine starter options because its adjustable stroke system allows experimentation with multiple tattoo styles.
Learning fundamentals should remain the priority. Understanding tattoo healing stages, proper client consultation, and realistic expectations using a professional tattoo pricing guide will contribute more to long-term success than chasing equipment trends.
For aspiring artists who are not ready for permanent tattooing yet, experimenting with temporary tattoo ideas, reading a temporary tattoo pens review, learning how to make temporary tattoos, or exploring a glitter tattoo guide can provide valuable artistic practice.
Bottom Line
The best tattoo machine starter in 2026 is not necessarily the most expensive machine. It is the machine that helps you learn efficiently, practice consistently, and grow into professional work without immediate replacement.
For most beginners, the INKSOUL® HV6 PRO is our top recommendation because it balances professional-grade performance, beginner usability, battery convenience, and long-term value.
If versatility is your priority, the Dragonhawk Fold Pro is a close second thanks to its adjustable stroke system and broad application range.
Invest in quality equipment once, focus on technique, and avoid the common beginner trap of constantly chasing new gear.
Frequently Asked Questions
What is the best tattoo machine starter for beginners?
The INKSOUL® HV6 PRO is our top beginner recommendation due to its reliability, wireless design, and professional-grade performance.
Should beginners use coil or rotary tattoo machines?
Most beginners should start with rotary tattoo pens because they are easier to control and require less maintenance.
Is a wireless tattoo machine worth it?
Yes. Modern wireless machines offer excellent performance and greater freedom of movement.
How much should a beginner spend on a tattoo machine?
Most quality beginner machines range from $100 to $400 depending on features and brand reputation.
Can I tattoo professionally with a starter machine?
Many modern starter machines are fully capable of professional work when paired with proper technique.
How long should a quality tattoo machine last?
A well-built machine can remain reliable for several years with proper maintenance and battery care.
References
FK Irons Technical Resources
Allied Health Schools Tattoo Artist Education Guide
Occupational Safety and Health Administration (OSHA)