
ニュース
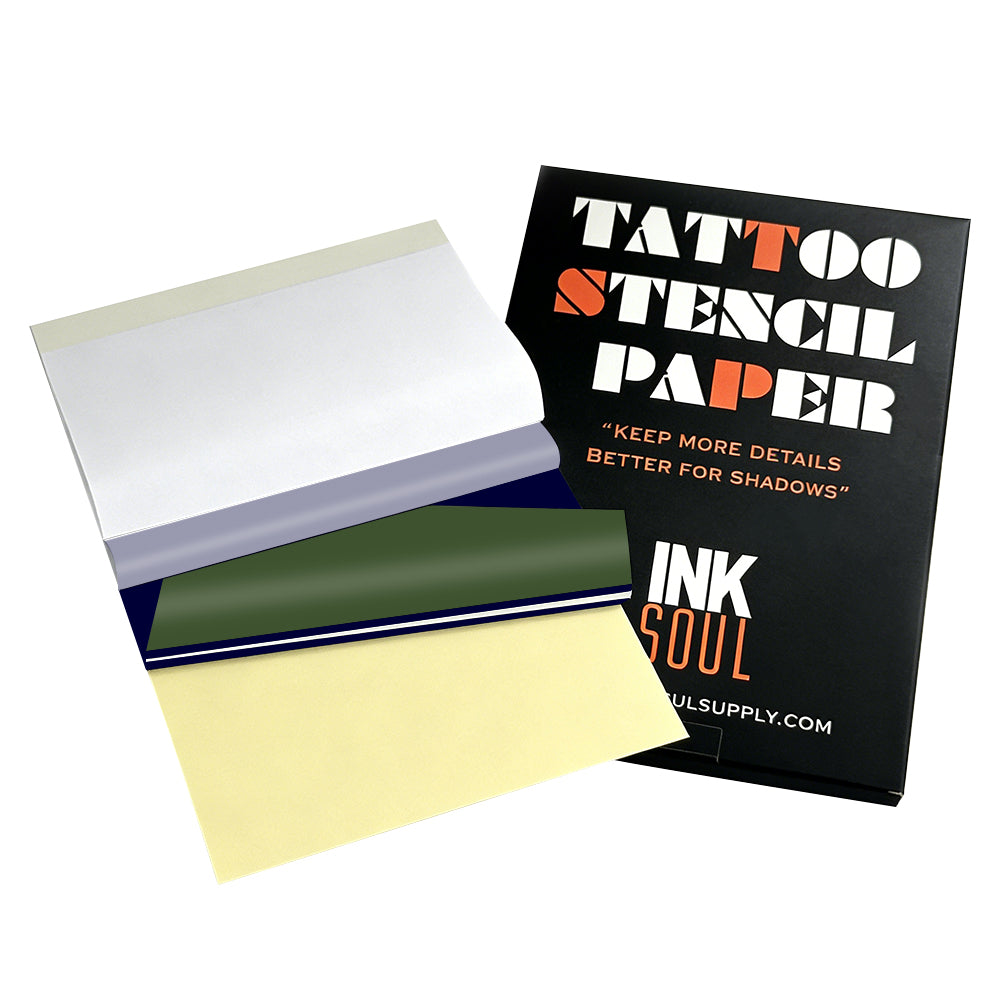
freehand stencil
How to Draw on Tattoo Transfer Paper
Yes — you can draw directly on tattoo transfer paper with a ballpoint pen or a stylus, no printer needed. Draw on the top sheet with firm, even pressure and the carbon layer underneath copies every line onto the sheet that touches the skin.
Hand drawing is the fastest way to make a one-off stencil — a walk-in flash piece, a freehand adjustment, a design that only exists in your head. It is also the slowest way to make a complicated one. This guide covers the paper, the pen, the pressure, and when to stop drawing and print instead.
What you are actually drawing on
A sheet of tattoo transfer paper is a stack, and each layer has one job:
Top sheet (master sheet): the white sheet you draw on. Your pen never touches anything else.
Carbon layer: the purple or blue sheet in the middle. Your pen's pressure pushes its pigment onto the back of the top sheet — that back becomes the stencil.
Protective tissue (onion sheet): a thin separator that keeps the carbon from marking the top sheet in storage. Remove it for the darkest transfer (see step 2).
Backing sheet: the bottom layer. Leave it in place — it keeps the stack aligned and the carbon off your desk.
Two types of paper take hand drawing. Freehand (hectograph) paper is made for it: its carbon layer is pressure-activated and forgiving of uneven strokes. Thermal paper is made for heat. It also takes a pen, but the lines come out lighter and less consistent — its carbon layer is tuned for the printhead, not your hand. Use a stylus and firm pressure. For printed work the paper choice matters more: our SP100 is made for shadow work and the LP100 for line work, both $38.88 for 100 A4 sheets.
The right pen (and the wrong ones)
The pen is not leaving ink on the paper — it is pressing pigment through three layers. What works:
Medium-tip ballpoint pen: the studio standard. A firm, round tip presses evenly without cutting the top sheet. This is the tool to reach for first.
Stylus or hectograph pencil: purpose-built for this job. A stylus gives the most consistent line weight over a long session — the tip never goes soft or scratchy.
Fine-tip ballpoint: good for detail and lettering, but keep pressure light — a sharp tip tears the top sheet faster than a medium one.
What does not work: a soft graphite pencil (6B and softer). Graphite smears under your palm, and a soft lead cannot press the carbon evenly — grey smudge on top, faint broken line underneath. The final pass on transfer paper should always be pen or stylus.
How to draw on tattoo transfer paper: step by step
1. Set up a hard, flat surface
Carbon transfer needs resistance underneath. A clipboard or a hard table works. A soft surface — a sketchbook, a bed, your thigh — absorbs the pressure and your lines come out uneven. Tape the top corners down so it cannot shift mid-drawing.
2. Remove the tissue layer
Peel out the thin protective tissue between the top sheet and the carbon for the darkest transfer. Drawing through it still works, but the lines come out lighter — some artists keep it in while sketching, then remove it for the final pass. Keep the backing sheet underneath.
3. Draw on the top sheet, in one confident pass
Draw the design on the top white sheet, as you want it on the skin. Use smooth strokes and steady, even pressure — not a death grip. Work top to bottom (left to right if you are left-handed) so your palm never rests on lines already drawn; hand oils and friction smear fresh carbon.
4. Check the transfer before you commit
Halfway through, lift a corner and check the underside: lines should be solid purple and continuous. Faint or broken lines mean too light; a torn top sheet means too hard. Adjust now, while you can still redraw.
5. Trim close to the lines
Cut close to the design, leaving a small margin. Less loose paper means less chance of shifting or creasing when you press it to skin, and easier positioning on curved areas like ribs or forearms. Store finished stencils flat with the tissue slipped back in — heat and pressure in a bag smudge the carbon.
6. Prep the skin, then apply
Shave if needed, wash with antibacterial soap, wipe with alcohol, then apply a thin, even layer of stencil gel. Wait until it turns tacky — about 30 seconds to a minute — then place the stencil face down and press firmly for 30 to 60 seconds without sliding it. Peel from one corner. If a line looks weak, do not press the paper back down — it will double-print. Redraw instead. If the whole placement is wrong, wipe it off with green soap and water and start over — never tattoo over a stencil you cannot trust.
7. Let it dry before you tattoo
Give the stencil 5 to 15 minutes to dry fully — starting too soon turns a crisp stencil into a smudge halfway through the outline. For the full routine, see our guide on using stencil gel so the transfer stays sharp all session.
Do you need to draw it backwards?
No — the image flips twice. Your pen presses the carbon onto the back of the top sheet, which mirrors the drawing — then that back goes face down on the skin, which mirrors it again. The stencil lands the right way round. Draw normally, exactly as you want it to look.
The same applies when tracing a printed reference: trace what you see. A printed design that looks reversed is a printer problem, not a drawing problem — see which side of transfer paper faces up.
Pressure and line weight: the part that separates clean stencils from muddy ones
Hand-drawn lines come out on skin slightly heavier than they look on paper — the carbon spreads a fraction under pressure and the gel softens the edge. Two adjustments fix most muddy stencils:
Draw fine lines thinner than the final tattoo line. If the tattoo needs a 0.35 mm line, draw it like a 0.25 mm line — the transfer fattens it for you. Draw at full weight and the stencil looks bold before the needle touches skin.
Keep pressure even, not hard. Past a point, pressing harder does not darken the stencil — it tears the top sheet and embosses a trench that prints as a thick, blurred line. If lines are faint, make a second slow pass over the same stroke.
Shading is the hard limit of hand drawing: you cannot print grey wash with a pen. Map shadow areas as boundary lines and shade freehand with the machine. If the design lives or dies on smooth gradients, that is a printing job.
Hand-drawn vs printed: when to put the pen down
Hand-drawn on transfer paper
Printed (thermal stencil printer)
Best for
One-off designs, walk-in flash, freehand adjustments
Repeat designs, large pieces, fine-line detail
Speed
Minutes for simple designs; hours for complex ones
Seconds per sheet once the file is ready
Line consistency
Depends on your hand that day
Identical every time
Shading
Boundary lines only — shade with the machine
Prints shadow gradients (SP100 paper)
Gear needed
Paper + a ballpoint pen
Printer + paper + phone app
When you are redrawing the same design for the third time, printing starts paying for itself. Our pick is the INKSOUL T08FD ($188.88): its touchscreen lets you preview and size the design before it prints — the second look hand drawing cannot give you. The T08FS ($168.88) is the classic wireless model if you print from your phone. The transfer workflow bundle ($288.88) pairs the T08FD with LP100 and SP100 paper plus stencil gel. Our full comparison is in the best tattoo stencil printer for professional use.
5 mistakes that ruin a hand-drawn stencil
Mistake
What happens
Fix
Drawing through the tissue layer
Lighter lines than a direct pass
Remove the tissue for the final pass; keep it in only while sketching
Soft pencil instead of ballpoint
Grey smudge on top, broken line underneath
Sketch in pencil on scrap; final pass in pen or stylus
Resting your palm on drawn lines
Hand oils and friction smear the carbon
Work top to bottom; keep the drawing hand floating
Re-pressing a weak line
Double-printed ghost lines
Never re-press; redraw a fresh stencil
Trying to erase a wrong line
Correction fluid and alcohol smear the carbon
Start a fresh sheet; keep the spoiled one for practice
Tattooing before the stencil dries
Lines smudge under the first wipe
Wait 5–15 minutes; test with a light touch first
FAQ
Can you draw on thermal transfer paper by hand?
Yes, but not as well as on freehand paper. Thermal paper's carbon layer is thinner and tuned for heat, so hand-drawn lines come out lighter and less consistent — use a stylus and firm pressure. Freehand (hectograph) paper is the better choice if you are buying paper to draw on: its carbon is made for pressure transfer and more forgiving of uneven strokes.
What pen do you use to draw on tattoo transfer paper?
A medium-tip ballpoint pen is the studio standard: firm, even pressure without tearing the top sheet. A stylus or hectograph pencil works just as well and holds line weight better over a long session. Avoid soft graphite pencils — they smear and cannot press carbon evenly.
Do you draw on the carbon side or the white side?
Draw on the white top sheet, never directly on the carbon. Your pen's pressure pushes the carbon pigment onto the back of the top sheet, and that back is what transfers to the skin. Remove the protective tissue first; leave the backing sheet in place.
Why is my hand-drawn stencil too faint?
Usually one of three things: you drew through the tissue layer, the pressure was too light, or the paper sat on a soft surface that absorbed the force. Check by lifting a corner mid-drawing — the underside should show solid, continuous purple lines. If lines are broken, slow down and make a second pass over the same stroke instead of pressing harder.
Is it better to draw a stencil by hand or print it?
For a one-off design or a freehand adjustment, drawing is faster — paper and a pen, no file prep. For anything you will repeat, anything large, or anything with fine-line detail or smooth shading, print it: a thermal printer reproduces the same lines every time, and the T08FD's screen lets you check size and placement first.
stencil paper
Which Side of Tattoo Transfer Paper Faces Up?
Direct answer
Load the sheet so the blue carbon layer faces the printer's thermal head. On the top-loading thermal printers most studios use, that means blue side up, with the thin protective tissue removed before printing. Tear direction — top-down versus bottom-up — does not change how dark the stencil prints. If a reel shows one tear direction printing deep and the other printing faint, something else changed: the sheet was loaded the wrong way round, the tissue was still in place, or the darkness setting was different.
That distinction matters because a recent round of reels teaches a "correct direction to tear the paper," with one direction marked wrong and the other right. We taught the other version back in August: it is not about which way you tear. It is about which side faces the head.
The four layers, and which one does the work
A sheet of thermal transfer paper is not one sheet. It is a sandwich, and every layer has a job:
White master sheet — the sheet that carries the printed design to the skin.
Protective tissue — a thin, translucent sheet between the master sheet and the dye layer. It protects the pack in transit and must come out before printing.
Blue/purple carbon (dye) layer — the layer the thermal head heats. Heat activates the dye and bonds the line work onto the master sheet.
Stiff backing sheet — the yellow-backed support sheet that keeps the set flat and feeding straight.
The thermal head can only activate dye it can heat. Load the set backwards and the head fires at the backing sheet instead of the dye layer. The printer feeds normally, sounds normal, and produces nothing useful — or a ghost so pale you assume the printer is dying. It is not dying. It is heating the wrong side of the sandwich.
Before loading, peel one corner back and name the layers: white, tissue, blue, backing. If you cannot tell which is which on a new brand, print a 2–3 cm test strip before committing a full sheet.
Why "blue side up" is the rule — and when it is not
"Blue side up" is the working rule for a top-loading thermal printer, because on that feed path "up" is the side the thermal head meets. The invariant rule underneath it is dye layer toward the head. That is why you will occasionally see a manual for a different feed path show the carbon facing down: the head is underneath on that machine, so "down" is still "toward the head."
So the checklist is not "always up." It is:
Find your printer's feed diagram and confirm which side meets the head.
Load the dye layer on that side.
If the diagram is missing or ambiguous, run the test strip both ways and keep the one that prints solid.
Do not let a reel override your printer's diagram. Two artists can follow the same reel, tear the same way, and get different results — because one loaded dye-to-head and the other did not. The tear got the blame; the loading deserved it.
Tear direction: what it actually affects
Peeling the master sheet off the carbon layer after printing is a handling step, not a printing step. By the time you peel, the dye has either transferred or it has not. Peeling slowly and steadily, without yanking or dragging the sheet sideways, protects lines that are still slightly tacky. Peeling fast, at a sharp angle, can smudge a good print.
What peeling does not do is add dye. A faint stencil peeled "correctly" stays faint. A deep stencil peeled casually does not become faint — it may smudge at an edge, which is a different failure, and one you can see as a smear rather than as uniform paleness. If your whole stencil is pale, look at loading, tissue, and darkness first. Those are the three causes that change density across the entire design. Peeling only ever changes part of it.
The same logic applies on skin: the printed sheet goes face-down onto a thin, tacky layer of transfer gel, you press evenly without sliding, and you lift in one smooth motion. Lifting direction does not deepen the transfer; even pressure and a tacky — not wet — gel layer do. Too much gel and lines bleed; too little and the stencil lifts patchy. Once it is on, do not wipe it with green soap until the outline is in — dry-wipe or lubricant-wipe only — or soap and sweat will lift it mid-session.
Hand-drawn stencils follow the same physics, in reverse order
It is worth separating the two workflows, because they are where the confusion usually starts. When you draw a stencil by hand, you draw on the matte white top sheet, pressing through to the carbon layer underneath. The carbon is below your pen, and that is correct for hand work — pressure, not heat, is doing the transfer.
A thermal printer reverses the energy source. Heat comes from the head, so the dye layer must face the head. Artists who learned on hand-drawn stencils sometimes load a thermal set the same way — white on top, carbon underneath — and then wonder why the print is faint. The sheet order did not change; the direction the energy comes from did.
Roll paper adds one more trap: a roll looks the same from either end, so it is easy to thread neatly and backwards. Confirm the feed direction on the first length with a test print, then mark the roll's outer feed side so you do not have to guess again.
When orientation is right and the stencil still fails
Orientation is the first check, not the only check. If a correctly loaded test strip still prints pale, change one variable at a time: raise darkness one step and retest; clean a dirty head (power off, unplug, cool, then wipe in one direction with a lint-free swab dampened with isopropyl alcohol at no stronger than 70%, and let it dry fully); print on a full charge; store opened packs flat, cool, and sealed, since heat and damp age the dye layer; and re-export grey or photo-style files as pure black-and-white, because a thermal head treats grey as partial heat — modern printers render it by dithering, so gradients break into dots. A cheap printer loaded correctly will out-print an expensive printer loaded backwards, every time.
The 60-second check before every print
Work this order and you will almost never waste a sheet:
Peel a corner and identify the four layers. Remove the protective tissue.
Load dye layer toward the thermal head — blue side up on a top-loading machine.
Confirm the design is pure black-and-white at 100% scale, with no grey fills. A thermal head treats grey as partial heat, so grey comes out as broken speckles.
Print a 2–3 cm test strip. Check fine lines first: thin strokes carry less dye per millimetre than bold ones, so fine-line work is where a wrong loading shows up first.
Only then print the full design. If the test strip is pale, raise the darkness setting one step and retest — do not change three variables at once.
Correct vs. reversed vs. the myths, side by side
Situation
What you get
What to fix
Dye layer toward the head, tissue removed
Solid lines, fine detail holds
Nothing — print the full design
Sheet loaded backwards
Ghost print or blank sheet, printer sounds normal
Flip the set so the dye layer faces the head
Protective tissue left in place
Uniformly pale, washed-out stencil
Peel the tissue out before printing
Torn "the wrong way" but loaded correctly
Normal stencil; possible edge smudge if yanked
Peel steadily; do not reprint for tear direction alone
What to buy once, so this stops being a recurring problem
Keep one paper you know as your house stock, and learn its corner-peel test once. Switching brands mid-week means relearning which layer is which under time pressure.
Our Pick is the INKSOUL T08FD: a touch-screen machine with an INKSOUL-exclusive colourway and a failure rate far below the older model, printing from a phone app. The T08FS remains the classic option in the same workflow.
Match the sheet to the work: line paper for crisp line work, shadow paper for heavy blackwork, and a 210mm x 30m roll for large pieces, cut to length instead of taping sheets together. If you switch paper brands, re-run the test strip and darkness check first — sensitivity varies by paper, so a setting that was right for one brand is not automatically right for the next. Gel is not an afterthought here either: a tacky gel layer holds transferred dye, while an alcohol-wet surface lets it slide, so the gel choice interacts directly with how dense the stencil looks on skin.
Our Pick printer: INKSOUL T08FD
Classic printer: INKSOUL T08FS
Shadow stencil paper: Shadow stencil paper
Stencil paper roll 210mm x 30m: Stencil paper roll 210mm x 30m
Transfer gel: Transfer gel
Related troubleshooting: faint-stencil checklist, dark-transfer fix, smudge guide.
FAQ
Which side of tattoo transfer paper faces up in a thermal printer?
The blue carbon (dye) side faces the thermal head. On a top-loading printer that means blue side up, with the protective tissue removed. On a machine whose head sits underneath, the same rule means dye side down — dye toward the head is the rule, up is just the common case.
Does tear direction change how dark a stencil prints?
No. Tear or peel direction affects smudging at the edges if you yank the sheet, but it does not add or remove dye. A uniformly faint stencil is a loading, tissue, darkness, or source-file problem, not a peeling problem.
What happens if I load transfer paper backwards?
The thermal head heats the backing sheet instead of the dye layer, so you get a ghost print or a blank sheet while the printer feeds normally. Flip the set so the dye layer faces the head and reprint a test strip.
Should I remove the thin tissue sheet before printing?
Yes. The translucent protective tissue sits between the master sheet and the dye layer to protect the pack, and it blocks heat if left in place. Peel it out before loading; printing through it is the most common rookie cause of a faint stencil.
Why is my stencil pale even though the paper is loaded correctly?
Check darkness one step at a time, then the source file: grey fills and photo textures print as broken speckles because a thermal head treats grey as partial heat. Re-export as pure black-and-white.
A4 tattoo stencil paper
タトゥーステンシルペーパーはロールとシートどっち?
結論:大きなデザインを印刷する方、紙の消費が速い方はロールを買いましょう——210mm × 30mのロール1本はA4シートの箱より長持ちし、プリンターに合わせて紙を切る手間もありません。標準サイズのステンシルが中心で、手軽さを求める方はA4シートを。しかし、フォーマットは小さな決定事項です。ステンシルがシャープに印刷されるかを実際に決めるのは、紙の一貫性と保管方法です。
ロールがワークフローに実際に変えること
サーマルステンシルペーパーは層構造です:マスターシート、保護ティッシュ、インク付きカーボン層、バッキングシート。ロールかシートかでこの化学構造は変わりません——変わるのは紙がプリンターにどう給紙されるかです。210mm × 30mのロールは連続給紙で、実用的な違いは3つの場面に現れます:
1. 大判作品が紙の問題でなくなる。フルスリーブのラップや背中一面の作品はA4シート1枚に収まりません。シートでは複数の印刷をテープでつなぎ、継ぎ目がずれないことを祈ります。ロールならデザインを1回のパスでフルレングス印刷——継ぎ目なし、位置合わせの悩みなしです。
2. プリンターに合わせたカットが不要。これは痛い目を見て学ぶディテールです:すべてのシート幅がすべてのプリンターの紙経路に合うわけではありません。非標準のシートサイズを買うと、印刷のたびにカットすることになります——忙しい日の日々の税金です。標準的なA4/Letterシートに固執すればこの問題は起きません。210mmロールはINKSOUL T08FDとT08FSの紙経路に直接給紙されます(両モデルともロール印刷対応)ので、「これ合うかな?」という疑問は消えます。
3. ロール1本で在庫が大幅に減る。ロール1本に30mの連続紙。週に何十枚もステンシルを印刷するハイボリュームショップでは、棚の1箱が見た目よりはるかに多くのセッションをまかないます——再注文の頻度が減り、棚のスペースも少なくて済みます。
トレードオフ:ロールには置き場所と近くにハサミが必要です。給紙して印刷し、印刷されたステンシルを切り離します。印刷ごとにワンモーション増えます——スタジオでは些細なことですが、狭いゲストスポットでは少し煩わしいです。もう一つ、ロール特有の習慣:切りたてのロール紙にはカールの記憶があり、元に戻ろうとします。本の下に1分敷いて平らにするか、中央から外側へ肌に滑らかに貼るかしましょう。丸まった端が転写の途中で浮くと、ステンシルが二重に写ります。
A4シートが優れていること
シートの勝ちは経済性ではなく利便性です:
1. 印刷ごとのセットアップゼロ。箱を開けて1枚取り出して印刷。給紙もカットも計測もなし。8人のお客様がいる日は、このリズムが重要です。
2. 固定の予測可能なコスト。100シートは100回の印刷——セッションあたりの紙コストを正確に数えられます。ロールでは毎回の印刷がどれだけ長さを消費したかを目測する必要があります。
3. 仕事別に処方がラベル付けされている。これが転写品質に実際に効く部分です:すべてのA4紙が同じ処方というわけではありません。当店のLP100はくっきりしたライン用に、SP100ラインは滑らかなシャドウ用に調整されています——すべてを1本のロールで回すのではなく、その日印刷するものに合わせて箱を選べます。
直接対決:本当の比較
重要なポイント
ロール(210mm × 30m)
A4シート(100枚パック)
最適な用途
スリーブ、背中一面、ハイボリューム
標準サイズのステンシル、安定した日常フロー
印刷準備
給紙+印刷後にカット
なし——取って印刷するだけ
コスト管理
1mあたり(デザインサイズによる)
1シートあたり(固定)
保管
かさばるロール1本、使用まで密封のまま
シートの箱——箱は閉めておく
プリンター適合
210mmがT08FD/T08FSの紙経路に一致
プリンターの幅に合わせる必要、合わなければカット
無駄
ほぼなし——印刷分だけ正確にカット
大きすぎるカットごとの切れ端
ロール vs. シートより重要な5つのこと
どちらのフォーマットを買うにしても、チェックアウト前にこれらを問いましょう:
1. ロットの一貫性。格安ステンシルペーパーに関する実世界で最も多い不満はフォーマットではありません——同じ箱の印刷が濃さがばらつき、高濃度設定でも薄いものがあることです。ムラのある転写をする紙は、あなたの時間とお客様の忍耐を浪費します。これは製造品質の問題であって、フォーマットの問題ではありません。
2. 密封された遮光包装。サーマル紙の敵は空気と光です。ゆるい未密封の包装で届いた箱は、薄くムラのある印刷になりがちです——触れる前に既に劣化が始まっています。当店のLP100とSP100は密封遮光包装で出荷されます。水分と光への曝露こそが、良い紙を薄い印刷に変えるからです。
3. プリンターに合った幅。注文前にプリンターの紙経路を測りましょう。210mmロールは当店のT08FDとT08FSプリンターにカットなしで直接給紙されます。A4シートはA4経路のあるものなら何でも合います。幅が間違うと、印刷ごとにハサミ税がかかります。
4. ライン用 vs. シャドウ用の処方。ライン作業には、転写後も細いラインが見えるよう濃くくっきりした色素を定着させる紙が必要です。シャドウ作業には、滑らかで均一なトーンを載せる紙が必要です。両方印刷するなら、妥協の紙を探すより両方の処方を持つ方が勝ちます。
5. 開封後の保管。開封後は乾燥した暗所で密封保管しましょう。湿気の多いスタジオの棚で1ヶ月開けっ放しの箱は、別物のもっと悪い製品のように印刷します——そしてほとんどのアーティストはまずプリンターを疑います。
結論:シナリオで決める
ハイボリュームスタジオや大判カスタムワーク → ロール。 INKSOULタトゥーステンシルペーパーロール 210mm × 30m——連続給紙、合わせ切り不要、1ロール30m(1箱$42.88、4箱$152.88)。
安定したライン作業、標準サイズ → A4シート。 LP100 A4ステンシルペーパー 100シート(ラインに最適——1箱$38.88、4箱$138.88)、シャドウ作業にはSP100ライン。取って印刷するだけ、密封遮光包装。
何をしても転写が薄い → まず紙の品質と保管を直す。既に劣化したロットはフォーマットでは救えません。一貫した供給元の密封された紙を買い、暗く乾燥した場所で保管し、プリンターを疑う前に再テストしましょう。
プリンターとの組み合わせも。紙はプリンターが定着させた分だけ転写されます。T08FDもT08FSもA4シートと210mmロールに対応します。T08FDがおすすめです:タッチスクリーン、INKSOUL限定カラー、はるかに低い故障率。
よくある質問
タトゥーステンシルペーパーに使用期限はありますか?印刷された使用期限はありませんが、サーマル紙は空気、光、湿気への曝露で劣化します。密封して暗く乾燥した場所に保管すれば、長く安定して使えます。湿気の多い棚に開封したまま置いた箱は数週間で薄く印刷します——それは劣化であって期限切れではありません。
T08FDプリンターで210mmロールを直接使えますか?はい。T08FDもT08FSもロール印刷に対応し、210mmロールはカットなしで紙経路に給紙されます。
ロールはシートより本当に安いですか?紙1mあたりでは、実はいいえ——100枚のA4シート(約29.7m)が$38.88で、30mロール$42.88より単価で勝ちます。ロールの勝ちは無駄の部分です:小さなデザインなら必要な10cmだけ正確に切れます。A4シートの大部分を捨てる代わりにです。小さなステンシルを一日中印刷するハイボリュームショップは、紙の価格ではなく歩留まりで節約します。セッションあたりでは、シート1枚が固定コストなのでシートの方が予算を立てやすいです。ヘビーボリュームのショップはロールで節約し、ライトユーザーは利便性でトントンです。
ライン用紙とシャドウ用紙の違いは?ライン用紙(LP100など)は、転写後も細いアウトラインが見えるよう濃くくっきりした色素を定着させる処方です。シャドウ用紙(SP100など)はシェーディング用に滑らかで均一なトーンを載せます。仕事に処方を合わせることで、1種類で回すより目に見えて良い転写が得られます。
最大濃度でもステンシルが薄く印刷されます——プリンターのせいですか?まず紙を確認しましょう。高濃度設定でも薄い印刷は、劣化またはばらつきのある紙の典型的な症状です——水分への曝露、ゆるい包装、弱いロット。新品の密封シートで試して比較してから、プリンターの設定に触りましょう。