
Notizie
freehand stencil
How to Draw on Tattoo Transfer Paper
Yes — you can draw directly on tattoo transfer paper with a ballpoint pen or a stylus, no printer needed. Draw on the top sheet with firm, even pressure and the carbon layer underneath copies every line onto the sheet that touches the skin.
Hand drawing is the fastest way to make a one-off stencil — a walk-in flash piece, a freehand adjustment, a design that only exists in your head. It is also the slowest way to make a complicated one. This guide covers the paper, the pen, the pressure, and when to stop drawing and print instead.
What you are actually drawing on
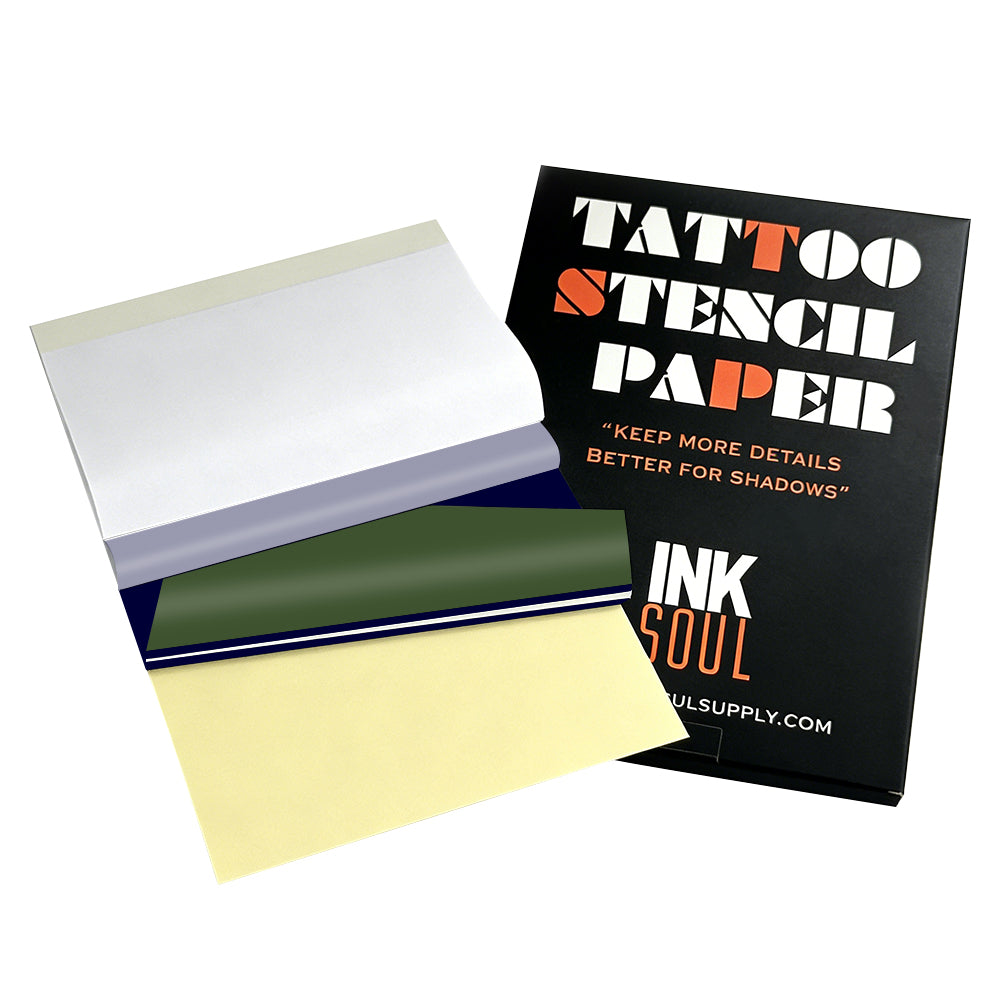
A sheet of tattoo transfer paper is a stack, and each layer has one job:
Top sheet (master sheet): the white sheet you draw on. Your pen never touches anything else.
Carbon layer: the purple or blue sheet in the middle. Your pen's pressure pushes its pigment onto the back of the top sheet — that back becomes the stencil.
Protective tissue (onion sheet): a thin separator that keeps the carbon from marking the top sheet in storage. Remove it for the darkest transfer (see step 2).
Backing sheet: the bottom layer. Leave it in place — it keeps the stack aligned and the carbon off your desk.
Two types of paper take hand drawing. Freehand (hectograph) paper is made for it: its carbon layer is pressure-activated and forgiving of uneven strokes. Thermal paper is made for heat. It also takes a pen, but the lines come out lighter and less consistent — its carbon layer is tuned for the printhead, not your hand. Use a stylus and firm pressure. For printed work the paper choice matters more: our SP100 is made for shadow work and the LP100 for line work, both $38.88 for 100 A4 sheets.
The right pen (and the wrong ones)
The pen is not leaving ink on the paper — it is pressing pigment through three layers. What works:
Medium-tip ballpoint pen: the studio standard. A firm, round tip presses evenly without cutting the top sheet. This is the tool to reach for first.
Stylus or hectograph pencil: purpose-built for this job. A stylus gives the most consistent line weight over a long session — the tip never goes soft or scratchy.
Fine-tip ballpoint: good for detail and lettering, but keep pressure light — a sharp tip tears the top sheet faster than a medium one.
What does not work: a soft graphite pencil (6B and softer). Graphite smears under your palm, and a soft lead cannot press the carbon evenly — grey smudge on top, faint broken line underneath. The final pass on transfer paper should always be pen or stylus.
How to draw on tattoo transfer paper: step by step
1. Set up a hard, flat surface
Carbon transfer needs resistance underneath. A clipboard or a hard table works. A soft surface — a sketchbook, a bed, your thigh — absorbs the pressure and your lines come out uneven. Tape the top corners down so it cannot shift mid-drawing.
2. Remove the tissue layer
Peel out the thin protective tissue between the top sheet and the carbon for the darkest transfer. Drawing through it still works, but the lines come out lighter — some artists keep it in while sketching, then remove it for the final pass. Keep the backing sheet underneath.
3. Draw on the top sheet, in one confident pass
Draw the design on the top white sheet, as you want it on the skin. Use smooth strokes and steady, even pressure — not a death grip. Work top to bottom (left to right if you are left-handed) so your palm never rests on lines already drawn; hand oils and friction smear fresh carbon.
4. Check the transfer before you commit
Halfway through, lift a corner and check the underside: lines should be solid purple and continuous. Faint or broken lines mean too light; a torn top sheet means too hard. Adjust now, while you can still redraw.
5. Trim close to the lines
Cut close to the design, leaving a small margin. Less loose paper means less chance of shifting or creasing when you press it to skin, and easier positioning on curved areas like ribs or forearms. Store finished stencils flat with the tissue slipped back in — heat and pressure in a bag smudge the carbon.
6. Prep the skin, then apply
Shave if needed, wash with antibacterial soap, wipe with alcohol, then apply a thin, even layer of stencil gel. Wait until it turns tacky — about 30 seconds to a minute — then place the stencil face down and press firmly for 30 to 60 seconds without sliding it. Peel from one corner. If a line looks weak, do not press the paper back down — it will double-print. Redraw instead. If the whole placement is wrong, wipe it off with green soap and water and start over — never tattoo over a stencil you cannot trust.
7. Let it dry before you tattoo
Give the stencil 5 to 15 minutes to dry fully — starting too soon turns a crisp stencil into a smudge halfway through the outline. For the full routine, see our guide on using stencil gel so the transfer stays sharp all session.
Do you need to draw it backwards?
No — the image flips twice. Your pen presses the carbon onto the back of the top sheet, which mirrors the drawing — then that back goes face down on the skin, which mirrors it again. The stencil lands the right way round. Draw normally, exactly as you want it to look.
The same applies when tracing a printed reference: trace what you see. A printed design that looks reversed is a printer problem, not a drawing problem — see which side of transfer paper faces up.
Pressure and line weight: the part that separates clean stencils from muddy ones
Hand-drawn lines come out on skin slightly heavier than they look on paper — the carbon spreads a fraction under pressure and the gel softens the edge. Two adjustments fix most muddy stencils:
Draw fine lines thinner than the final tattoo line. If the tattoo needs a 0.35 mm line, draw it like a 0.25 mm line — the transfer fattens it for you. Draw at full weight and the stencil looks bold before the needle touches skin.
Keep pressure even, not hard. Past a point, pressing harder does not darken the stencil — it tears the top sheet and embosses a trench that prints as a thick, blurred line. If lines are faint, make a second slow pass over the same stroke.
Shading is the hard limit of hand drawing: you cannot print grey wash with a pen. Map shadow areas as boundary lines and shade freehand with the machine. If the design lives or dies on smooth gradients, that is a printing job.
Hand-drawn vs printed: when to put the pen down
Hand-drawn on transfer paper
Printed (thermal stencil printer)
Best for
One-off designs, walk-in flash, freehand adjustments
Repeat designs, large pieces, fine-line detail
Speed
Minutes for simple designs; hours for complex ones
Seconds per sheet once the file is ready
Line consistency
Depends on your hand that day
Identical every time
Shading
Boundary lines only — shade with the machine
Prints shadow gradients (SP100 paper)
Gear needed
Paper + a ballpoint pen
Printer + paper + phone app
When you are redrawing the same design for the third time, printing starts paying for itself. Our pick is the INKSOUL T08FD ($188.88): its touchscreen lets you preview and size the design before it prints — the second look hand drawing cannot give you. The T08FS ($168.88) is the classic wireless model if you print from your phone. The transfer workflow bundle ($288.88) pairs the T08FD with LP100 and SP100 paper plus stencil gel. Our full comparison is in the best tattoo stencil printer for professional use.
5 mistakes that ruin a hand-drawn stencil
Mistake
What happens
Fix
Drawing through the tissue layer
Lighter lines than a direct pass
Remove the tissue for the final pass; keep it in only while sketching
Soft pencil instead of ballpoint
Grey smudge on top, broken line underneath
Sketch in pencil on scrap; final pass in pen or stylus
Resting your palm on drawn lines
Hand oils and friction smear the carbon
Work top to bottom; keep the drawing hand floating
Re-pressing a weak line
Double-printed ghost lines
Never re-press; redraw a fresh stencil
Trying to erase a wrong line
Correction fluid and alcohol smear the carbon
Start a fresh sheet; keep the spoiled one for practice
Tattooing before the stencil dries
Lines smudge under the first wipe
Wait 5–15 minutes; test with a light touch first
FAQ
Can you draw on thermal transfer paper by hand?
Yes, but not as well as on freehand paper. Thermal paper's carbon layer is thinner and tuned for heat, so hand-drawn lines come out lighter and less consistent — use a stylus and firm pressure. Freehand (hectograph) paper is the better choice if you are buying paper to draw on: its carbon is made for pressure transfer and more forgiving of uneven strokes.
What pen do you use to draw on tattoo transfer paper?
A medium-tip ballpoint pen is the studio standard: firm, even pressure without tearing the top sheet. A stylus or hectograph pencil works just as well and holds line weight better over a long session. Avoid soft graphite pencils — they smear and cannot press carbon evenly.
Do you draw on the carbon side or the white side?
Draw on the white top sheet, never directly on the carbon. Your pen's pressure pushes the carbon pigment onto the back of the top sheet, and that back is what transfers to the skin. Remove the protective tissue first; leave the backing sheet in place.
Why is my hand-drawn stencil too faint?
Usually one of three things: you drew through the tissue layer, the pressure was too light, or the paper sat on a soft surface that absorbed the force. Check by lifting a corner mid-drawing — the underside should show solid, continuous purple lines. If lines are broken, slow down and make a second pass over the same stroke instead of pressing harder.
Is it better to draw a stencil by hand or print it?
For a one-off design or a freehand adjustment, drawing is faster — paper and a pen, no file prep. For anything you will repeat, anything large, or anything with fine-line detail or smooth shading, print it: a thermal printer reproduces the same lines every time, and the T08FD's screen lets you check size and placement first.
stencil paper
Which Side of Tattoo Transfer Paper Faces Up?
Direct answer
Load the sheet so the blue carbon layer faces the printer's thermal head. On the top-loading thermal printers most studios use, that means blue side up, with the thin protective tissue removed before printing. Tear direction — top-down versus bottom-up — does not change how dark the stencil prints. If a reel shows one tear direction printing deep and the other printing faint, something else changed: the sheet was loaded the wrong way round, the tissue was still in place, or the darkness setting was different.
That distinction matters because a recent round of reels teaches a "correct direction to tear the paper," with one direction marked wrong and the other right. We taught the other version back in August: it is not about which way you tear. It is about which side faces the head.
The four layers, and which one does the work
A sheet of thermal transfer paper is not one sheet. It is a sandwich, and every layer has a job:
White master sheet — the sheet that carries the printed design to the skin.
Protective tissue — a thin, translucent sheet between the master sheet and the dye layer. It protects the pack in transit and must come out before printing.
Blue/purple carbon (dye) layer — the layer the thermal head heats. Heat activates the dye and bonds the line work onto the master sheet.
Stiff backing sheet — the yellow-backed support sheet that keeps the set flat and feeding straight.
The thermal head can only activate dye it can heat. Load the set backwards and the head fires at the backing sheet instead of the dye layer. The printer feeds normally, sounds normal, and produces nothing useful — or a ghost so pale you assume the printer is dying. It is not dying. It is heating the wrong side of the sandwich.
Before loading, peel one corner back and name the layers: white, tissue, blue, backing. If you cannot tell which is which on a new brand, print a 2–3 cm test strip before committing a full sheet.
Why "blue side up" is the rule — and when it is not
"Blue side up" is the working rule for a top-loading thermal printer, because on that feed path "up" is the side the thermal head meets. The invariant rule underneath it is dye layer toward the head. That is why you will occasionally see a manual for a different feed path show the carbon facing down: the head is underneath on that machine, so "down" is still "toward the head."
So the checklist is not "always up." It is:
Find your printer's feed diagram and confirm which side meets the head.
Load the dye layer on that side.
If the diagram is missing or ambiguous, run the test strip both ways and keep the one that prints solid.
Do not let a reel override your printer's diagram. Two artists can follow the same reel, tear the same way, and get different results — because one loaded dye-to-head and the other did not. The tear got the blame; the loading deserved it.
Tear direction: what it actually affects
Peeling the master sheet off the carbon layer after printing is a handling step, not a printing step. By the time you peel, the dye has either transferred or it has not. Peeling slowly and steadily, without yanking or dragging the sheet sideways, protects lines that are still slightly tacky. Peeling fast, at a sharp angle, can smudge a good print.
What peeling does not do is add dye. A faint stencil peeled "correctly" stays faint. A deep stencil peeled casually does not become faint — it may smudge at an edge, which is a different failure, and one you can see as a smear rather than as uniform paleness. If your whole stencil is pale, look at loading, tissue, and darkness first. Those are the three causes that change density across the entire design. Peeling only ever changes part of it.
The same logic applies on skin: the printed sheet goes face-down onto a thin, tacky layer of transfer gel, you press evenly without sliding, and you lift in one smooth motion. Lifting direction does not deepen the transfer; even pressure and a tacky — not wet — gel layer do. Too much gel and lines bleed; too little and the stencil lifts patchy. Once it is on, do not wipe it with green soap until the outline is in — dry-wipe or lubricant-wipe only — or soap and sweat will lift it mid-session.
Hand-drawn stencils follow the same physics, in reverse order
It is worth separating the two workflows, because they are where the confusion usually starts. When you draw a stencil by hand, you draw on the matte white top sheet, pressing through to the carbon layer underneath. The carbon is below your pen, and that is correct for hand work — pressure, not heat, is doing the transfer.
A thermal printer reverses the energy source. Heat comes from the head, so the dye layer must face the head. Artists who learned on hand-drawn stencils sometimes load a thermal set the same way — white on top, carbon underneath — and then wonder why the print is faint. The sheet order did not change; the direction the energy comes from did.
Roll paper adds one more trap: a roll looks the same from either end, so it is easy to thread neatly and backwards. Confirm the feed direction on the first length with a test print, then mark the roll's outer feed side so you do not have to guess again.
When orientation is right and the stencil still fails
Orientation is the first check, not the only check. If a correctly loaded test strip still prints pale, change one variable at a time: raise darkness one step and retest; clean a dirty head (power off, unplug, cool, then wipe in one direction with a lint-free swab dampened with isopropyl alcohol at no stronger than 70%, and let it dry fully); print on a full charge; store opened packs flat, cool, and sealed, since heat and damp age the dye layer; and re-export grey or photo-style files as pure black-and-white, because a thermal head treats grey as partial heat — modern printers render it by dithering, so gradients break into dots. A cheap printer loaded correctly will out-print an expensive printer loaded backwards, every time.
The 60-second check before every print
Work this order and you will almost never waste a sheet:
Peel a corner and identify the four layers. Remove the protective tissue.
Load dye layer toward the thermal head — blue side up on a top-loading machine.
Confirm the design is pure black-and-white at 100% scale, with no grey fills. A thermal head treats grey as partial heat, so grey comes out as broken speckles.
Print a 2–3 cm test strip. Check fine lines first: thin strokes carry less dye per millimetre than bold ones, so fine-line work is where a wrong loading shows up first.
Only then print the full design. If the test strip is pale, raise the darkness setting one step and retest — do not change three variables at once.
Correct vs. reversed vs. the myths, side by side
Situation
What you get
What to fix
Dye layer toward the head, tissue removed
Solid lines, fine detail holds
Nothing — print the full design
Sheet loaded backwards
Ghost print or blank sheet, printer sounds normal
Flip the set so the dye layer faces the head
Protective tissue left in place
Uniformly pale, washed-out stencil
Peel the tissue out before printing
Torn "the wrong way" but loaded correctly
Normal stencil; possible edge smudge if yanked
Peel steadily; do not reprint for tear direction alone
What to buy once, so this stops being a recurring problem
Keep one paper you know as your house stock, and learn its corner-peel test once. Switching brands mid-week means relearning which layer is which under time pressure.
Our Pick is the INKSOUL T08FD: a touch-screen machine with an INKSOUL-exclusive colourway and a failure rate far below the older model, printing from a phone app. The T08FS remains the classic option in the same workflow.
Match the sheet to the work: line paper for crisp line work, shadow paper for heavy blackwork, and a 210mm x 30m roll for large pieces, cut to length instead of taping sheets together. If you switch paper brands, re-run the test strip and darkness check first — sensitivity varies by paper, so a setting that was right for one brand is not automatically right for the next. Gel is not an afterthought here either: a tacky gel layer holds transferred dye, while an alcohol-wet surface lets it slide, so the gel choice interacts directly with how dense the stencil looks on skin.
Our Pick printer: INKSOUL T08FD
Classic printer: INKSOUL T08FS
Shadow stencil paper: Shadow stencil paper
Stencil paper roll 210mm x 30m: Stencil paper roll 210mm x 30m
Transfer gel: Transfer gel
Related troubleshooting: faint-stencil checklist, dark-transfer fix, smudge guide.
FAQ
Which side of tattoo transfer paper faces up in a thermal printer?
The blue carbon (dye) side faces the thermal head. On a top-loading printer that means blue side up, with the protective tissue removed. On a machine whose head sits underneath, the same rule means dye side down — dye toward the head is the rule, up is just the common case.
Does tear direction change how dark a stencil prints?
No. Tear or peel direction affects smudging at the edges if you yank the sheet, but it does not add or remove dye. A uniformly faint stencil is a loading, tissue, darkness, or source-file problem, not a peeling problem.
What happens if I load transfer paper backwards?
The thermal head heats the backing sheet instead of the dye layer, so you get a ghost print or a blank sheet while the printer feeds normally. Flip the set so the dye layer faces the head and reprint a test strip.
Should I remove the thin tissue sheet before printing?
Yes. The translucent protective tissue sits between the master sheet and the dye layer to protect the pack, and it blocks heat if left in place. Peel it out before loading; printing through it is the most common rookie cause of a faint stencil.
Why is my stencil pale even though the paper is loaded correctly?
Check darkness one step at a time, then the source file: grey fills and photo textures print as broken speckles because a thermal head treats grey as partial heat. Re-export as pure black-and-white.
A4 tattoo stencil paper
La carta per stencil per tatuaggi va comprata in rotoli o in fogli?
Risposta breve: Compra il rotolo se stampi disegni grandi o consumi carta in fretta — un rotolo da 210mm × 30m dura più di una scatola di fogli A4 e non ti costringe mai a tagliare la carta per farla entrare nella stampante. Compra fogli A4 se stampi soprattutto stencil di dimensioni standard e vuoi la semplicità del prendi-e-stampa. Ma il formato è la decisione minore. La consistenza della carta e la conservazione sono ciò che decide davvero se il tuo stencil esce nitido.
Cosa cambia davvero un rotolo nel tuo flusso di lavoro
La carta per stencil termica è composta da strati: un foglio master, un velo protettivo, lo strato di carbonio inchiostrato e un foglio di supporto. Rotolo o foglio non cambia quella chimica — cambia il modo in cui la carta alimenta la tua stampante. Un rotolo da 210mm × 30m è un'alimentazione continua, e la differenza pratica emerge in tre momenti:
1. I pezzi grandi smettono di essere un problema di carta. Una sleeve completa o un back piece non entrano in un foglio A4. Con i fogli attacchi insieme più stampe e speri che le giunzioni non si spostino. Con un rotolo, stampi il disegno a piena lunghezza in un'unica passata — niente giunzioni, niente mal di testa di allineamento.
2. Niente tagli per farlo entrare nella stampante. Questo è il dettaglio che la gente impara a sue spese: non tutte le larghezze di foglio corrispondono al percorso carta di ogni stampante. Compra un formato non standard e taglierai prima di ogni stampa — una tassa quotidiana nei giorni pieni. Resta sui fogli standard A4/Letter e questo problema non si presenta mai. Un rotolo da 210mm alimenta direttamente i percorsi carta della INKSOUL T08FD e T08FS (entrambi i modelli supportano la stampa da rotolo), quindi la domanda "questo entra?" sparisce.
3. Un rotolo sostituisce molto inventario. Un singolo rotolo contiene 30 metri continui. Per negozi ad alto volume che stampano decine di stencil a settimana, una scatola sullo scaffale copre molte più sessioni di quanto sembri — meno riordini, meno spazio sugli scaffali.
Il rovescio della medaglia: un rotolo ha bisogno di un posto dove stare e di un paio di forbici vicino. Lo alimenti, stampi, poi tagli libero lo stencil stampato. È un movimento di mano in più per stampa — banale in uno studio, leggermente fastidioso in una configurazione angusta da guest spot. Un'altra abitudine specifica del rotolo: la carta da rotolo appena tagliata ha memoria di curvatura e vuole tornare indietro. Appiattiscila sotto un libro per un minuto o liscia sulla pelle dal centro verso l'esterno, altrimenti il bordo arricciato può sollevarsi a metà trasferimento e sdoppiare lo stencil.
Cosa fanno meglio i fogli A4
I fogli vincono sulla comodità, non sull'economia:
1. Zero setup per stampa. Apri la scatola, prendi un foglio, stampa. Niente alimentazione, niente tagli, niente misurazioni. In un giorno con otto clienti, quel ritmo conta.
2. Costo fisso e prevedibile. 100 fogli sono 100 stampe — puoi contare il tuo costo esatto di carta per sessione. I rotoli ti costringono a stimare a occhio quanta lunghezza ha consumato ogni stampa.
3. Le formulazioni sono etichettate per lavoro. Questa è la parte che sposta davvero l'ago sulla qualità del transfer: non tutta la carta A4 è la stessa ricetta. Il nostro LP100 è tarato per linework nitido, la linea SP100 per riempimenti ombra morbidi — scegli la scatola in base a cosa stampi quel giorno invece di fare tutto su un rotolo.
Testa a testa: il confronto reale
Cosa conta
Rotolo (210mm × 30m)
Fogli A4 (pacco da 100)
Ideale per
Sleeve, back piece, alto volume
Stencil di dimensioni standard, flusso giornaliero costante
Preparazione stampa
Alimenta + taglia dopo la stampa
Nessuna — prendi e stampa
Tracciamento costi
Al metro (dipende dalle dimensioni del disegno)
Al foglio (fisso)
Conservazione
Un rotolo ingombrante, resta sigillato fino all'uso
Scatola di fogli — tieni la scatola chiusa
Compatibilità stampante
210mm corrisponde al percorso carta di T08FD/T08FS
Deve corrispondere alla larghezza della tua stampante o tagli
Spreco
Quasi nessuno — taglia esattamente ciò che stampi
Scarti da ogni taglio sovradimensionato
Le cinque cose che contano più di rotolo vs. foglio
Chiedi queste prima di pagare — qualunque formato tu compri:
1. Consistenza del lotto. La lamentela più comune nel mondo reale sulla carta per stencil economica non è il formato — è che le stampe dalla stessa scatola escono con diversa scurezza, alcune pallide anche con impostazioni di densità alte. La carta che trasferisce in modo non uniforme spreca il tuo tempo e la pazienza del tuo cliente. Questa è una questione di qualità di produzione, non di formato.
2. Confezione sigillata e a prova di luce. I nemici della carta termica sono aria e luce. Le scatole che arrivano con involucro allentato e non sigillato tendono a stampare pallido e non uniforme — la carta ha già iniziato a degradarsi prima che tu la tocchi. Il nostro LP100 e SP100 vengono spediti in confezioni sigillate e a prova di luce proprio perché umidità ed esposizione alla luce sono ciò che trasforma la buona carta in stampe pallide.
3. La larghezza giusta per la tua stampante. Misura il percorso carta della tua stampante prima di ordinare. Un rotolo da 210mm alimenta le nostre stampanti T08FD e T08FS direttamente senza tagli; un foglio A4 entra in qualsiasi stampante con percorso A4. Una larghezza sbagliata significa una tassa di forbici su ogni stampa.
4. Formulazione linea vs. ombra. Il linework ha bisogno di una carta che depositi pigmento denso e nitido così le linee fini restano visibili dopo il transfer. Il lavoro d'ombra ne ha bisogno di una che stenda un tono morbido e uniforme. Se stampi entrambi, avere entrambe le formulazioni batte la caccia a una carta di compromesso.
5. Conservazione dopo l'apertura. Una volta aperta, tieni la carta asciutta, al buio e sigillata. Una scatola lasciata aperta su uno scaffale umido dello studio per un mese stampa come un prodotto diverso e peggiore — e la maggior parte degli artisti dà prima la colpa alla stampante.
Il verdetto: decidi per scenario
Studio ad alto volume o lavoro personalizzato grande → il rotolo. Rotolo di carta per stencil da tatuaggio INKSOUL 210mm × 30m — alimentazione continua, niente tagli per farlo entrare, 30 metri per rotolo ($42.88 per una scatola, $152.88 per quattro).
Linework costante, dimensioni standard → fogli A4. Carta per stencil LP100 A4, 100 fogli (migliore per linea — $38.88 per una scatola, $138.88 per quattro), o la linea SP100 per lavoro d'ombra. Prendi e stampa, confezione sigillata a prova di luce.
I transfer continuano a uscire pallidi comunque → sistema prima la qualità e la conservazione della carta. Il formato non salverà un lotto già degradato. Compra carta sigillata da una fonte consistente, conservala al buio e all'asciutto, e riprova prima di dare la colpa alla tua stampante.
Abbinalo alla stampante giusta. La carta trasferisce solo quanto bene la stampante lo deposita. Sia la T08FD che la T08FS gestiscono fogli A4 e rotoli da 210mm. La T08FD è la nostra scelta: touchscreen, colori esclusivi INKSOUL e un tasso di guasti molto più basso.
FAQ
La carta per stencil da tatuaggio scade?Non ha una data di scadenza stampata, ma la carta termica si degrada con l'esposizione ad aria, luce e umidità. Sigillata, conservata al buio e all'asciutto, resta affidabile a lungo. Una scatola aperta lasciata su uno scaffale umido stampa pallido entro settimane — quello è degrado, non scadenza.
La mia stampante T08FD può usare un rotolo da 210mm direttamente?Sì. Sia la T08FD che la T08FS supportano la stampa da rotolo, e un rotolo da 210mm alimenta i loro percorsi carta senza tagli.
Un rotolo è davvero più economico dei fogli?Al metro di carta, in realtà no — 100 fogli A4 (≈29.7m) a $38.88 battono il rotolo da 30m a $42.88 sul prezzo unitario. Dove il rotolo vince è nello spreco: per disegni piccoli tagli esattamente i 10cm che ti servono invece di buttare la maggior parte di un foglio A4. I negozi ad alto volume che stampano piccoli stencil tutto il giorno risparmiano sulla resa, non sul prezzo della carta. Per sessione, i fogli sono più facili da preventivare perché ogni foglio è un costo fisso. I negozi ad alto volume risparmiano con i rotoli; gli utenti leggeri pareggiano sulla comodità.
Qual è la differenza tra carta per linea e carta per ombra?La carta per linea (come LP100) è formulata per depositare pigmento denso e nitido così i contorni fini restano visibili dopo il transfer. La carta per ombra (come SP100) stende un tono più morbido e uniforme per lo shading. Abbinare la formulazione al lavoro dà transfer visibilmente migliori che fare tutto con un solo tipo.
Il mio stencil esce troppo pallido anche a densità massima — è la stampante?Controlla prima la carta. Le stampe pallide con impostazioni di densità alte sono il sintomo classico di carta degradata o incostante — esposizione all'umidità, confezione allentata o un lotto debole. Prova con un foglio fresco e sigillato e confronta prima di toccare le impostazioni della stampante.