Yes — you can draw directly on tattoo transfer paper with a ballpoint pen or a stylus, no printer needed. Draw on the top sheet with firm, even pressure and the carbon layer underneath copies every line onto the sheet that touches the skin.
Hand drawing is the fastest way to make a one-off stencil — a walk-in flash piece, a freehand adjustment, a design that only exists in your head. It is also the slowest way to make a complicated one. This guide covers the paper, the pen, the pressure, and when to stop drawing and print instead.
What you are actually drawing on
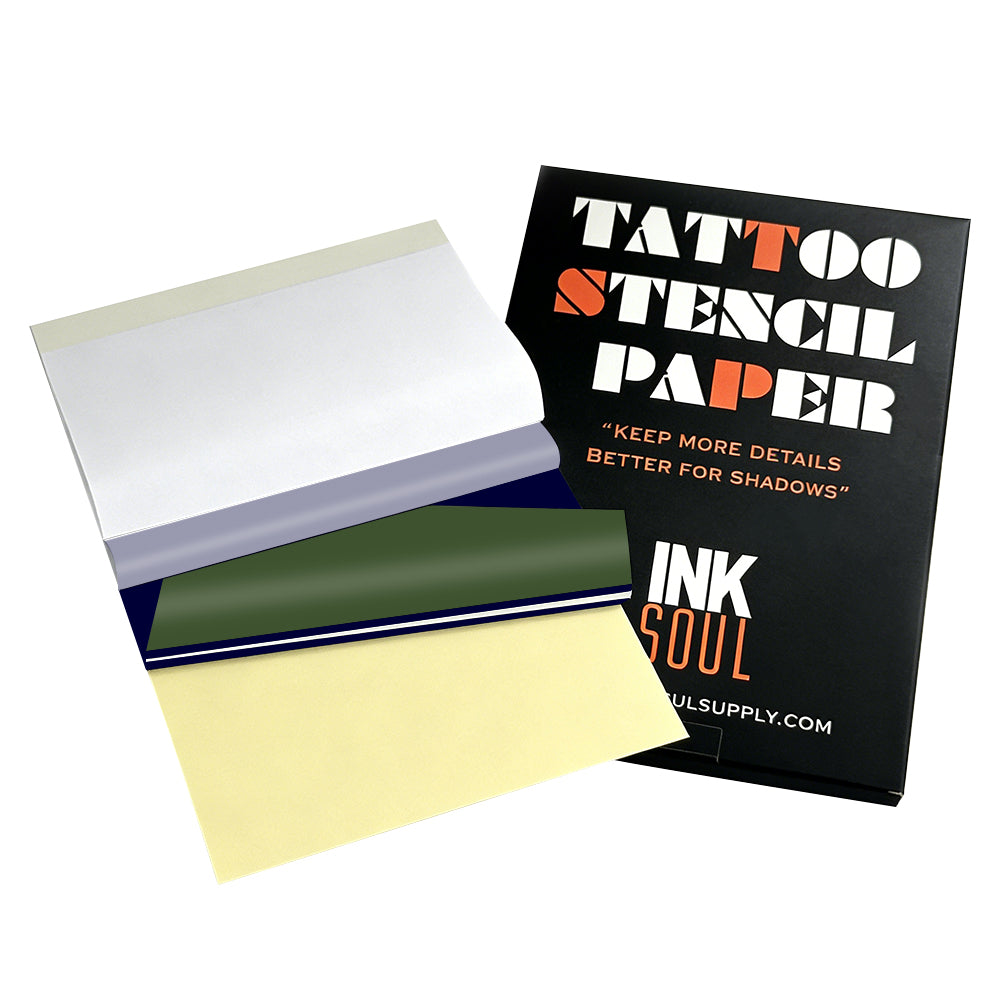
A sheet of tattoo transfer paper is a stack, and each layer has one job:
- Top sheet (master sheet): the white sheet you draw on. Your pen never touches anything else.
- Carbon layer: the purple or blue sheet in the middle. Your pen's pressure pushes its pigment onto the back of the top sheet — that back becomes the stencil.
- Protective tissue (onion sheet): a thin separator that keeps the carbon from marking the top sheet in storage. Remove it for the darkest transfer (see step 2).
- Backing sheet: the bottom layer. Leave it in place — it keeps the stack aligned and the carbon off your desk.
Two types of paper take hand drawing. Freehand (hectograph) paper is made for it: its carbon layer is pressure-activated and forgiving of uneven strokes. Thermal paper is made for heat. It also takes a pen, but the lines come out lighter and less consistent — its carbon layer is tuned for the printhead, not your hand. Use a stylus and firm pressure. For printed work the paper choice matters more: our SP100 is made for shadow work and the LP100 for line work, both $38.88 for 100 A4 sheets.

The right pen (and the wrong ones)
The pen is not leaving ink on the paper — it is pressing pigment through three layers. What works:
- Medium-tip ballpoint pen: the studio standard. A firm, round tip presses evenly without cutting the top sheet. This is the tool to reach for first.
- Stylus or hectograph pencil: purpose-built for this job. A stylus gives the most consistent line weight over a long session — the tip never goes soft or scratchy.
- Fine-tip ballpoint: good for detail and lettering, but keep pressure light — a sharp tip tears the top sheet faster than a medium one.
What does not work: a soft graphite pencil (6B and softer). Graphite smears under your palm, and a soft lead cannot press the carbon evenly — grey smudge on top, faint broken line underneath. The final pass on transfer paper should always be pen or stylus.
How to draw on tattoo transfer paper: step by step
1. Set up a hard, flat surface
Carbon transfer needs resistance underneath. A clipboard or a hard table works. A soft surface — a sketchbook, a bed, your thigh — absorbs the pressure and your lines come out uneven. Tape the top corners down so it cannot shift mid-drawing.
2. Remove the tissue layer
Peel out the thin protective tissue between the top sheet and the carbon for the darkest transfer. Drawing through it still works, but the lines come out lighter — some artists keep it in while sketching, then remove it for the final pass. Keep the backing sheet underneath.
3. Draw on the top sheet, in one confident pass
Draw the design on the top white sheet, as you want it on the skin. Use smooth strokes and steady, even pressure — not a death grip. Work top to bottom (left to right if you are left-handed) so your palm never rests on lines already drawn; hand oils and friction smear fresh carbon.

4. Check the transfer before you commit
Halfway through, lift a corner and check the underside: lines should be solid purple and continuous. Faint or broken lines mean too light; a torn top sheet means too hard. Adjust now, while you can still redraw.
5. Trim close to the lines
Cut close to the design, leaving a small margin. Less loose paper means less chance of shifting or creasing when you press it to skin, and easier positioning on curved areas like ribs or forearms. Store finished stencils flat with the tissue slipped back in — heat and pressure in a bag smudge the carbon.
6. Prep the skin, then apply
Shave if needed, wash with antibacterial soap, wipe with alcohol, then apply a thin, even layer of stencil gel. Wait until it turns tacky — about 30 seconds to a minute — then place the stencil face down and press firmly for 30 to 60 seconds without sliding it. Peel from one corner. If a line looks weak, do not press the paper back down — it will double-print. Redraw instead. If the whole placement is wrong, wipe it off with green soap and water and start over — never tattoo over a stencil you cannot trust.

7. Let it dry before you tattoo
Give the stencil 5 to 15 minutes to dry fully — starting too soon turns a crisp stencil into a smudge halfway through the outline. For the full routine, see our guide on using stencil gel so the transfer stays sharp all session.
Do you need to draw it backwards?
No — the image flips twice. Your pen presses the carbon onto the back of the top sheet, which mirrors the drawing — then that back goes face down on the skin, which mirrors it again. The stencil lands the right way round. Draw normally, exactly as you want it to look.
The same applies when tracing a printed reference: trace what you see. A printed design that looks reversed is a printer problem, not a drawing problem — see which side of transfer paper faces up.
Pressure and line weight: the part that separates clean stencils from muddy ones
Hand-drawn lines come out on skin slightly heavier than they look on paper — the carbon spreads a fraction under pressure and the gel softens the edge. Two adjustments fix most muddy stencils:
- Draw fine lines thinner than the final tattoo line. If the tattoo needs a 0.35 mm line, draw it like a 0.25 mm line — the transfer fattens it for you. Draw at full weight and the stencil looks bold before the needle touches skin.
- Keep pressure even, not hard. Past a point, pressing harder does not darken the stencil — it tears the top sheet and embosses a trench that prints as a thick, blurred line. If lines are faint, make a second slow pass over the same stroke.
Shading is the hard limit of hand drawing: you cannot print grey wash with a pen. Map shadow areas as boundary lines and shade freehand with the machine. If the design lives or dies on smooth gradients, that is a printing job.
Hand-drawn vs printed: when to put the pen down
| Hand-drawn on transfer paper | Printed (thermal stencil printer) | |
|---|---|---|
| Best for | One-off designs, walk-in flash, freehand adjustments | Repeat designs, large pieces, fine-line detail |
| Speed | Minutes for simple designs; hours for complex ones | Seconds per sheet once the file is ready |
| Line consistency | Depends on your hand that day | Identical every time |
| Shading | Boundary lines only — shade with the machine | Prints shadow gradients (SP100 paper) |
| Gear needed | Paper + a ballpoint pen | Printer + paper + phone app |
When you are redrawing the same design for the third time, printing starts paying for itself. Our pick is the INKSOUL T08FD ($188.88): its touchscreen lets you preview and size the design before it prints — the second look hand drawing cannot give you. The T08FS ($168.88) is the classic wireless model if you print from your phone. The transfer workflow bundle ($288.88) pairs the T08FD with LP100 and SP100 paper plus stencil gel. Our full comparison is in the best tattoo stencil printer for professional use.

5 mistakes that ruin a hand-drawn stencil
| Mistake | What happens | Fix |
|---|---|---|
| Drawing through the tissue layer | Lighter lines than a direct pass | Remove the tissue for the final pass; keep it in only while sketching |
| Soft pencil instead of ballpoint | Grey smudge on top, broken line underneath | Sketch in pencil on scrap; final pass in pen or stylus |
| Resting your palm on drawn lines | Hand oils and friction smear the carbon | Work top to bottom; keep the drawing hand floating |
| Re-pressing a weak line | Double-printed ghost lines | Never re-press; redraw a fresh stencil |
| Trying to erase a wrong line | Correction fluid and alcohol smear the carbon | Start a fresh sheet; keep the spoiled one for practice |
| Tattooing before the stencil dries | Lines smudge under the first wipe | Wait 5–15 minutes; test with a light touch first |
FAQ
Can you draw on thermal transfer paper by hand?
Yes, but not as well as on freehand paper. Thermal paper's carbon layer is thinner and tuned for heat, so hand-drawn lines come out lighter and less consistent — use a stylus and firm pressure. Freehand (hectograph) paper is the better choice if you are buying paper to draw on: its carbon is made for pressure transfer and more forgiving of uneven strokes.
What pen do you use to draw on tattoo transfer paper?
A medium-tip ballpoint pen is the studio standard: firm, even pressure without tearing the top sheet. A stylus or hectograph pencil works just as well and holds line weight better over a long session. Avoid soft graphite pencils — they smear and cannot press carbon evenly.
Do you draw on the carbon side or the white side?
Draw on the white top sheet, never directly on the carbon. Your pen's pressure pushes the carbon pigment onto the back of the top sheet, and that back is what transfers to the skin. Remove the protective tissue first; leave the backing sheet in place.
Why is my hand-drawn stencil too faint?
Usually one of three things: you drew through the tissue layer, the pressure was too light, or the paper sat on a soft surface that absorbed the force. Check by lifting a corner mid-drawing — the underside should show solid, continuous purple lines. If lines are broken, slow down and make a second pass over the same stroke instead of pressing harder.
Is it better to draw a stencil by hand or print it?
For a one-off design or a freehand adjustment, drawing is faster — paper and a pen, no file prep. For anything you will repeat, anything large, or anything with fine-line detail or smooth shading, print it: a thermal printer reproduces the same lines every time, and the T08FD's screen lets you check size and placement first.