The tattoo industry has evolved rapidly over the last decade, shifting from an exclusive, highly guarded subculture into a heavily integrated aspect of mainstream cosmetic expression. As custom ink becomes more prevalent, so does the anxiety surrounding permanent body modification. Clients and enthusiasts alike are desperately searching for ways to test-drive their artwork before committing to the needle. Consequently, one of the most frequent questions we receive at INKSOUL® is whether it is actually possible to print your own temporary tattoos at home using standard office equipment.

From our experience engineering advanced thermal printing technology for professional tattoo artists, we know that the intersection of standard home printing and skin-safe adhesives is fraught with misconceptions. Many consumers confuse the process of printing a glossy, temporary party tattoo with the rigorous process of printing a professional tattoo stencil. We take a clear position: while home-printing temporary tattoos is entirely feasible and fun for casual use, it is a fundamentally different process with vastly different materials than what professional studios use. In this comprehensive guide, we will answer your search intent directly, explain the chemical and mechanical reality of printable tattoo paper, and provide commercial and practical judgment on whether you should invest your time and money into this DIY process.
Quick Answer: Can You Print Your Own Fake Tattoos?
Yes, it is absolutely possible to print your own temporary tattoos. By using a standard home inkjet or laser printer combined with specialized "waterslide decal tattoo paper," you can transfer any digital image onto your skin. However, you must understand the following caveats:
- The Mechanism: You print your design onto a specialized glossy sheet, apply a clear adhesive medical-grade film over it, cut it out, and apply it to your skin using a damp cloth.
- The Lifespan: These DIY temporary tattoos typically last 1 to 3 days. They are highly susceptible to friction, hot water, and natural skin oils.
- The Finish: They will have a noticeable glossy, plastic-like sheen over the design, which immediately gives away that they are not real tattoos.
In most professional situations, if your ultimate goal is to prepare a design for a real, permanent tattoo session, printing a temporary glossy tattoo is the wrong approach. You should instead look into how to use tattoo transfer paper with a dedicated thermal stencil printer to create an accurate, matte blueprint on the skin.
What It Is: The Anatomy of Printable Temporary Tattoos
When you ask if it is possible to print your own temporary tattoos, you are essentially inquiring about the capabilities of waterslide decal paper engineered for dermatological use. Unlike standard printer paper, which merely absorbs liquid ink into its porous wood-pulp fibers, temporary tattoo paper is a multi-layered chemical composite.
A standard DIY temporary tattoo kit consists of two distinct components. The first is the printable sheet, which features a water-soluble backing coated with a specialized receptive layer designed to hold inkjet or laser toner without bleeding. The second component is the adhesive sheet. This is a clear, medical-grade adhesive film attached to a protective release liner. The magic happens when these two sheets are combined. You are not actually printing directly onto an adhesive; you are printing onto a carrier sheet and then manually laminating the adhesive over your fresh ink.
How It Works: The Step-by-Step Home Printing Process
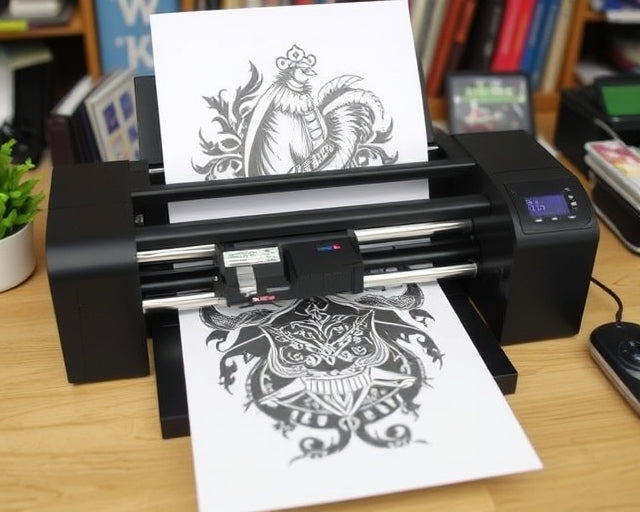
To execute this process successfully, you must understand the mechanical limitations of your home office equipment. If you are wondering can a normal printer print tattoo stencils, the answer is complex. A normal printer cannot print a professional thermal stencil, but it *can* print a temporary tattoo decal. Here is the operational workflow:
- Design and Mirroring: You format your desired artwork on your computer. Crucially, you must flip or "mirror" the image horizontally before printing. If your design includes text or asymmetrical geometry, failing to mirror the image means your temporary tattoo will be applied backward on your skin.
- Printing the Carrier: Load the printable waterslide sheet into your inkjet or laser printer. Ensure you have purchased the correct paper for your specific printer type—running inkjet paper through a laser printer will melt the coating and destroy your fuser roller.
- Laminating the Adhesive: Once the ink is completely dry, you peel the backing off the clear adhesive sheet and carefully laminate it over your printed design. You must use a squeegee or a credit card to push out any trapped air bubbles.
- Application: You cut out the design, peel off the final clear plastic layer, place the sticky side face down on clean, hairless skin, and press a wet sponge against the paper backing for 30 to 60 seconds until the paper slides off effortlessly.
If you lack access to a printer entirely, there are alternative DIY methods available, which we detail in our guide on how to make temporary tattoos.
Benefits of DIY Temporary Tattoos
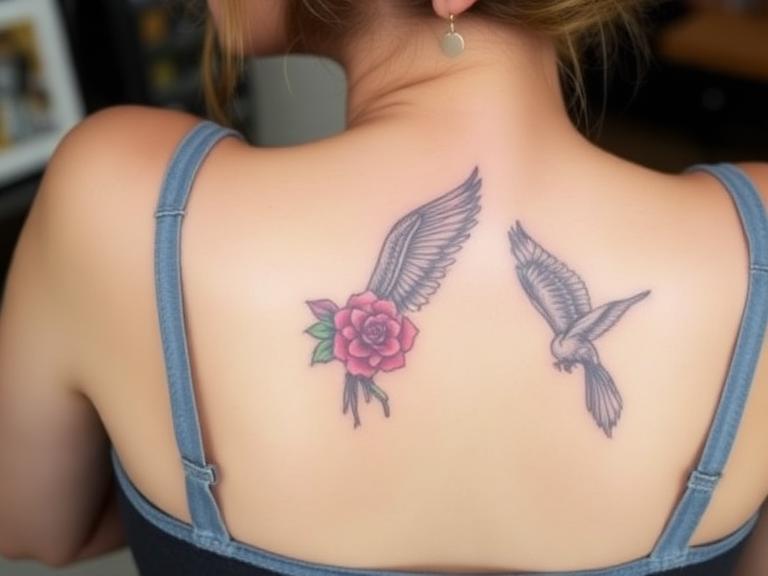
There are distinct psychological and aesthetic benefits to printing your own temporary tattoos. For beginners, the permanence of real ink is intimidating. A printed temporary tattoo serves as the ultimate test-drive. You can evaluate the sizing, the placement on your body, and how the design flows with your natural musculature before you spend hundreds of dollars at a professional studio.
Furthermore, this technology is incredibly cost-effective for event planners and cosplayers. If you need highly specific, intricate character markings for a weekend convention or custom logos for a corporate party, batch-printing temporary tattoos on an inkjet printer is a highly efficient, pain-free solution.
Limitations and Hard Truths
We must use commercial and practical judgment here: DIY temporary tattoos are aesthetically flawed. They do not look like real tattoos. The medical-grade adhesive creates a distinct, reflective film over the skin. When light hits it, it shines like plastic tape. As the skin flexes and stretches throughout the day, this plastic film will begin to micro-fracture, causing the image to crack and peel within 48 hours.
Additionally, while the adhesive is generally safe, the actual printer ink from your HP or Canon printer was never formulated for dermal contact. While the adhesive layer acts as a barrier, long-term or repeated exposure to standard printer ink on the skin is not advisable. This is exactly why professional tattoo artists rely on specialized spirit carbon paper and a thermal tattoo printer to create safe, matte, and highly accurate stencils for permanent work.
Who Should Use Printable Temporary Tattoos
For beginners and casual users: If you are planning a children's birthday party, assembling a Halloween costume, or nervously debating whether that forearm wolf design is too large, printing a temporary tattoo at home is the perfect application. It requires low investment and offers zero commitment.
Who Does Not Need Them
For commercial users and professional tattoo artists: Do not attempt to use waterslide temporary tattoo paper to place a stencil on a client. The glossy film will block your needle, gum up your tattoo machine, and completely destroy your line work. Professionals require deep, matte carbon transfers that bond to the skin's surface without a plastic film. If you are operating a studio, you need to understand tattoo transfer printer guide requirements, which exclusively mandate thermal technology.
Common Mistakes in DIY Tattoo Printing
In our testing, the most frequent point of failure for consumers attempting this process is paper incompatibility. Users frequently ask, "regular printer for tattoo transfer paper?" The distinction is vital. A regular printer can print temporary tattoo paper, but it absolutely cannot print professional thermal transfer paper (the purple carbon sheets used in studios). Shoving a 4-ply thermal transfer sheet into a standard home inkjet printer will result in a catastrophic paper jam and zero image transfer.
Another common mistake is failing to prep the skin. Applying a temporary tattoo over dense body hair or oily, lotion-covered skin guarantees that the adhesive will fail to bond, resulting in the image flaking off within hours.
Expert Buying Considerations
If you decide to proceed with printing your own temporary tattoos, you must verify your printer type before purchasing paper. Inkjet paper relies on absorption, while laser paper relies on heat fusion. Buying the wrong type will waste your money. Additionally, always perform a patch test on a small area of your skin before applying a massive back-piece, as the acrylic-based adhesives used in these kits can trigger mild contact dermatitis in sensitive individuals.
However, if your ultimate goal is to transition from testing fake designs to executing real, permanent tattoos, you must upgrade your hardware. The gap between a home inkjet printer and professional studio equipment is immense.
Expert Recommendation: Evolving to Professional Stencils
We recommend that anyone serious about body art eventually abandons the glossy, cracking limitations of temporary tattoo paper. When you are ready to step into the professional realm, whether as an apprentice or an established artist looking to streamline your workflow, you must invest in dedicated thermal printing technology. For heavy-duty applications and flawless, intricate stencil transfers, standard printers simply cannot compete.
If you are evaluating the best tattoo stencil printers, you need a machine that requires no ink, no ribbons, and integrates seamlessly with your digital design ecosystem.

INKSOUL® T08FS Wireless Tattoo Transfer Stencil Printer - Can Print Shadows
Price: $168.88
Ditch the messy inkjet cartridges and fragile temporary paper. The INKSOUL T08FS is engineered for professional tattoo artists who demand flawless, long-lasting stencils. Utilizing advanced thermal printing technology, this machine burns your design directly onto professional carbon transfer paper, ensuring lines and complex shadows that will not wipe away during long tattoo sessions.
- Advanced Capability: Supports printing intricate Shader images and crisp line images.
- Versatile Sizing: Accommodates multiple paper sizes (A4, LTR, Legal, LTR+).
- Wireless Freedom: 1200mAh battery with seamless Bluetooth connection for mobile phones and tablets.
- Zero Ink Required: Uses economical thermal technology—just load A4 thermal paper. No cartridges, no ribbons, no maintenance.
- Precision Specs: 203 dpi resolution with a maximum printing speed of 13-15 mm/s.
For artists who prefer a localized, hardware-driven interface without relying solely on mobile apps, we also highly recommend exploring the touch screen tattoo printer variants in our catalog.
Summary and Comparison Tables
Pros and Cons of Printing Your Own Temporary Tattoos
| Pros (Advantages) | Cons (Limitations) |
|---|---|
| Extremely cost-effective for testing large designs. | Leaves a glossy, unnatural plastic sheen on the skin. |
| Pain-free and requires zero long-term commitment. | Cracks and peels rapidly with normal skin movement. |
| Can be done using standard home office equipment. | Printer ink is not FDA-approved for dermal absorption. |
| Excellent for cosplay, theater, and children's events. | Cannot be used as a stencil guide for a real tattoo machine. |
Comparison: Temporary Tattoo Paper vs. Professional Thermal Stencil
| Feature | DIY Temporary Tattoo Paper | Professional Thermal Stencil Paper |
|---|---|---|
| Printer Required | Standard Home Inkjet or Laser Printer | Dedicated Thermal Printer (e.g., INKSOUL T08FS) |
| Primary Mechanism | Prints ink onto a carrier, laminated with an adhesive film. | Heat transfers purple carbon dye directly onto the paper. |
| Skin Finish | Glossy, reflective, sits on top of the skin like tape. | Matte, vibrant purple lines that bond to the skin's surface. |
| Purpose | Final visual display for a few days. | A wipe-resistant blueprint for a permanent tattoo procedure. |
| Ink/Toner Cost | High (consumes expensive CMYK printer ink). | Zero (thermal printers do not use ink cartridges). |
Frequently Asked Questions (FAQ)
No. Normal printer paper is highly porous and relies on wood pulp. It has no adhesive properties and will dissolve immediately if you apply a wet sponge to it. You must use specialized waterslide decal temporary tattoo paper, which features a chemical release liner and a separate medical-grade adhesive sheet.
In most professional situations, we observe that DIY temporary tattoos last between 1 to 3 days. Their longevity is heavily dependent on placement. Tattoos placed on areas with high friction (like wrists or hands) or areas that bend frequently (like elbows) will crack and peel off much faster than those placed on flat, low-friction areas like the shoulder blade or calf.
Standard inkjet and laser toners are not formulated or approved for cosmetic use on the human epidermis. However, when using temporary tattoo paper, the ink is sandwiched between the carrier paper and the clear adhesive film. The adhesive acts as a barrier against the skin. While generally considered safe for short-term wear, individuals with highly sensitive skin should perform a patch test first to ensure they do not develop contact dermatitis from the adhesive.
Authoritative Industry References
- U.S. Food and Drug Administration (FDA): The FDA regulates the color additives used in temporary tattoos and cosmetic products. Always verify that the adhesive components of your DIY paper comply with federal cosmetic regulations. Visit the FDA guidelines on Temporary Tattoos.
- American Academy of Dermatology (AAD): The AAD provides critical medical insights regarding contact dermatitis and allergic reactions caused by synthetic adhesives and non-dermatological inks applied to the skin. Visit the AAD.
- ASTM International: ASTM develops consensus standards for the performance and safety of pressure-sensitive adhesives used in medical and skin-contact applications. Visit ASTM International.