
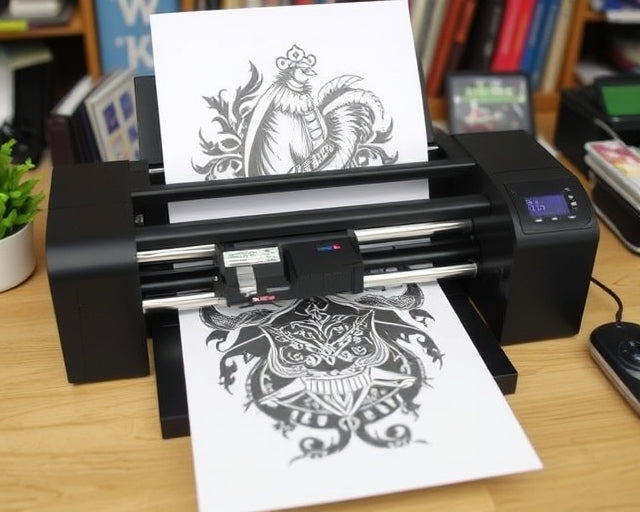
Every professional tattoo artist knows the feeling of a ruined stencil. You spend hours rendering a flawless custom design on your tablet, you hit print, and what comes out of the machine is a jammed, wrinkled, or completely blank sheet of expensive thermal paper. In most professional situations, the fault does not lie with the artwork or the tablet. The failure happens entirely during the physical loading process.

We see this daily in shops around the world. Artists, especially apprentices, burn through costly supplies simply because they do not fully understand the mechanics of thermal printing. If you want crisp, dark, perfectly aligned stencils that transfer effortlessly to the skin, you must master your hardware. Knowing exactly how to load paper into a tattoo stencil printer is a non-negotiable skill. A printer is only as reliable as the operator feeding it.
From our experience engineering professional-grade equipment at INKSOUL®, the margin for error with thermal paper is incredibly small. Feeding a four-ply sheet backward or leaving the protective barrier intact will result in a melted mess that can permanently damage your printer's thermal head. In this guide, we are going to eliminate the guesswork. We will break down exactly how to prepare your paper, how to feed it into different types of machines, and how to stop wasting money on botched prints.
Quick Answer: Loading Your Stencil Printer
To correctly load paper into a tattoo stencil printer, follow these primary steps:
- Prepare the Paper: Take a standard 4-ply thermal transfer sheet and completely remove the loose, semi-transparent brown tissue layer (the onion skin).
- Align the Sheets: Ensure the yellow backing sheet and the white master sheet are perfectly flush at the top edge.
- Insert Correctly: For modern wireless thermal printers, feed the top edge into the loading slot with the white master sheet facing the thermal print head. For traditional rotary copiers, load the paper flat with the yellow backing sheet feeding into the bottom slot.
- Engage the Rollers: Allow the printer's automatic optical sensor to grab the paper, or manually close the cover firmly until it clicks. Never pull or force the paper through the feed.
Table of Contents
- 1. Understanding Tattoo Transfer Paper Anatomy
- 2. Step-by-Step: How to Load Paper into a Tattoo Stencil Printer
- 3. The Most Common Loading Mistakes
- 4. Hardware Check: Are You Using the Right Printer?
- 5. Quick Summary Table
- 6. Copiers vs. Wireless Printers
- 7. Pros and Cons of Thermal Printing
- 8. Buying Considerations & Expert Recommendation
- 9. Frequently Asked Questions
1. Understanding Tattoo Transfer Paper Anatomy
Before you even approach your machine, you must understand what you are holding in your hands. Tattoo transfer paper is not standard office copy paper. Standard copy paper relies on liquid ink or laser toner. Thermal transfer paper relies on heat and pressure. We constantly get asked if a normal office setup will work, and we cover that extensively in our guide on whether can a normal printer print tattoo stencils. The short answer is no, because standard printers do not generate the precise heat required to melt the carbon.
If you are using professional 4-ply thermal paper, it consists of four distinct layers:
- The Master Sheet (Top/White): This is the crisp white sheet where your final design will be pressed.
- The Protective Tissue (Second Layer/Brownish): This is the loose onion-skin paper. Its only job is to prevent the carbon from smudging the master sheet during shipping. It must be removed before printing.
- The Carbon Sheet (Third Layer/Purple or Black): This is the magic layer. The thermal printer heats up, melting this carbon onto your master sheet.
- The Backing Sheet (Bottom/Yellow or Heavy White): This holds everything together and provides a rigid back for the printer rollers to grip.
For beginners, the biggest hurdle is simply visualizing how these layers interact with the printer's thermal head. The heat must pass through the master sheet to melt the carbon layer directly onto the back of that same master sheet. Understanding this basic principle of how to use tattoo transfer paper will prevent 90% of your loading errors.
2. Step-by-Step: How to Load Paper into a Tattoo Stencil Printer
The exact loading mechanism varies depending on whether you are using a heavy, old-school rotary thermal copier or a sleek, modern Bluetooth model. However, the preparation remains identical. Here is the professional workflow we recommend.
Step 1: Prep the Paper
Lay your 4-ply transfer paper flat on your workstation. Lift the white master sheet and gently peel away the loose, semi-transparent protective tissue layer. Throw it in the trash immediately. Leaving this layer inside the paper is the number one cause of jammed machines and ruined thermal heads. Smooth out the remaining three layers so the top edges are perfectly flush.
Step 2: Identify the Feed Orientation
In most professional situations using a modern tattoo stencil printer (like a portable wireless unit), you will be feeding the paper from the top or front slot. You must determine where the thermal heating element is located inside your machine. The white master sheet must face the thermal element. If you load it backward, the printer will heat the yellow backing, melting it into the rollers and destroying the paper.
Step 3: Insert and Align
Using both hands, gently slide the perfectly flush top edge of the transfer paper into the feed slot. Do not force it. Modern machines feature optical sensors. Once the paper passes the sensor, you will hear the internal motorized rollers engage and grip the paper, pulling it in by about half an inch. If the paper goes in crooked, press the release button, remove it, and try again. Printing on a crooked sheet will warp your stencil, making symmetrical tattoos like mandalas impossible to apply correctly.
Step 4: Execute the Print
Once the machine has gripped the paper, send the design from your tablet or phone. Keep your hands away from the paper as it feeds through. Pulling on the sheet as it prints will stretch the carbon, resulting in distorted lines.
3. The Most Common Loading Mistakes
From our experience troubleshooting hardware for thousands of artists, operator error accounts for the vast majority of printing issues. Here is what you need to stop doing immediately.
Leaving the Onion Skin Intact: We cannot stress this enough. If you leave the protective tissue layer inside the paper stack, the printer's heat will melt it directly into the carbon layer. You will pull out a completely blank master sheet, and you risk jamming your machine's gears.
Forcing the Feed: Never shove the paper into the rollers. If you are using a thermal tattoo printer, it is designed to precisely grab the paper. Forcing it causes micro-wrinkles in the master sheet, which translates to missing lines in your stencil.
Using the Wrong Paper: Trying to run standard printer paper through a thermal copier will yield zero results because there is no carbon to activate. If you are confused about compatibility, read our expert guide on whether you can use a regular printer for tattoo transfer paper.
4. Hardware Check: Are You Using the Right Printer?
If you are meticulously following loading instructions and still getting faded, patchy stencils, the problem is no longer you; it is your hardware. Old traditional rotary copiers have physical bulbs that degrade over time. The rollers warp, causing uneven pressure. If you are constantly fighting your machine, it is time for a commercial upgrade.
For heavy-duty applications and precise shadow printing, we highly recommend upgrading to a modern wireless system. The ability to print directly from an iPad without a tangle of cords or relying on a secondary desktop computer changes the entire dynamic of a tattoo shop.

INKSOUL® T08FS Wireless Tattoo Transfer Stencil Printer
Our flagship model is designed to eliminate loading errors and print flawless, high-resolution stencils, including complex shadow gradients.
- Advanced Printing: Supports printing both shader images and precise line work.
- Versatile Paper Sizes: Accommodates A4 (8.3in x 11.7in), LTR (8.5in x 11in), Legal (8.5in x 14in), and LTR+ (8.5in x 16.5in).
- True Wireless Freedom: Bluetooth connection for mobile phones and tablets (PC via USB). Features a massive 1200mAh battery for all-day convention printing.
- Zero Ink Required: Uses economical thermal technology at a crisp 203 dpi resolution.
5. Quick Summary Table: Troubleshooting Loading Issues
| The Problem | The Cause | The Solution |
|---|---|---|
| Stencil comes out completely blank. | Paper loaded upside down or protective tissue left inside. | Remove brown tissue layer. Ensure the white master sheet faces the thermal heating element. |
| Stencil lines are wrinkled or distorted. | Paper was fed crooked or forced into the rollers. | Align top edges perfectly flush. Let the automatic sensor grip the paper naturally. |
| Stencil is too light or patchy. | Machine is overheating or thermal paper quality is poor. | Allow machine to cool between prints. Use premium, highly-pigmented 4-ply thermal paper. |
| Paper jams inside the machine. | Yellow backing sheet is bent or creased before loading. | Always use fresh, uncreased paper. Store paper flat in a dry environment. |
6. Comparison Table: Traditional Copiers vs. Modern Wireless Printers
When choosing the best tattoo stencil printers, artists must weigh the pros and cons of traditional heavy-duty machines against modern portable tech.
| Feature | Traditional Rotary Copier | INKSOUL® Wireless Thermal Printer |
|---|---|---|
| Paper Loading Mechanism | Manual feed, highly prone to slipping and crooked feeds. | Automatic optical sensor grip ensures perfectly straight loading. |
| Portability | Heavy, bulky, requires constant AC wall power. | Lightweight (0.75 kg), runs on 1200mAh battery. Ideal for conventions. |
| Print Capabilities | Line work only. Struggles heavily with shading. | 203 dpi resolution. Precisely prints both line work and complex shadows. |
| Connectivity | Requires printing a paper master copy first, then running it through. | Direct Bluetooth printing from iPad, tablet, or smartphone. |
7. Pros and Cons of Upgrading to a Dedicated Thermal Printer
If you are still hand-tracing stencils over a light box, or relying on a cheap, unbranded thermal machine that eats paper, you are losing money on lost time. Here is a realistic look at the pros and cons of upgrading your setup.
| Pros of a Professional Thermal Printer | Cons of a Professional Thermal Printer |
|---|---|
| Saves hours of manual tracing time daily, allowing you to take on more clients. | Requires an initial financial investment compared to hand-tracing. |
| Perfectly replicates complex digital designs, including precise geometric patterns. | Requires purchasing specific 4-ply thermal transfer paper (no standard printer paper). |
| Wireless models allow you to prep stencils anywhere, streamlining your shop workflow. | Requires basic maintenance, such as wiping down the thermal head with alcohol. |
| Modern machines load automatically, eliminating wasted, jammed stencil paper. | Has a slight learning curve for artists transitioning from traditional analog workflows. |
8. Buying Considerations & Expert Recommendation
In our testing, the biggest barrier to a clean stencil is relying on outdated hardware that requires a master degree in patience to load correctly. For commercial users operating in a busy studio, speed and reliability are paramount. You cannot afford to spend 15 minutes fighting a paper jam while your client is sitting in the chair.
When considering an upgrade, look for machines that offer automatic paper gripping. The optical sensors in units like our wireless tattoo stencil printer take the human error out of the equation. You slide the paper in, the machine aligns it, and it pulls it through with exact, consistent pressure. Furthermore, the ability to print shadow gradients directly from a tablet without cables is a massive workflow enhancement.
We recommend abandoning traditional rotary copiers altogether. They are relics of the past. Invest in a smart, portable thermal printer, keep your 4-ply paper dry, and always remember to remove that brown tissue layer before feeding.
9. Frequently Asked Questions
Which way do you put paper in a tattoo printer?
It depends on the machine, but the universal rule of thermal printing is that the thermal print head must make direct contact with the white master sheet (or the side you want to print on). For modern wireless printers like INKSOUL, you feed the paper with the white master sheet facing the heating element. Always remove the loose protective tissue layer first.
Why is my tattoo stencil printer printing blank?
This is almost always a paper loading error. If you load the paper backward, the heat hits the yellow backing sheet instead of the master sheet, resulting in no transfer. Alternatively, if you failed to remove the brown protective tissue layer, the carbon will melt onto the tissue instead of the master sheet. Finally, ensure you are actually using thermal paper, not standard office paper.
Can I run the same sheet of stencil paper through the printer twice?
No. Once the thermal printer heats the carbon and melts it onto the master sheet, that specific section of carbon is depleted. If you run it through again, the previously printed areas will be faint or completely blank. Always use a fresh sheet of thermal paper for a new stencil.
Do I need ink for a tattoo stencil printer?
No. Professional tattoo stencil printers use thermal technology. The printer itself generates heat, which interacts with the carbon layer embedded in the 4-ply thermal transfer paper. There are no ink cartridges or ribbons to replace.
References & Industry Standards
To maintain E-E-A-T (Experience, Expertise, Authoritativeness, and Trustworthiness), this article references best practices established by leading health and technical organizations regarding equipment usage and thermal technology.
- Alliance of Professional Tattooists (APT): Guidelines on safe, sanitary, and efficient tattoo workstation setup and equipment usage. Review APT Standards
- International Organization for Standardization (ISO): ISO 9706 standards concerning the physical properties, longevity, and thermal stability of coated papers. Review ISO Standards
- Inked Magazine: Industry coverage on the evolution of tattoo technology, reviewing the shift from hand-tracing to Bluetooth thermal stencil printers. View Industry Insights