
Noticias
buying guide
Is Glitter Tattoo Ink Safe? What to Know Before You Buy
Short answer: the product sold as "glitter tattoo ink" is almost always a temporary cosmetic product — cosmetic glitter in a skin-safe adhesive — not ink for a tattoo machine. No established professional ink brand sells a glitter ink for permanent tattooing: glitter flakes are far too large to pass through a cartridge needle cleanly. If you want sparkle that lasts, use real tattoo ink applied well — not a bottle with "glitter" on the label.
Search "glitter tattoo ink" and you will find two completely different products sharing one name: temporary glitter tattoos for festivals and parties, and the idea of a permanent tattoo that sparkles. Most listings and roundups only ever talk about the first one — and rarely say so clearly. That confusion is where buyers waste money, and where artists get asked to do something they should refuse.
What "Glitter Tattoo Ink" Actually Means
Three different products hide behind the same search term. Knowing which one you are looking at changes everything about safety and price.
Temporary glitter tattoo kits. Cosmetic-grade glitter, a water-based skin adhesive, and a stencil. Applied to the surface of the skin, no needle involved. This is what nearly every "glitter tattoo ink" listing actually sells. It lasts a few days and washes off.
Glitter tattoo ink pens and markers. Skin-safe markers with a glitter finish, again for temporary designs.
"Permanent" glitter tattoo ink for machines. The product buyers imagine — a bottle you load into a cartridge and tattoo into the dermis. It barely exists as a legitimate product.
If a listing does not say which of the three it is, that is your first red flag.
Temporary vs. Permanent Glitter: The Comparison That Matters
Temporary glitter tattoo
"Permanent" glitter ink
How it goes on
Glitter pressed onto skin adhesive through a stencil
Would need a tattoo machine and cartridge needle
How long it lasts
3–7 days, less with water and friction
Unproven — no established product or protocol
What is in it
Cosmetic-grade glitter + water-based adhesive
Unstandardised; often craft glitter in a carrier
Regulation
Cosmetic rules (ingredient list, skin safety)
No pro ink brand sells one; no standard exists
Who should use it
Anyone, including beginners and events
Nobody, until a reputable manufacturer proves it
Notice the pattern: the temporary column has answers, the permanent column has blanks. That is not a gap in this guide — it is a gap in the market.
Why No Major Pro Ink Brand Sells a Glitter Ink
Search the catalogues of the established professional ink brands — Eternal, Intenze, Dynamic, World Famous — and you will not find a glitter ink. That absence is the market telling you something, and it comes down to physics, not fashion.
Standard tattoo pigment is ground to a few microns across, small enough to flow through a cartridge and settle evenly in the dermis. Cosmetic glitter flakes are tens to hundreds of microns across — many times the size of a pigment particle, and wider than the gaps in a tight liner grouping like a 3RL. Push that through a cartridge and three things happen: the flakes jam between the needles, the ink flow turns patchy mid-line, and the flakes that do get through sit in the skin as visible foreign bodies rather than dispersing like pigment.
That is the detail most "glitter tattoo ink" content never mentions, because most of it is written by people who have never loaded a cartridge. A needle grouping is a precision instrument with clearances measured in microns. Glitter is, by design, a visible flake. The two do not belong in the same tool.
The regulatory picture backs this up. The FDA has not approved any pigment for injection into the skin. In the EU, REACH has restricted more than 4,000 substances in tattoo inks since January 2022, and Germany's Federal Institute for Risk Assessment notes that special-effect ink ingredients are largely unknown. A glitter flake that will sit in someone's dermis for decades, with no safety dossier behind it, is not a product a serious brand will put its name on.
The Particle-Size Problem Nobody Mentions
Even if you could get glitter through a needle, the healed result would disappoint. Pigment works because it disperses evenly and the skin heals over a uniform layer of colour. Glitter flakes are flat, reflective plates: they catch light at some angles and go dark at others, so a design that sparkles under the shop lights can look patchy and grey in daylight. And because the flakes are large foreign bodies, the body treats them differently from pigment — raised texture and granuloma-type reactions are a known risk with large-particle material in the dermis.
There is also a practical point artists discover too late: metallic pigments can create artefacts on MRI scans. A client with a glitter tattoo may face questions or a degraded scan years later, for a sparkle effect that never looked as good healed as it did fresh.
The honest summary: if the sparkle only exists because of a flake large enough to see, that flake is too large to tattoo safely.
How to Buy Temporary Glitter Tattoo Supplies
Temporary glitter work is a legitimate service — festivals, parties, and clients who want to try a design before committing:
Cosmetic-grade glitter only. Cosmetic glitter is polyester film with rounded edges, tested for skin use. Craft glitter is often cut from metalised PET film with sharp edges and is not meant for skin — never use it on a client, and never near the eyes.
Read the ingredient list. A real product lists its adhesive and glitter composition. No ingredient list means no purchase. Patch-test on the inner arm 24 hours before a full application.
Use a stencil for clean lines. Freehand glitter bleeds at the edges; a stencil gives you the crisp shape clients photograph. Print the design as a stencil with a thermal printer — our ultimate stencil printer guide covers which machine to pick — then apply adhesive through the stencil and press the glitter in.
Keep the work photographable. Glitter is one of the hardest things to shoot: direct light blows it out. A polarised anti-glare photography kit ($59.99) lets you shoot the finished design without the hot spots that ruin portfolio photos.
For the stencil step itself, a transfer gel that holds the line through a long session matters more than it looks: if the stencil lifts while you are pressing glitter in, the design smudges and you start over. Our stencil transfer gel ($8.88, 4 fl oz / 120 ml) is the same one we use for permanent stencil work — long-lasting and smudge-proof, which is exactly what a glitter application needs.
What to Buy Instead for a Permanent Sparkle
Clients who ask for glitter usually want a tattoo that catches the light, or a design that stands out in photos. Both are achievable with real ink and good technique — no glitter required.
White and light-colour highlights. A skilled artist can make a design pop with white ink highlights and high-contrast shading. It heals predictably, photographs well, and will not raise questions at an MRI appointment.
Metallic-effect colour work. Some colour palettes read as metallic on skin — golds, coppers, and bright yellows over solid black — without any metal flake in the ink. The effect comes from colour choice and contrast, not from particles.
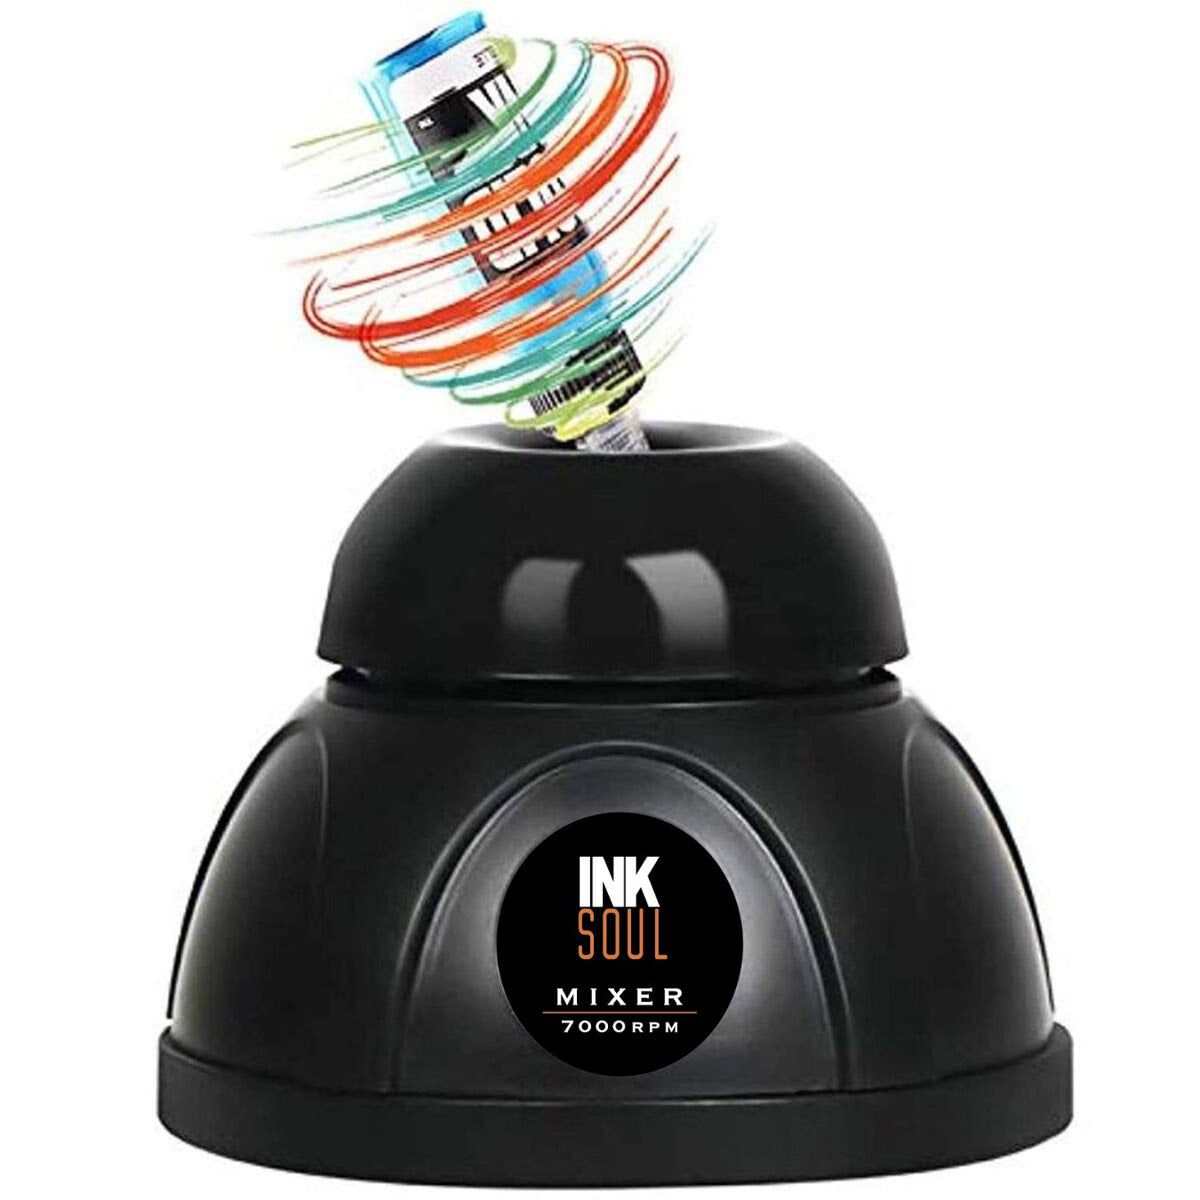
Keep your ink mixed and your station organised. The unglamorous truth behind bright, even colour is ink that is properly mixed before every session — pigment settles, and settled ink packs unevenly. A vortex mixer ($48.88) takes seconds and is the difference between a flat fill and an even one; a rotating ink rack (from $228.88) keeps 48 bottles mixed and within reach. Single-use silicone ink caps ($12.88 for 180) keep each colour clean and separate — soft enough that a needle knocked into the bottom does not blunt, and disposable so there is no cross-contamination between clients.
Red Flags When Shopping for Glitter Tattoo Ink
"Permanent glitter ink" with no brand behind it. If no established ink manufacturer sells it, a no-name bottle is not a discovery — it is an untested product.
Craft glitter relabelled for skin. "Glitter is glitter" is wrong. Cosmetic-grade and craft-grade are different materials with different safety profiles, and the label should say which one it is.
No ingredient list, no expiry date, no batch number. Professional ink always carries these. Their absence means the seller is not operating to professional standards.
Photos that only show the bottle, never a healed result. If every photo is fresh, wet, and under studio lights, the seller is hiding what it looks like in a month.
Claims of "FDA approved glitter ink." The FDA has not approved any pigment for injection into the skin. Any listing that says otherwise is lying about something basic.
FAQ
Is glitter tattoo ink safe?
Temporary glitter tattoo products made with cosmetic-grade glitter and a skin-safe adhesive are generally safe for most people, with a patch test first. Injecting glitter into the skin with a tattoo machine is not an established safe practice: no major professional ink brand sells a glitter ink, and the flakes are too large to pass through cartridge needles cleanly.
Can you tattoo with glitter ink using a tattoo machine?
Not recommended. Glitter flakes are tens to hundreds of microns across — far larger than standard pigment particles — so they jam between the needles in a cartridge, make ink flow patchy, and sit in the dermis as large foreign bodies. The result heals unevenly and carries a higher risk of raised texture and foreign-body reactions.
How long do glitter tattoos last?
A temporary glitter tattoo applied with skin adhesive lasts about 3–7 days, less with water, sweat, and friction. A "permanent" glitter tattoo has no proven lifespan — no standardised permanent glitter ink exists.
What is glitter tattoo ink made of?
Real glitter tattoo products are cosmetic-grade glitter (usually polyester film) in a water-based, hypoallergenic skin adhesive. That is a surface cosmetic, not a tattoo ink. Anything labelled "glitter tattoo ink" that does not list its ingredients should not go on a client's skin, let alone under it.
What should I buy instead for a permanent sparkly tattoo?
Use real professional tattoo ink: white and light-colour highlights, metallic-effect colour palettes, and strong contrast give clients what they actually want — a design that catches the eye and photographs well — without putting large foreign particles into the dermis. Keep ink properly mixed with a vortex mixer and the result will outlast any glitter.
Further reading: our earlier guides What Are Glitter Tattoos? and How Do Permanent Glitter Tattoos Work? cover the basics of temporary and permanent glitter designs.
buying guide
P19 vs INKSOUL T08FD: Which Stencil Printer Is Worth Your Money?
A $50 gap is enough to make any tattoo artist stop and ask: is the P19 at $138.88 really the same deal as the INKSOUL T08FD at $188.88? The short answer: no — and not for the reason you might expect. The P19 is cheaper, but it is also a rebranded printer you can buy direct from its original brand for less, it publishes no resolution or paper-size specs, and its headline shading claim is contradicted by the original manufacturer's own blog. The T08FD costs more because it does the one thing that pays for a stencil printer: real grayscale shading for realism and black-and-grey work.
If you only ever print clean outlines and your budget is the whole decision, the P19 will print your lines. If shading work is how you earn — portraits, realism, black-and-grey — the printer that cannot prove it prints shadows is the expensive choice, no matter what the sticker says. Here is the full comparison, with every fact checked on 9 November 2026.
The Fact That Changes the Whole Comparison: the P19 Is a Rebrand
The P19 is the TAIDU P19 under a new name. TAIDU is the original Chinese factory brand for this printer, and it sells the identical machine direct on its own store, xhwstattoo.com, for $129.99 — with 20 sheets of paper included. The store selling it asks $138.88 with 10 sheets. So the "budget" P19 is not even the cheapest way to buy the P19: the original brand undercuts the rebrand by $9 and doubles the starter paper.
The branding does not stop at two names. The seller's own Instagram and Facebook demo videos brand the same device a third name, "InkForge P19" — one printer, three labels. That is what white-label stock with swapped logos looks like, and it matters for one practical reason: if anything goes wrong, you are dealing with a reseller of a resold printer, not the company that made it.
By contrast, the T08FD and T08FS are AIMO's own original models — the T08FD is the improved flagship with a touch screen and INKSOUL-exclusive colors, and the T08FS is the classic that built the line's reputation. They are not rebadged hardware, and INKSOUL has sold and supported them for years, with nearly 300 reviews on the T08FD alone in our store.
P19 vs T08FD: Specs Side by Side
P19 — $138.88
INKSOUL T08FD — $188.88
Resolution
Not stated by the seller
203 dpi, stated
Touch screen
No
Yes — fingertip control on the printer
Shadow / shading printing
Claimed ("Rich Shading"), one sample photo; TAIDU's own blog cautions this printer class on shading
Defining feature — real grayscale shading with dedicated SP100 shadow paper
Paper sizes
Not stated by the seller (roll mode implied)
A4, LTR, Legal, LTR+, plus 210 mm roll paper
Print speed
Not stated
13–15 mm/s
Weight
Not stated (TAIDU lists ~600 g for the identical hardware)
~745 g
Connectivity
Bluetooth (iOS/Android) + USB
Bluetooth + USB, plus on-device touch screen
App
"tattooprinter" app (resize, crop, line extraction, 3D preview)
Phone app for printing + touch screen on the machine
Sheets included
10
5
Warranty
1 year, replacement if unrepairable
1 year, whole machine — if it breaks, we send a new one
Subscription
Not stated
None for basic printing — only some optional AI features are paid, and printing does not depend on them
A deliberate omission: battery capacity is not in this table. The seller publishes no battery figure at all, and our own materials list conflicting figures for the T08FD. We would rather leave a row blank than compare on a number we cannot stand behind. Buy on what you can verify — resolution, screen, paper sizes, shading — and those rows are all above.
The Shading Question Is the Whole Decision
The seller's hero claim for the P19 is "Fine Lines. Rich Shading." It rests on a single sample photo on the product page and no stated DPI to back it. TAIDU's own blog for the same printer says the opposite in substance: "The P19 is well-suited for linework and simple designs. For highly detailed or shaded stencils, thermal printers in this class may not capture every nuance. Artists who specialise in photorealism or heavily shaded work may want to test the printer…"
That is the original manufacturer telling you, in its own words, that this class of printer struggles exactly where the seller's marketing says it shines. When the maker and the reseller disagree, believe the maker.
The T08FD's shading is not a slogan, it is the machine's defining feature: it renders realistic grayscale gradients exactly as they appear on screen, with SP100 shadow paper made for the job — what you see is what you get on skin, sharp and smudge-proof. And shading is not a T08FD exclusive in our line: the classic T08FS prints shadows too — it says so in its own product name — at $168.88, which is still $30 more than the P19 but $20 less than the T08FD if you want shading without the touch screen.
Here is the money angle. A stencil printer earns its keep by the work it lets you take on. Outlines are the entry ticket; shading is where realism and black-and-grey jobs — the higher-priced work — live. A printer that cannot prove it prints shadows does not just save you $50. It quietly caps the jobs you can say yes to.
The Real Price Math: $138.88 Is Not the Price You Pay
Three numbers change the $50 gap:
Shipping: The seller charges $10 shipping under $159, and the P19 at $138.88 sits just under that threshold — a standalone P19 costs $148.88 all-in. With the WELCOME10 first-order code it is $124.99 + $10 = $134.99. The T08FD ships free over $159, so $188.88 is the whole price.
The direct price: TAIDU sells the identical P19 for $129.99 with 20 sheets. If you have decided on this hardware, buying the rebrand is paying more for less paper.
Delivery time: The seller dispatches within 3 business days and delivers in 7–12 business days to the US — 10–15 business days door to door. The T08FD ships from stock in 48 hours in most cases.
After shipping, the real gap between the P19 and the T08FD is about $40, not $50 — and the gap between the P19 and the shading-capable T08FS ($168.88) is about $20. That is the price of one small tattoo. Ask whether the shading, the touch screen, the stated specs and the established seller are worth one small tattoo to you.
Trust: Who Are You Actually Buying From?
A printer is a working tool, and when it breaks you need a seller who answers. Here the two sides are not close:
Age: the store's domain was registered on 13 October 2026 — the store is about a month old. INKSOUL has sold stencil printers for years, and the T08FD alone carries nearly 300 reviews in our store.
Identity: The seller is a Wyoming company registered at 30 N Gould St, Ste R, Sheridan — a well-known registered-agent address, not a store or office; the site itself says not to send anything there. No founder or team member is named anywhere. Contact is a free Outlook address and a China (+86) WhatsApp number.
Storefront quality: the P19 product page's "Related Products" section still shows four items literally titled "Example Product Title" — an unfinished template on the store's hero product page.
Its own pages disagree: The seller's buying guide says the P19 includes five starter sheets; the product page says ten. When a store cannot agree with itself on what is in the box, take its other claims with the same caution.
Reviews: the P19 page shows 4.8/5 from 37 reviews — that figure is self-published on the seller's own site, with no independent verification anywhere (no independent review of the P19 was found on Trustpilot, Reddit, Amazon or YouTube). One reviewer claims "three months of daily use" of a printer from a store whose domain is 27 days old. Treat the count as the seller's own claim, not a fact.
None of this proves the P19 is a bad printer. It proves you are buying a rebranded machine from a one-month-old reseller with no track record to check — while the same hardware is cheaper from its maker and the established alternative costs one small tattoo more.
Who Should Buy Which?
Buy the P19 if: your budget is the entire decision, you only print clean outlines, and you are comfortable with 10–15 business-day delivery and no stated resolution or paper sizes. Even then, check TAIDU's own $129.99 direct price first — same printer, more paper.
Buy the T08FD if: you do realism, portraits or black-and-grey; you want real grayscale shading with SP100 paper, a touch screen, stated 203 dpi and A4/LTR/Legal sizes, and a seller who replaces a broken machine with a new one under a one-year warranty.
Buy the T08FS if: you want the shading at a lower price and can live without the touch screen — $168.88, and it prints shadows too.
The P19 is a real price threat at the budget end, and we would rather you know exactly what it is than discover the rebrand after you paid. But a stencil printer is not a price tag, it is the tool your shading work depends on. The $50 question is really this: does the printer prove it can do the work you get paid for? The T08FD proves it on the spec sheet. The P19 asks you to take its word for it — while its own maker says otherwise.
Keep Reading
7 Best Tattoo Stencil Printers for Professional Artists (2026) — our full ranking, with the T08FD as Our Pick.
T08FD vs Ozer vs EZ: Which Stencil Printer Actually Prints Shadows?
Cheap vs Expensive Tattoo Stencil Printer: What Are You Actually Paying For?
Tattoo Stencil Printer Buying Guide 2026: How to Choose the Best One
FAQ
Is the P19 the same printer as the TAIDU P19?
Yes. The P19 is the TAIDU P19 under a new brand name — the same hardware TAIDU sells direct for $129.99 with 20 sheets of paper, against the reseller's $138.88 with 10 sheets. The seller's own demo videos even brand it a third name, "InkForge P19".
Can the P19 print shaded stencils?
The seller claims "Fine Lines. Rich Shading." but publishes no DPI and offers one sample photo as evidence. TAIDU's own blog says this class of thermal printer "may not capture every nuance" of highly detailed or shaded stencils, and recommends photorealism artists test it first. The T08FD, by contrast, is built for real grayscale shading with dedicated SP100 shadow paper — and the T08FS prints shadows too.
How much does the P19 really cost after shipping?
A standalone P19 is $138.88 + $10 shipping = $148.88, since the seller's free-shipping threshold is $159. With the WELCOME10 first-order code it is $124.99 + $10 = $134.99. TAIDU direct is $129.99 with 20 sheets included.
Is the T08FD worth $50 more than the P19?
If you do realism or black-and-grey work, yes: you are paying for proven grayscale shading, a touch screen, stated 203 dpi, A4/LTR/Legal/LTR+ paper sizes, and a one-year warranty from an established seller that replaces a broken machine with a new one. If you only print outlines and budget is everything, the P19 is cheaper — but check TAIDU's $129.99 direct price before you buy the rebrand.
Does the T08FD need a subscription to print?
No. Basic printing on the T08FD needs no subscription. Only some optional AI features are paid, and printing does not depend on them.
ambition
What Is a Tattoo Grip Light and Should You Use One?
What Is a Tattoo Grip Light and Should You Use One?
A tattoo grip light is a small ring of LEDs that clips onto your disposable grip and shines light directly onto the needle tip, so you can see your lines without moving a lamp. The disposable kind costs about $3 a session, weighs 5 g, and runs a full working day. It is a task light, not a replacement for a studio lamp — worth it for fine linework, guest spots, or hand shadows; a waste of money if your only problem is glare.
What a Tattoo Grip Light Actually Does
A grip light sits at the bottom of your grip, above the cartridge, and throws a ring of light onto the few square centimetres where the needle meets the skin. Because it moves with the machine, the lit spot never drifts: tilt the machine, change your angle, stretch the skin — the light follows the needle.
The version most artists will meet is the disposable clip-on. Ambition's clips onto a standard disposable grip: install the grip, clip the light on, pull the power protector tab, and work. It is individually sealed, rated 10+ hours of flicker-free light, weighs 5 g, and uses high-CRI LEDs. When the session ends it goes in the bin with the grip. Nothing to charge, wipe down, or sterilise.
In 2026 Bishop built the light into the machine: the Power Wand XLUMEN puts LEDs and a diffuser inside the grip, four settings, at $1,299.99 for the full set. The clip-on is for everyone who likes the machine they already own.
The Problem: Your Own Hand Is the Shadow
Ask any artist what they do when they cannot see a line: lean in, tilt the lamp, lean in again. The real culprit is rarely the lamp — it is your own hand. The moment you lean over fine linework, your hand and the machine block the studio lamp, and the exact spot you need falls into shadow. You move the lamp; ten minutes later you have shifted and the shadow is back.
A light on the grip cannot be shadowed by your hand — it is on the same side of the shadow as the needle, the one thing no floor lamp or ceiling panel can do. It matters most for fine-line work, where the line is thinner than the shadow over it; for PMU, where you read hair-stroke depth; and for guest spots, where the lighting is whatever it is. There is a quieter benefit, too: lit from centimetres away, you stop making the "just to be sure" second pass over a line already laid. Overworked skin comes from passes that did not need to happen.
The Four Ways to Light the Needle
Option
Where it sits
Cost
Best for
Weakness
Disposable clip-on grip light
On the grip, at the needle
About $3 per session
Fine lines, PMU, guest spots
Single use; one colour temperature
Built-in machine light (Bishop XLUMEN)
Inside the grip
$1,299.99 full set
Artists buying a new flagship
Price; locked into one machine and battery system
Headlamp
On your forehead
From $48.88
Following your gaze
Follows your head, not the needle
Polarised studio light (TAIDU X5)
Off the machine, on a stand or wall
From $158.88
All-day setup, glare control, photos
Fixed; your hand can still shadow it
The grip light is the cheapest way to test needle-level light; the studio light is the only one that deals with glare. If you can only buy one light this year, buy the studio light.
How to Choose One: 6 Things to Check
1. Fit first — measure your grip, not your machine. Grip lights clip onto the grip, so grip diameter is what matters. Ambition makes two housings: a hard shell for larger disposable grips, and a soft body for smaller ones — if you are between sizes, the soft body is the forgiving pick — flexible housing conforms where a rigid shell needs an exact fit. A light that wobbles is worse than no light. One honest gap: the listing gives the ring diameter (about 26 mm) and overall length (about 105 mm) but no grip-diameter range — check the ring clears your cartridge twist-lock before buying a ten-pack. Note the fine print: it is not suitable for thinner tattoo pen machines.
2. Runtime has to cover a real day, not a demo. A light that dies at hour six of a ten-hour session is a liability — your eyes will have adapted to it by then. The Ambition unit is rated 10+ hours of flicker-free light: a full working day with margin. Flicker matters: a flickering light tires your eyes, and tired eyes miss lines.
3. Weight is a balance question, not a comfort slogan. Five grams sounds like marketing until you remember where it sits: at the front of the machine, ahead of your fingers. A 30–40 g clip-on lamp changes the balance point in a way you feel by hour three. Five grams does not.
4. Colour rendering decides whether you can trust what you see. Cheap white LEDs wash out reds and flatten fresh work — exactly the wrong error when judging saturation. Look for high-CRI LEDs, which the Ambition unit specifies, and be suspicious of any grip light that only says "bright". Bright is easy; accurate colour is what matters — but no CRI number, lumen figure, or Kelvin temperature is published, so judge by eye, not by numbers.
5. Disposable or rechargeable is a workflow decision, not a price decision. A rechargeable clip-on costs more up front and less per session, but it must be charged, wiped down, and tracked between clients. A disposable unit costs about $3 a session (soft 5-pack $14.99; 10-pack $25.99) and disappears with the grip.
6. Heat: check it on skin, not on paper. Any LED close to skin for hours warms up. The Ambition unit is specified as low-heat — but "low heat" is a claim, not a measurement. On first use, run it for an hour and touch the ring — warm is fine, hot means it goes back.
How to Use It
Setup takes seconds: install your grip, clip the light on, pull the power protector tab, and start working. The tab is the part most artists get wrong, because it looks like packaging. It is actually the on-switch: it keeps the battery fresh in the pack, and once it is out, the light is on and the 10-hour clock is running. Do not pull it while setting up or waiting for a late client — pull it when the client is in the chair. A tab pulled an hour early is an hour of light you will not get back. There is no switch to turn it off for a break, and no water-resistance rating is published — keep rinse spray off the ring.
Try it on a practice skin before a full-day client, and check the fit at full stretch with your usual grip tape and machine bag on — a light snug on a dry grip can loosen once your hand warms it up. It is single-use and cannot be recharged, so there is no point saving a half-used unit for tomorrow.
What a Grip Light Will Not Fix
Most listings skip this part. A grip light adds light; it does not control reflection. If petroleum jelly turns fresh work into a mirror and your lines vanish behind glare, more lumens will not help — you need polarisation, not brightness. A polarised light with matching glasses cuts the jelly reflection instead of adding to it. A grip light and a polarised lamp solve opposite problems.
It will not fix your photos, either: a ring of light at the needle is tuned for your eyes, not for a camera. Glare-free healed photos are a studio-light and polariser job — our guide to choosing a tattoo light covers the setup. And with one colour temperature and no dimmer, it will not tune warmth to skin tone.
Who Should Buy One — and Who Shouldn't
Buy it if: you do fine-line, single-needle, or PMU work and lose lines to your own shadow; you work guest spots where you cannot control the lighting; you want to test needle-level light for the price of a coffee; or your studio lamp is good but fixed, and you keep repositioning it.
Skip it if: your real problem is glare, not shadow — get a polarised setup first; you run a very slim pen machine the clip cannot grip; or you already own a machine with a built-in light.
For most working artists, buy the 5-pack and run it for a week. Five sessions is enough to know whether your hand shadow was costing you lines, and whether you reach for it on day six. If you do, the 10-pack at $25.99 is cheaper per session. If not, you spent $14.99 finding out. The Ambition Tattoo Grip Lights come in soft and hard housings, in 5- or 10-packs.
Frequently Asked Questions
Will a tattoo grip light fit my machine?
It depends on your grip, not your machine. The light clips onto a standard disposable grip: a hard shell for larger grips, a soft body for smaller ones. The ring is about 26 mm across, so check it against your grip diameter. It is not suitable for thinner tattoo pen machines.
How long does a disposable grip light last?
The Ambition unit is rated for 10+ hours of flicker-free light — a full working day. The clock starts when you pull the power protector tab, so pull it when the client is in the chair, not during setup. It cannot be recharged: when the session ends, it goes in the bin with the grip.
Can I reuse a grip light for another session?
No. It is a single-use, individually sealed disposable unit with a built-in battery that cannot be recharged. Reusing it would also mean reusing a non-sterile item across clients. At about $3 a session, it is a consumable, like the grip it clips onto.
Will a grip light change how my machine feels?
At 5 g, effectively no. The weight sits at the front of the machine, ahead of your fingers, and it will not shift the balance point the way a heavier clip-on lamp can. If you can feel 5 g by hour three, your machine has other balance problems.
Does a grip light replace my studio lamp?
No. A grip light solves hand shadow at the needle; a studio lamp lights the client, the station, and your photos. And neither one fixes glare — that takes a polarised light with matching glasses. Think of it as the last metre of your lighting setup.
buying guide
What Does a Tattoo Stencil Printer Really Cost Per Year?
When you buy a tattoo stencil printer, the sticker price is only the first number. The real question is what the machine costs to keep using for a year: the printer, the paper you will run through it, and any app subscription sitting behind it. Add those three together before comparing models. A cheaper machine tied to a paid app and proprietary paper often ends up costing more over a year than a higher-priced printer with free basic printing.
On the INKSOUL T08FD, basic printing needs no subscription. You can print from the app without paying anything recurring. Advanced AI design features are offered as optional paid add-ons, and they are not required to print. If you never pay for them, the printer still prints.
The three numbers that make up a year of printing
The machine. A one-time purchase, from a mini pocket printer to a full-size roll printer. Machines of different sizes and print widths serve entirely different purposes, so be sure you are comparing models in the same class.
The paper. The recurring cost. A studio printing every day runs through far more paper than a beginner printing a few stencils a week, so price per sheet, or per meter on a roll, matters more than most buyers expect.
The app. The part that surprises people. Most stencil printers print from a phone app with a free tier and a paid tier. The paid tier is normally about AI design tools, extra templates, or a bigger design library — not about printing itself. But not every brand explains that clearly, and annual billing plus auto-renewal can turn a casual tap into a year-long charge.
One buyer of a popular mini printer noted that while they liked the machine, they accidentally got charged $36 for an annual subscription. They were fine with it in the end. That $36 is close to the published Pro+ annual price of $36.99, which tells you the charge was real even if the tap was not intended. That is the accident to avoid.
Brand by brand: what is free, what is paid
Printer / app
Free: basic printing
Paid: what sits behind the paywall
What the app costs
INKSOUL T08FD (AIMO app) — full-size roll printer, our pick
Yes. Basic printing needs no subscription, and printing does not depend on any paid feature.
Advanced AI design features are offered as optional paid add-ons. They are extras for design generation, not a requirement to print.
$0 recurring for basic printing. Machine $188.88, roll paper 210mm x 30M $42.88, transfer gel 4oz $8.88 (INKSOUL store prices).
INKSOUL T08FS (AIMO app) — classic model
Yes. Same app approach: basic printing is free.
Same optional AI features as the T08FD.
$0 recurring for basic printing. Machine $168.88 (INKSOUL store price).
Phomemo (TP31 / M08F / TP81 + Phomemo app)
Yes, according to Phomemo's own listings: standard features meet everyday needs.
Pro unlocks AI image tools, tattoo pattern extraction, more design resources and stencil styles.
Published Google Play tiers (Sep 2026): Pro $8.99 a month or $32.99 a year; Pro+ $12.99 a month or $36.99 a year. Subscriptions auto-renew and are charged within 24 hours before the period ends. Prices vary by region and platform — check the in-app price before you buy.
Phomemo buyers disagree because the paywall is genuinely confusing: one M08F buyer calls the subscription "in no way needed" for basic use, another says you must sign up before you can print, and the brand also runs a second app, PrintMaster, for some models — support threads show buyers subscribing in the wrong app. Test the free tier yourself before paying anything; that tells you more than any price quoted here.
A note on third-party AI stencil apps
These are design tools, not printer apps; you do not need any of them to print. They only matter if you want AI to turn a photo into stencil linework. StencilMaker: limited free tier (1 a day, 10 total), then Pro $7.99 a month or $59.99 a year, credit packs from $4.99. InkPro: 5 free trial credits, then Basic $5.99 a month or Premium $18.99 a month, with no auto-renewal. Needmo Ink: $0.99 per conversion, Pro $19 a month, Studio $49 a month. They are an optional design step, not part of printing.
What a year actually looks like: two worked examples
These are illustrations with stated assumptions, not promises. Paper usage is the variable that moves every total.
Example A: INKSOUL T08FD route
Machine: $188.88
One roll of stencil paper, 210mm x 30M: $42.88
One bottle of transfer gel, 4oz: $8.88
App subscription for basic printing: $0
First-year total on those assumptions: $240.64
A 30-meter roll may last a solo artist several months, whereas a high-volume studio might go through it in a few weeks — but the app line stays at zero either way, because basic printing is free.
Example B: Phomemo TP31 mini route, on published app tiers and buyer-reported paper
Machine: $78.99 on the INKSOUL store
Paper: about $17 per 100 sheets, buyer-reported
Transfer gel, 4oz: $8.88
App: Pro+ annual $36.99, published Google Play tier
First-year total on those assumptions, at 100 sheets: about $142
Do not read Example B as "the cheaper printer wins." The TP31 is a mini printer for smaller designs, a different class from a full-size roll printer, and the two examples use different paper volumes. What matters is the structure: where the recurring money goes, and whether any of it is money you did not expect to spend. On the T08FD route, the recurring line is paper and gel only. On the Phomemo route, there is a third line, the app.
Year one is not where the story ends. After that, the recurring lines keep charging: $51.76 a year on the T08FD route (one more roll and gel) against about $62.87 on the TP31 route (paper, gel, and a Pro+ renewal). Over three years that is $155.28 against about $188.61 — the cheaper machine's subscription line quietly overtakes the free-printing route's consumables. The sticker price fades; the recurring lines do not.
The accidental-subscription trap, and how to avoid it
Annual plans are usually cheaper per month, which is why apps push them to the front of the screen. That discount only saves money if you wanted a year in the first place. Three habits prevent the accident:
Print on the free tier first. Before you enter any payment detail, print a stencil of your own design on the free tier. If the app will not let you print without subscribing, you have learned something important about that brand — before paying.
Read the renewal terms, not just the price. Annual plans typically auto-renew. Know the renewal date and the cancel deadline — some apps require cancellation at least 24 hours before the period ends.
Check what stops when the subscription stops. Don't just ask "what do I get if I pay?" Ask "what stops working if I cancel?" On the T08FD, nothing that affects printing stops. On other brands, let a trial lapse or ask support before building a workflow around paid features.
Paper lock-in is the other hidden cost
A subscription is not the only recurring lock-in. Some printers only work well, or only work at all, with their own brand's paper. The TP31's listing, for example, says it is compatible only with Phomemo tattoo paper. That is a size and form-factor restriction — a mini printer takes smaller pre-cut sheets — not a digital lock, but the effect on your wallet is the same: you buy that brand's packs at that brand's price. Compare the paper you are actually locked into, per sheet or per meter, not just the machine price.
Pre-purchase checklist
Print one stencil of your own design on the free tier before paying anything.
Find out whether the app requires an account or a subscription before the first print.
Read the renewal terms: annual or monthly billing, auto-renewal, and the cancel deadline.
Confirm paper compatibility and the real paper price per sheet or per meter — and whether only the brand's own paper works.
Separate "AI design generation" from "printing." You may not need the first at all, and it is usually the part that costs money.
Add up machine plus a year of your actual paper usage plus the app, then compare that total — not the sticker price.
Check what happens when a subscription lapses: does basic printing keep working?
Re-check the in-app price on the day you buy. App prices vary by model, offer, and date.
Our pick
INKSOUL T08FD is our pick for this comparison, for a simple reason: its cost structure has no surprises. Basic printing needs no subscription, advanced AI design features are offered as optional paid add-ons, and printing does not depend on them. The machine is $188.88, a 30-meter roll is $42.88, and a bottle of transfer gel is $8.88. The T08FS remains the classic model at $168.88. For the full buying guide behind this comparison, start with our ultimate guide to choosing a tattoo stencil printer, and pair the printer with roll paper and transfer gel.
FAQ
Do I need a subscription to print tattoo stencils?
On the INKSOUL T08FD and T08FS, basic printing needs no subscription. Phomemo's own listings say standard features meet everyday needs, with a paid Pro tier for AI tools and extras. Third-party AI stencil apps are optional design tools, not a requirement for printing.
What does the T08FD app actually charge for?
Basic printing is free and does not depend on any paid feature. Advanced AI design features are offered as optional paid add-ons. If you never pay for them, the printer still prints.
Why do Phomemo subscription prices differ between reviews?
Because there are two tiers, two apps, and prices that vary by region and platform. The published Google Play tiers are Pro at $8.99 a month or $32.99 a year, and Pro+ at $12.99 a month or $36.99 a year — which lines up with the $13 a month and $36 to $37 a year figures buyers report. Older reviews also mention $49 a year and $14.99 a month, so check the in-app price on the day you buy.
Is paper really the biggest cost over a year?
It depends on volume. For a busy studio, paper is the largest recurring line, which is why a 30-meter roll at $42.88 changes the math compared with small sheet packs. For a light user, the machine itself dominates the first-year total.
Can I use any brand's paper with any printer?
No. Some printers are listed as compatible only with their own brand's paper, which locks you into that brand's paper price. Factor that into the year-one total before you buy.
buying guide
Are Silicone Tattoo Ink Cups Worth It?
Yes — if you buy soft cups with backbone. A good silicone ink cup protects your needle when you dip too deep, stays where you put it, and does not splash ink back at you. A bad one does the opposite: thin walls fold under your needle, the cup skitters across the station, and you spend the session chasing pigment. The difference is not "silicone versus plastic." It is soft versus collapsing, and you can test for it before you commit to a whole box.
Why a 7-Cent Cup Deserves a Buying Decision
Ink cups are the cheapest thing on your station and the easiest to blame last. When saturation goes uneven mid-session, artists check the machine, the voltage, the needle, the skin — and almost never the cup the pigment sat in. But the cup controls three things that show up in the tattoo: how cleanly the needle loads, whether the pigment stays where you put it, and whether your colour layout survives a long session intact.
A cup that tips or bounces breaks your rhythm: you stop, wipe, re-pour, re-find your colour, and re-settle your hand. Do that three times in a session and you have lost more time than the whole box cost.
Soft Is the Point — Collapse Is the Trap
Here is the distinction most buying guides blur, and it is the one that matters. Silicone earned its reputation for one reason: it is soft. Dip a needle too deep into a hard plastic cup and the tip hits an unforgiving bottom. Do it into a soft silicone cup and the material gives. That forgiveness is why silicone cups are now standard in so many studios — a needle that bottoms out in silicone is far less likely to come back burred or dulled than one that bottoms out in rigid plastic.
But "soft" has a failure mode artists actually complain about: collapse. A thin-walled cup feels soft in the hand, then folds under a real working dip — the wall buckles, the pigment surges, and you get the splash you bought silicone to avoid.
Judge a cup by two qualities at once: give, which protects the needle, and backbone, which keeps its shape when you load a magnum or lean on a dip during a long shade pass. A cup with both feels forgiving and still sits square when you let go; a cup with only give feels lovely until the first heavy dip.
One more edge case working artists know: dip a wide magnum grouping in at an angle and a soft rim can fold inward and catch on the grouping. Dip straight, and reject any cup whose rim deforms into the needles instead of holding its shape. Try this before you buy in bulk. Set one cup on your station and dip your working needle grouping into it the way you actually dip — not a gentle tap, a real working dip. Watch the wall, not the ink. If the wall dimples and springs straight back, you have a keeper. If it folds and stays dented, or the whole cup rocks, that box will fight you all session. One cup tells you everything a product photo cannot.
Buying Checklist: 7 Things to Check Before You Buy
Wall with backbone. Press the wall between thumb and finger, then dip-test as above. Forgiving under the needle, stable under load — both, not one.
A base that stays put. Many artists anchor loose cups with a dab of ointment on the tray — a workable habit, but it adds a messy cleanup step and another gloved touchpoint. Self-standing cups with a grippy base, or caps that link into a fixed array, skip that step entirely.
Mouth matched to your needle groupings. Small cups suit single-colour line work and small colour blocks. Large magnum shading wants a wider mouth so the whole grouping loads evenly instead of dragging on the rim. If a listing does not state the mouth size, ask before ordering — do not assume one size covers every grouping you run.
Single-use, honestly labelled. Disposable means one client, then out. If you want reusable cups, buy a product designed and rated for reprocessing — do not stretch a disposable cup into a second session to save pennies.
A layout that does not wander. Loose cups migrate. Caps that link together into a fixed palette keep your colour order exactly where your hand expects it, which matters most on multi-colour pieces.
Count you will actually use. Price per cup, not price per box, is the honest number. A box that sits half-used for a year is not a bargain, and a box that runs out mid-week is not either.
Heat awareness. Direct lamp heat is mainly a threat to the pigment, not the cup: ink left in the beam dries and skins over, especially fast-drying formulas. Keep cups out of prolonged direct lamp light so the working ink stays usable all session.
Silicone vs. Plastic vs. Reusable Holders
Type
Needle forgiveness
Stability
Hygiene
Best for
Disposable silicone cups
High — soft bottom forgives a deep dip
High, if the wall has backbone
Single-use, then discarded
Busy studios that want needle safety without a holder
Hard plastic cups
Low — rigid bottom punishes a deep dip
Moderate — light, easy to knock
Single-use, then discarded
Budget bulk setups where a holder does the stabilising
Wide-base plastic cups
Low — still rigid
High — broad base resists tipping
Single-use, then discarded
Artists who like plastic but hate spills
Reusable silicone or steel holders
Varies by design
High
Must be cleaned and reprocessed between clients
Studios with a real reprocessing routine, not a rinse-and-hope habit
That is also where a linked array earns its place: loose cups migrate every time you bump the station, while caps snapped into a hexagon palette hold their colour order and form a stable base of their own, so most stations will not need a separate holder.
The honest summary: plastic wins on upfront price and loses on needle forgiveness. Reusable holders win on waste and lose if your cleaning routine is not disciplined. Disposable silicone wins on the combination working artists actually feel — needle safety plus a cup that stays put — provided the wall has backbone. That last condition is doing all the work, which is why the dip test above matters more than any marketing line.
Setting Up Cups So They Stop Costing You Time
Pour less than you think you need. A cup filled to the brim splashes on the first deep dip and wastes pigment you will throw away at the end of the session. Start shallow, top up as you go, and keep the working level consistent — a needle that loads from the same depth every time lays pigment more evenly than one dipping into a falling level.
Fix your colour order before the client sits down. Lay colours in the sequence you will actually use them, left to right or in the order of your palette, and do not rearrange mid-session. Every time you hunt for a colour, your hand leaves its working position and your line pays for it. Linked or splicable caps help here because the palette holds its shape when you reach, wipe, or bump the station.
Keep one spare of each working colour within reach for the moment a cup tips or runs dry — it costs cents and saves a five-minute reset mid-session. And at the end of the session, snap the array apart and discard the cups with the rest of the single-use setup — no sorting, no soaking, no "just one more use."
Our Pick for a Working Studio
For a studio that wants the soft-plus-backbone combination without adding a holder to the station, the INKSOUL Disposable Silicone Tattoo Ink Caps are the straightforward choice: disposable silicone, so a needle that bottoms out meets give instead of rigid plastic, and a hexagon splicable design, so the caps link together into a stable palette that does not wander across the station. Each set holds 180 pieces in orange or black, at $12.88 — about 7 cents a cup — which makes the dip test above a cheap experiment: try one cup hard before you commit the box to a full working week.
What we would not claim for them: they are single-use cups, not reusable ones, they come in a single size, and no cup fixes pigment poured too deep or left to dry under a lamp. If you regularly run extra-wide magnum groupings, test your largest grouping in one strip first before retiring your dedicated magnum cups. Buy them for what they are: a soft, stable, disposable cup that keeps needle safety and station order as one problem instead of two. Put a strip on the station for your next full working day and run it alongside your current cups — one day of real dips will tell you more than any product page.
FAQ
Are silicone tattoo ink cups better than plastic ones?
For most working artists, yes — with one condition. Silicone forgives a needle that dips too deep, while hard plastic punishes it, and silicone grips the station better. But the advantage disappears if the silicone wall is so thin it collapses under a real dip. Test one cup before buying in bulk.
Can I reuse silicone ink cups?
Not disposable ones. Our INKSOUL silicone caps are single-use: one client, then discarded. Reusable silicone or steel cups are a different product class and need proper cleaning and reprocessing between clients. Do not stretch a disposable cup into a second session.
What size ink cup should I buy?
Match the mouth to your needle groupings. Small cups suit line work and small colour blocks; wider cups suit large magnum shading, where the whole grouping needs to load evenly. If a listing does not state the mouth size, ask the seller before ordering rather than assuming one size fits every grouping.
Why do my ink cups splash when I dip?
Usually one of three causes: a thin wall collapsing under the dip, a cup filled too full, or a cup light enough to rock when the needle hits it. Fix them in that order — dip-test the wall, pour shallower, and switch to a self-standing or linked cup that stays put.
Do silicone cups damage tattoo needles?
Good silicone does the opposite: its soft bottom is far more forgiving than rigid plastic when a needle dips too deep. What damages needles is bottoming out hard against a rigid surface, or reusing a cup whose wall has deformed and now drags on the grouping. Replace deformed cups instead of working around them.
buying guide
What Is the Best Portable Tattoo Machine for Guest Spots and Travel?
If you are flying to a guest spot or working a convention, the best portable tattoo machine is a wireless pen with two batteries, a stroke length that matches the work you booked, and a wired fallback for the day a battery quits. That combination — not the lightest pen on the shelf — is what keeps you tattooing when the host studio's outlets are taken and your next client is already in the chair.
What "portable" actually has to mean for a working artist
Portable does not just mean small. Plenty of pens are small. A travel-ready machine has to survive a day away from your own station, where you cannot walk to your drawer for a spare cable or a second power supply. Judge every candidate against the trip, not the spec sheet.
First, power independence: your machine should run a full session without an outlet, and your backup plan should not be "hope the host studio has a free socket." Second, balance in the hand, not just grams on a listing — a light pen that is tail-heavy from its battery tires your wrist faster than a slightly heavier pen that balances over your grip. Third, recovery from failure: batteries lose runtime after months of daily charging, which is normal, not defective — the question is whether your kit still works when that happens. Fourth, cleaning between clients in someone else's studio, where a removable grip matters more than it does at home. And fifth, setup speed: fewer cables and boxes is real time saved when you are building a station in a corner of someone else's room.
The portable checklist: 7 things to check before you buy
Two batteries, not one. A second charged battery is the single most useful travel accessory. It covers a long day, a forgotten charge, and the gradual capacity loss every rechargeable battery suffers over months of use.
Stroke length matched to your bookings. A 4.2mm stroke covers bold lining and colour packing; a shorter stroke suits fine detail and soft shading. An adjustable-stroke pen covers mixed bookings in one bag.
USB-C charging you already own. If the pen charges over USB-C, you can top up from a laptop, a power bank, or the host studio's cable drawer. A proprietary charger is one more thing to lose.
A wired fallback. A pen that also accepts an RCA connection can run off a power supply when both batteries are flat. That fallback has saved more guest-spot days than any battery upgrade.
A grip you can remove and clean. Guest spots mean back-to-back clients and unfamiliar sterilisation setups. A detachable grip you can clean thoroughly beats a fixed grip that traps ink where you cannot reach it — and a grip held on by a tiny screw that strips out can turn a pen into scrap, so check how the grip actually comes off before you buy.
Balance, not just weight. Hold the pen with the battery fitted, not the bare body. The battery decides the centre of gravity, and a pen that feels fine empty can feel nose- or tail-heavy once it is fully assembled.
A pedal plan you have tested. Pedal-free operation is simplest for travel. If you use a Bluetooth pedal, test it at home first: wireless pedals can occasionally drop connection, and discovering that on a paying client at a guest spot is the wrong time to learn it.
Comparison: three travel-ready pens
Machine
Stroke
Battery setup
Why it travels well
INKSOUL HV6 Pro
4.2mm
Two 2000mAh batteries included
Two batteries in the box means a full guest-spot day with no outlet hunting; two grip sizes (33mm and 38mm, autoclavable) and two working modes cover lining and shading bookings in one pen.
Mast Archer S
4.2mm
Wireless pen, ultra-fast charging
A straightforward 4.2mm wireless pen for bold lining and deep shading; the kit version pairs it with a Bluetooth foot pedal for a cable-free station.
Mast Fold Pro
2.4–4.2mm (7 adjustable lengths)
1500mAh battery, about 4–6 hours, USB-C charging in about 1.5 hours
Adjustable stroke covers mixed bookings in one pen, and the interchangeable RCA connector gives you a wired fallback when the battery runs out.
If your bookings mix lining, shading, and colour packing, the adjustable-stroke pen is the most versatile single purchase. If you mostly line bold work, a fixed 4.2mm stroke is simpler. Either way, the battery setup matters more than the stroke range: a versatile pen with one flat battery is still a pen that stops.
Our pick for guest spots and travel
For a travelling artist, our pick is the INKSOUL HV6 Pro. The reason is not the stroke or the motor — it is the second battery. Two TRUE 2000mAh batteries in the box, plus two autoclavable grip sizes, means your travel kit already contains its own backup plan: one battery in the pen, one charged and waiting, and no need to borrow an outlet mid-day. Its 4.2mm stroke suits the bold lining and colour packing that guest-spot bookings usually are, and the two working modes (standard voltage adjustment and fixed-frequency mode) give you a choice of feel — but switching modes changes how the pen hits, so test both at home before you rely on either at a guest spot.
If you want the lightest possible bag and you already carry a charging routine you trust, the Mast Archer S is the lighter, charge-and-go alternative: a 4.2mm wireless pen with ultra-fast charging that does one job well — but treat it as the short-session option, not the full-day workhorse in this list; a day of back-to-back clients still belongs to the two-battery pen above. And if you want one pen to cover every booking type on a mixed trip, the Mast Fold Pro's seven stroke lengths are the practical answer. Also worth a look for a compact wireless pen is the TangLong Yuan3 wireless tattoo pen — the backup-pen version of the same strategy: a second lightweight pen in the bag instead of a second battery — same insurance, different spare part, and worth it only if you would rather swap pens than swap batteries mid-day. For a deeper dive on battery life alone, see our guide on how to choose a battery pen machine that won't die mid-session.
Packing for a guest spot: the kit that actually fits in a backpack
Pack the pen, both batteries, and the charging cable first — those three items are the whole job. Then add cartridges for the bookings you actually have, not your full drawer; a small grip-cleaning kit; and the cable or RCA fallback if your pen supports one. And don't judge a battery by its mAh number alone: heavy colour packing at high voltage drains a cell faster than fine lining, and spare packs are usually made for a specific pen, so confirm the matching spare for your exact pen before you travel. Charge both batteries the night before, not at the airport, and run the pen for a minute at home to confirm the battery, pedal, and voltage display all behave. Bad guest-spot days rarely come from the wrong pen — they come from a flat battery, a stripped grip screw, or a dropped pedal connection discovered after the client sat down.
One rule that catches travelling artists out: spare lithium batteries go in your cabin bag, not checked luggage, on most airlines. Keep them protected, keep the pen where you can reach it, and check your carrier's rules before you fly.
FAQ
Can I take a wireless tattoo machine on a plane?
Yes, in most cases — but pack spare lithium batteries in your cabin bag, not your checked luggage, because airlines generally require that. Keep the machine itself protected in your carry-on, bring your charging cable, and check your carrier's battery rules before you fly, since limits vary by airline.
How many batteries do I need for a full guest-spot day?
Two, as a minimum. One battery in the machine and one charged spare covers a full day of back-to-back clients without hunting for an outlet, and it covers you when a battery starts losing capacity after months of use. A single-battery pen is fine for short sessions, but it is not a full-day travel setup on its own.
Is a wireless pen machine powerful enough for lining at a guest spot?
Yes, provided you pick the right stroke length. A 4.2mm stroke pen handles bold lining and colour packing well, while a shorter stroke suits fine detail and shading. What matters at a guest spot is not wireless versus wired — it is whether the stroke and motor suit the work you actually booked for that trip.
What should I do if my wireless pen dies mid-tattoo away from home?
Switch to your charged spare battery first — that is the fastest recovery and the reason a two-battery setup is worth it. If your pen also accepts an RCA adapter, a wired connection to a power supply is your second fallback. Travelling with only one battery and no cable fallback is how a dead battery turns into a cancelled appointment.
Do I need a foot pedal at a guest spot, or can I run pedal-free?
You can run pedal-free with most modern wireless pens, which use a button or tap start, and that is one less thing to pack. If you prefer a pedal, a Bluetooth pedal keeps the station cable-free, but wireless pedals can occasionally drop connection, so pack the cable or RCA fallback if your setup supports one — and test the pedal at home before you travel, not on a paying client.
3.5mm stroke
What Is a 3.5mm Stroke Tattoo Pen Machine Good For?
A 3.5mm stroke tattoo pen machine is the all-rounder of the pen world. It hits hard enough to pull clean lines with small needle groupings, soft enough to shade smooth black-and-grey gradients without chewing up the skin, and strong enough to pack color into small and medium areas. If you want one pen that covers most of a working day — lining, shading, and color work — without switching machines, 3.5mm is the stroke length most artists land on. It is not the best choice for bold, single-pass traditional outlines with large liners, or for packing huge areas of solid color fast. For those two jobs, a longer stroke (4.0mm and up) still wins.
What Stroke Length Actually Means
Stroke length is how far the needle travels up and down on each cycle — 3.5 millimetres of travel, in this case. It is not needle depth. Depth is how far the needle sticks out of the tip and how deep you work it into the skin; stroke is the distance the machine moves the needle on every hit. Confusing the two is the most common beginner mistake in machine shopping, and it leads to the wrong diagnosis when something goes wrong: a patchy line is often a depth or needle-hang problem, not a stroke problem.
Stroke length sets three things at once: how hard each hit lands, how fast the needle cycles, and how much ink the needle can pick up on each return into the tip. A short stroke cycles fast and hits soft, so the needle spends less time in the skin and you can layer passes safely. A long stroke cycles slower and hits harder, driving more ink per hit but punishing heavy hands. A 3.5mm stroke sits in the middle on all three counts, which is exactly why it works as a daily driver.
What a 3.5mm Stroke Is Good For
Lining With Small to Medium Groupings
With 3 to 9-round liners and tight groupings, a 3.5mm stroke pulls a solid, controlled line in one pass. The hit is firm enough that the needle does not skate or skip, and the needle retracts fully into the tip on every cycle, so it reloads ink instead of dragging dry across the skin. Where it runs out of steam is big traditional work: a 14-round liner or larger wants more momentum per hit than a 3.5mm stroke comfortably delivers, and forcing it means extra passes — which is how skin gets overworked.
Black-and-Grey Shading and Smooth Gradients
This is where 3.5mm earns its keep. The hit is soft enough for layered passes and whip shading, but firm enough that gradients do not come out washed-out and patchy. Artists who do realism and portrait work often keep a 3.5mm pen as their shading machine even when they line with something longer, because it blends without the harshness that makes gradients look stippled.
Color Packing in Small and Medium Areas
For color work up to roughly palm-sized areas, a 3.5mm stroke packs saturation well with magnum groupings, especially when you slow your hand speed slightly and let each hit land. On very large solid-color areas — a full back piece panel, for example — a 4.0mm or 4.2mm stroke will fill faster with fewer passes. The 3.5mm will still get there; it just takes longer, and more passes on the same skin is a trade-off you should make deliberately, not by accident.
A Sensible First Serious Pen
Beginners are often steered to short strokes (2.5mm and under) because they are forgiving. The problem is that a very short stroke cannot pull a real line at all — the needle does not retract far enough to reload ink, so lines come out broken and the artist blames their hand. A 3.5mm stroke avoids that trap: it is forgiving enough to learn on and capable enough that you will not outgrow it in three months. If you are buying your first pen that you intend to keep, 3.5mm is the safer bet than either extreme.
What It Is Not Good For
Bold, single-pass traditional and neo-traditional outlines with large liners. You will need extra passes, and extra passes on an outline are where blowouts and scarring start.
Fast packing of very large solid-color areas. A longer stroke does this in fewer passes with less cumulative skin trauma.
Ultra-fine, multi-pass portrait shading at the softest end. A shorter stroke (2.5–3.0mm) layers more gently there, though a skilled hand can still shade beautifully on 3.5mm by dropping voltage and slowing down.
Stroke Length Comparison
Stroke
Hit
Best for
Watch out for
2.0–3.0mm
Soft, fast
Soft shading, blends, PMU, fine detail
Cannot pull solid lines; needle may not reload ink
3.5mm
Balanced
All-round lining (small groupings), shading, small–medium color packing
Struggles with large liners and very large fills
4.0mm
Strong
Bold lining, faster color packing
Harsher on skin; less forgiving on shading
4.2mm
Strong
Bold lining, large color areas, color packing
More momentum to control
4.5mm
Heaviest
Heavy color packing, big groupings
Most skin trauma; experienced hands only
Buying Checklist for a 3.5mm Pen
Fixed or adjustable stroke? A fixed 3.5mm pen is simpler and there is nothing to come loose mid-session. An adjustable-stroke pen covers 3.5mm plus other lengths in one body — better value if your work ranges from fine shading to bold color, but check that the stroke lock actually locks. A stroke adjustment that drifts under vibration is worse than no adjustment at all.
Match taper, stroke, and voltage together. A short-taper needle on a long stroke at high voltage is a classic blowout recipe, and the same logic applies in miniature at 3.5mm. If lines start spreading, drop voltage or switch to a longer taper before you blame the machine.
Check needle hang first when lines go patchy. Before you decide the machine is at fault, check that the needle retracts fully into the tip on each cycle so it can reload ink. A needle hung too far out starves the line and looks exactly like a weak machine.
Grip: can you take it apart and clean it properly? A grip that cannot be fully disassembled traps ink and plasma, and a grip screw that strips turns a good pen into a disposable one. Look for a grip you can strip down, clean, and reassemble without tools fighting you.
Battery reality, not headline hours. If you buy wireless, ask what the runtime is at the voltage you actually tattoo at, and whether a second battery is in the box. A pen that dies mid-session costs you a client, not just a charge cycle.
Weight and balance. A pen that is tail-heavy from its battery will tire your wrist on a long session no matter how good the motor is. Hold it the way you tattoo, not the way it sits in a product photo.
Machines to Look At
Dragonhawk Mast Archer 2 — a fixed 3.5mm stroke pen with a brushless motor and a color screen, at a working-artist price. This is the straightforward pick if you know 3.5mm is your stroke: nothing to adjust, nothing to drift.
EZ P6 — an adjustable-stroke wireless pen with a high-torque motor, for artists who want 3.5mm in the rotation rather than as the only setting. If your week runs from fine shading to bold packing, one adjustable pen beats two fixed ones.
If you already know you want a longer stroke for bold work, compare our 4.2mm stroke guide before deciding.
FAQ
Is a 3.5mm stroke good for lining?
Yes, with small to medium liner groupings. It pulls clean, solid lines in one pass. For large traditional liners (14-round and up), a 4.0mm or longer stroke gives you the momentum for a single-pass line.
Is 3.5mm good for beginners?
It is the best beginner-to-keeper compromise. Shorter strokes are more forgiving but cannot pull a real line; longer strokes punish mistakes harder. A 3.5mm pen lets you learn lining, shading, and packing on one machine.
Can one 3.5mm machine do lining, shading, and color?
For most working artists, yes — that is the whole point of the all-rounder stroke. Specialists (bold traditional liners, ultra-soft portrait shaders) will still want a second stroke length for their edge cases.
Should I buy a fixed 3.5mm pen or an adjustable-stroke pen?
Buy fixed if you already know 3.5mm is your stroke — simpler, nothing to drift. Buy adjustable if your work spans fine shading to bold packing and you want one pen to cover it.
Why are my lines patchy on a 3.5mm machine?
Check needle hang and depth first: if the needle does not retract fully into the tip, it cannot reload ink and the line starves. Then check taper and voltage pairing. Only after those check out should you suspect the machine itself.
buying guide
How Do I Print a Large Tattoo Stencil (Sleeve / Back Piece) Without Taping Multiple Sheets Together?
If your design is no wider than 210 mm, print it on roll paper in one continuous length and cut only what you need. If it is wider than 210 mm, do not tape random sheets together: split the design deliberately along a background edge or a gap between elements, add registration marks across each join, and apply the panels in sequence. Both methods beat taping, but they solve different problems, and mixing them up is where most large stencils go wrong.
A sleeve or a back piece fails at the stencil stage for one reason more than any other: the artist treats a large design like a small design, only bigger. A small stencil is one sheet, one press, one peel. A large stencil is a piece of logistics — it has to survive printing, handling, and application without drifting a millimetre at a join, on a surface that curves, breathes, and moves. Tape cannot fix that: it adds a ridge under the paper, lets two sheets creep apart while you press, and leaves you guessing where one panel ends once the purple is on the skin.
Measure the body before you touch the printer
Most large-stencil mistakes start before printing, with a design sized on a screen instead of on the client. Measure the placement area on the body: the length of the panel, the width at its widest point, and — for a sleeve — the circumference at the thickest part of the arm. A design that looks right flat on a monitor wraps differently around a bicep, and a back piece that fits a client standing straight may pull tight when they bend forward.
Then print at 100%, with every "fit to page" or "shrink to fit" option switched off. This is the trap that ruins more large stencils than any printer fault: the app quietly scales your design to the sheet, and a sleeve set at 280 mm comes out at 250 mm with no warning. Print a plain-paper proof first, put a ruler on it, and check a known dimension against the number you set. Find any scaling now — not after you have burned a length of transfer paper.
One more check that only matters at large scale: the invisible margin. Sizing tools measure the whole file, not the ink, so 15 mm of blank border on each side turns a design set at 200 mm into artwork printed at 170 mm. Crop the blank border before you set the size, and measure the proof again. Artists who skip this step reprint the same sleeve three times, convinced the printer is shrinking their work, when the file was lying to them all along.
Route 1: One continuous piece on roll paper (designs up to 210 mm wide)
If the widest part of your design fits within 210 mm, roll paper ends the problem entirely: one continuous strip, as long as the design needs, cut to length afterwards. No joins, no registration marks, no taping, no seam drifting halfway through a back piece. The INKSOUL T08FD works with A4 stencil paper and with 210 mm roll paper, and the roll is 30 m long — so a full sleeve panel or a spine piece is one print, not a jigsaw.
Working with a long strip is different from handling a sheet. Support it as it comes out of the printer; do not let a metre of printed paper hang off the table and drag, or the free end will curl and pick up dust. Cut after printing, not before, and leave a little extra at both ends. Peel the backing in sections rather than stripping the whole length at once: a long exposed stencil is a sail, and the first draught in the studio will fold it onto itself. And if you are changing darkness settings, print a short test strip first — a setting slightly too heavy wastes the whole panel, not one sheet.
The quiet saving with roll paper is waste. A small design on an A4 sheet burns the whole sheet; on a roll, you cut exactly the length you need. That matters little on one forearm piece and a lot in a studio doing large work weekly, where sheet offcuts pile up fast — and reprinting a long strip costs a length of paper, not a stack of sheets.
Route 2: Split deliberately (designs wider than 210 mm)
Some designs genuinely will not fit 210 mm — a full back piece, a chest panel, a wide thigh piece. For those, splitting is not a failure; it is the correct method, provided the split is designed rather than improvised. Split where a join will not show: a background edge, a gap between elements, a stretch of shading — never through the middle of a face or a line that must stay continuous. Then add a short registration mark across each join on both panels before you cut, so you line panels up by matching marks, not by eyeballing purple lines.
Label the panels in order and apply them in sequence, not all at once. For a back piece, anchor the centre panel first and work outward — the centre is the landmark everything else hangs off. For a sleeve, start with the most visible surface, then join the panels that wrap underneath. Let each transfer dry and check it before placing the next: a panel a few millimetres out will not announce itself until you are two panels further along, and by then the whole composition has drifted.
Curves need relief. Shoulders, ribs, and elbows do not take a flat sheet kindly, and a wide panel will wrinkle or bridge across a curve. Cut small relief slits into the edges of the paper — not into the design — so it can bend without pulling the transfer with it. And keep the client's position the same from application to tattooing: a sleeve applied with the arm hanging will sit differently when the arm is raised on an armrest.
Which route should you choose?
Route
Max width without a join
Joins
Best for
Watch out for
Roll paper, one continuous piece
210 mm
None
Sleeves, spine pieces, back panels to 210 mm wide
Support the strip; peel in sections
Deliberate split panels
Unlimited (tiled panels)
Designed joins, registration marks
Full back pieces, wide chest/thigh work
Panel drift; splitting a key line
Taped-together sheets
Unlimited
Improvised tape seams
Nothing — last resort only
Tape ridges, creeping seams, no registration
Wider-format machine
Varies — check spec before buying
None, if the design fits
Studios doing wide work daily
Width rarely used; paper cost
The honest rule is simple: if it fits the roll, use the roll. Splitting is a skill worth having, but every join is a place where a large design can quietly go wrong. A wider-format machine only earns its keep if wide work is a regular part of your week; for most studios, a 210 mm roll plus a disciplined split method covers everything a client will ask for.
Applying a long stencil without ruining it
Preparation matters more at large scale because you get fewer second chances. Shave, clean, and dry the area, and apply transfer gel thinly and evenly — too much gel is the classic cause of a long stencil sliding, and on a back piece you may not notice until the gel has set. Place the stencil once, press from the centre outward, and do not slide it to adjust: sliding drags the wet transfer and doubles your lines. Peel slowly from one end, and check before peeling the whole thing off — a corner that has not taken can still be pressed back down, but only before the rest is peeled.
For a back piece, use a second pair of hands. One person holds the strip taut and level, the other presses it down from the centre outward. Applying a metre-long stencil alone, reaching around a client's back, is how panels go on crooked — and a crooked panel on a back piece is a reprint, not a fix. Give the transfer its drying time, then check the full composition from a step back before the first line goes in. At this size, a small drift reads as a big mistake.
Our Pick for large stencil work
For large designs, our pick is the INKSOUL T08FD. It is our flagship stencil printer: the improved successor to the classic T08FS, with a smart touch screen for fingertip control, INKSOUL-exclusive custom colours, and a much lower failure rate than the older model. It prints realistic shading and shadow gradients — the detail a large design lives or dies on — and it takes both A4 sheets and 210 mm roll paper, so the roll method here needs no extra machine. Pair it with the INKSOUL 210 mm x 30 m stencil paper roll for continuous prints, and keep A4 sheets on hand for the split-panel method. The T08FS remains the classic model, with a long track record behind it, for artists who already know and trust it.
If you are setting up for large work, the INKSOUL Transfer Workflow bundle pairs the T08FD with stencil paper and transfer gel, so printer, paper, and gel arrive as one working system.
FAQ
What is the widest design I can print without splitting?
On the T08FD, 210 mm — the width of its roll paper. If your design fits within that, print it as one continuous length, however long it needs to be.
Can I print a full back piece in one piece?
Only if its width fits within 210 mm. Most full back pieces are wider, so split them along background edges, add registration marks across each join, and apply panels in sequence from the centre outward.
How do I stop split panels from drifting apart on the skin?
Mark a short registration line across each join on both panels before cutting, label the panels in order, and apply one at a time, checking each before placing the next. Do not slide a panel once it is down — sliding drags the wet transfer and doubles the lines.
Does roll paper actually save money over sheets?
Yes, for studios doing large or frequent work: you cut only the length each design needs instead of burning a full A4 sheet per print. For occasional small designs, the saving is minor and sheets are simpler.
What if my design is wider than 210 mm and I hate splitting?
Then a wider-format machine is the honest answer — but check its print width and paper availability first, since width varies by model. For most studios, a disciplined split method covers wide work without a second machine.
4.5mm stroke
What Is a 4.5mm Stroke Tattoo Pen Machine Good For?
Short answer: A 4.5mm stroke pen is a specialist for bold, single-pass lining and fast, solid color packing. Buy it if thick traditional outlines and large filled areas are most of your week; skip it if soft black-and-grey shading, fine line, or PMU is your main work — a 4.5mm hit is too hard for that.
What stroke length actually measures
Stroke length is how far the needle travels up and down in one motor cycle — 4.5mm of travel per cycle here. It is set by the machine's cam and motor geometry, and it is the single biggest factor in how "hard" or "soft" a machine hits.
Kill the beginner mix-up first: stroke length is not needle depth. A 4.5mm stroke does not mean the needle goes 4.5mm into the skin. Depth is set separately by how far you hang the needle out of the cartridge, usually around 1–2mm into the skin. Stroke decides how much force is behind each puncture; hang decides how deep it goes. Confusing the two is how artists buy a long-stroke machine expecting "deeper tattoos" and end up with chewed-up skin instead.
One more piece of physics: at the same voltage, a longer stroke hits harder but cycles slightly slower, because the motor pushes the needle through a longer path each revolution. That is why experienced artists drop their voltage when they step up in stroke — same hand, same needles, less trauma. It is also why a short stroke can fail on a big liner: if the needle does not fully retract into the cartridge on each cycle, it cannot pick up fresh ink from the reservoir, and a bold line turns patchy no matter how steady your hand is. A 4.5mm stroke has retraction to spare. That is its whole point.
4.5mm vs 3.5mm vs 4.0mm: what actually changes on skin
Ink per pass. The 4.5mm stroke drives more pigment into the skin with every cycle than a 3.5mm or 4.0mm. On large solid color fields and thick black fills, you finish in noticeably fewer passes. Fewer passes means less total time the skin is being worked — which, done with a controlled hand, is actually kinder than going over the same area four times with a softer machine.
Line quality. Bold lines are where a 4.5mm earns its keep. A thick traditional outline that takes two passes with a 3.5mm often lands in one confident pass with a 4.5mm. Single-pass lines heal cleaner because the skin only gets opened once — and because the needle hangs further out of the tip at this stroke, you can actually see the tip better on a long line, which helps accuracy.
Shading. This is the trade-off, and it is sharper at 4.5mm than at 4.0mm. The softer, faster hit of a 3.5mm layers smooth gradients beautifully; a 4.5mm tends to leave shading that looks harsh and stippled unless you run it low and keep your hand genuinely light. It can be done — but you are fighting the tool's nature, and on a multi-pass gradient you will overwork the skin before you get the blend you want.
Trauma margin. A harder hit forgives less. Heavy-handed artists who get away with it on a 3.5mm will blow out lines and overwork skin on a 4.5mm. The machine does not cause the damage; it just stops covering for your pressure. And the step from 4.0mm to 4.5mm is smaller than the step from 3.5mm to 4.0mm — if you already own a good 4.0mm and it handles your lining, a 4.5mm is an upgrade in power, not a different universe. Buy it for the extra margin on big groupings, not because the number is bigger.
For the neighbouring choice, see our 4.0mm stroke guide.
Who should buy a 4.5mm machine
Buy it if you do: bold traditional or neo-traditional lining, tribal work, blackwork with large solid fills, big color pieces where packing speed matters, or work with large needle groupings — big liners and magnums — that a medium stroke struggles to push. Cover-ups on heavily tattooed skin are another honest use, with careful assessment first.
Skip it if you do: black-and-grey realism, portraits, soft whip shading, fine-line minimalism — or PMU. Brows, lips, and scalp work typically run 1.8–3.5mm; a 4.5mm on lip tissue is asking for swelling and trauma. Beginners should also start on a 3.5mm: it forgives the heavy hand you are still training out of yourself. Move up to 4.5mm once your pressure control is consistent and you can actually feel what a stroke change does on skin — not before.
Dotwork deserves a careful note, because advice conflicts here. A hard, clean hit deposits a single dot solidly, which is why some dotwork artists like long strokes. But dotwork is thousands of identical punctures, and a 4.5mm hit punishes any inconsistency in pressure — test it on practice skin first.
4.5mm machines compared: real specs from our shelves
No invented numbers below — every spec is taken from the product's own page, and unknown means the page does not publish it.
Machine
Stroke
Motor
Battery (stated)
Price
Best for
Dragonhawk Mast Archer Ultra
4.5mm fixed
MCore motor
2300mAh, over 6.5 hours stated, wireless charging dock
$599
The dedicated 4.5mm: bold lining and packing, Bluetooth/app control
WJX Hyper Force bundle
4.5mm
Faulhaber brushless motor
Unknown
$579 (kit)
A 4.5mm kit buy, if you want the bundle rather than a single pen
Dragonhawk Mast Fold Pro
2.4–4.2mm adjustable (7 strokes)
Coreless
1500mAh, 4–6 hours stated
$249–$279
Flexibility — but note the ceiling: it tops out at 4.2mm, not 4.5mm
Dragonhawk Mast Archer 2
3.5mm fixed
Brushless
Unknown
$189
The 3.5mm benchmark — buy this instead if shading is your main work
Two honest notes on that table. First, the Archer Ultra's stated battery — 2300mAh and over 6.5 hours — is the disclosure you should demand from any wireless pen; vague "long battery life" claims that hide the mAh number are a red flag. Second, the Fold Pro costs far less than either fixed 4.5mm, but it does not reach 4.5mm. If you specifically need 4.5mm of hit, no adjustable pen on this list gets you there — buy the fixed stroke.
A related option: the INKSOUL HV6 Pro runs 4.2mm with two grips, two batteries, and two modes. It is not a 4.5mm machine — but for an artist who wants a long-stroke pen that runs all day on a second battery, it is the practical alternative to check before paying flagship prices.
Buying checklist: 6 things to check before you pay
Fixed or adjustable — and what the ceiling really is. "Adjustable stroke" does not mean "goes to 4.5mm." Check the top of the range, not just the fact that it adjusts.
Motor torque for large groupings. A 4.5mm stroke is bought to push big liners and magnums. Ask whether the motor holds up under a large grouping at working voltage — a pen that sings on a 3-round liner and bogs down on a 15-magnum is not a 4.5mm pen in practice.
Battery stated in mAh and hours, not adjectives. If the listing will not give you both numbers, assume the worst.
Grip comes off for cleaning. A pen whose grip cannot be removed for proper cleaning is a pen with a built-in expiry date — check this before you buy, and check whether spare grips and small parts are sold separately.
Weight and balance with the battery fitted. A long-stroke pen is already a hard hitter; a tail-heavy pen makes a long session harder on your wrist. Judge the weight as you will hold it, battery in, not the bare pen figure.
Your voltage plan. Budget a practice-skin session to re-dial voltage (see below). A 4.5mm pen bought and run at your old 3.5mm voltage on a paying client is the most common way this purchase goes wrong.
Setting up a 4.5mm: the voltage mistake everyone makes
The classic first-week error: an artist switches from a 3.5mm to a 4.5mm, keeps the exact same voltage, and wonders why the skin looks chewed. Same voltage plus a longer stroke equals a meaningfully harder hit. Start about a volt below whatever you ran on your 3.5mm, then tune by watching the skin — not by chasing a number someone posted online. Voltage is a starting point; the skin's response is the actual setting.
One genuine advantage nobody talks about: a longer stroke lets you hang the needle a little further out of the cartridge while keeping control, improving your visibility of the needle tip on long lines. Use it — a 4.5mm rewards a slightly longer hang in a way a 3.5mm doesn't.
And the hard rule: long stroke plus heavy hand is the blowout recipe. Lighten your pressure and let the machine's momentum do the work. If you catch yourself pressing harder to "help" the machine, your voltage is too low — turn the dial, not your wrist. New to long strokes? Run your first session on practice skin: cheaper than a touch-up, and the only honest way to learn what 4.5mm feels like before a client is under the needle.
FAQ
Is a 4.5mm stroke machine good for beginners?
No. Start with a 3.5mm all-rounder — it forgives the heavy hand every beginner has while pressure control is still developing. Move to a 4.5mm once your hand is consistent and you can actually feel what a stroke change does on skin.
Can I do shading with a 4.5mm stroke?
You can, at lower voltage with a genuinely light hand, but you are fighting the tool's nature — the hard hit wants to leave harsh, stippled gradients. If shading is half your workload, keep a 3.5mm for shading days or buy an adjustable-stroke pen instead.
Does a 4.5mm stroke go 4.5mm deep into the skin?
No — this is the most common beginner mix-up. Stroke is how far the needle travels per cycle; penetration depth is set separately by your needle hang, typically around 1–2mm into the skin. Never set your depth from the stroke number.
Fixed 4.5mm or adjustable stroke — which costs less in the end?
A fixed 4.5mm on our shelves runs $579–$599, which is flagship money. If lining and packing are your main work, that is the honest price of the specialist tool. If you also shade daily, one adjustable pen ($249–$279) replaces two fixed machines — but remember its ceiling is 4.2mm, not 4.5mm, so it is a compromise, not a substitute.
What voltage should I run a 4.5mm stroke at?
There is no universal number — it depends on the machine, the needle grouping, and the skin. Start about one volt below your usual 3.5mm setting and adjust by watching how the skin responds. Anyone giving you a single “correct” voltage for every 4.5mm is guessing.