The foundation of every flawless tattoo is an immaculate stencil. If your lines are blurry, your stencil wipes away after the first pass, or you are spending hours tracing complex geometric patterns over a light box, you are actively losing money and compromising your art. The transition from physical tracing to digital design transfer has revolutionized the industry, but setting up a reliable system outside of a traditional shop environment presents unique challenges. Many artists ask us how to streamline their workflow when operating out of a private studio or home setup.

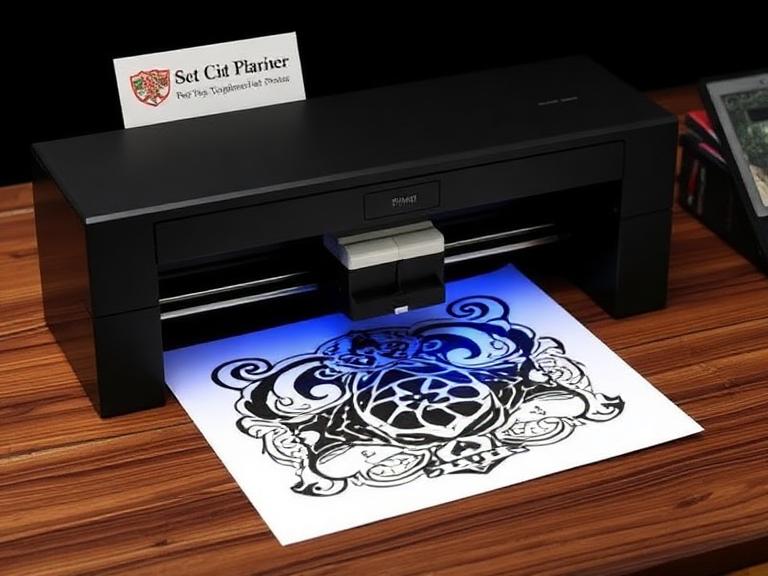
Direct Answer: Printing tattoo stencils at home requires specialized hardware. You cannot simply put spirit paper into a standard desktop inkjet printer. You must use either a dedicated thermal stencil printer (which uses heat to transfer carbon onto the transfer sheet), a modified EcoTank inkjet printer loaded with specialized methyl violet stencil ink, or a standard laser printer utilizing specific laser-compatible transfer paper. For consistent, professional-grade results that will not smear during the tattoo process, a dedicated thermal stencil printer is the industry standard.
Quick Answer: The 6 Methods at a Glance
- Dedicated Thermal Printer (Recommended): Uses heat to melt carbon onto the transfer sheet. Fast, reliable, and requires no ink cartridges.
- Modified Inkjet Printer: Uses an EcoTank printer filled with specialized stencil ink. Offers the highest resolution for extreme realism.
- Wireless Portable Thermal Printers: Battery-powered thermal printers driven by Bluetooth tablet apps. Ideal for traveling artists.
- Standard Laser Printer (With Caveats): Requires specialized laser-compatible transfer paper; cannot use standard thermal paper.
- The "Inkjet Hack" (Not Recommended): Printing on standard paper and tracing over it. A massive waste of time.
- Hand Tracing over a Lightbox: The analog method. Zero tech required, but highly inefficient for commercial pacing.
Table of Contents
- What It Is: The Mechanics of Stencil Printing
- How It Works: Thermal vs. Inkjet
- The 6 Ways to Print Stencils at Home
- Benefits of Upgrading Your Setup
- Limitations to Consider
- Who Should Use It & Who Does Not Need It
- Common Mistakes During Transfer
- Commercial Buying Considerations
- Summary & Comparison Tables
- Expert Recommendation & INKSOUL Spotlight
- Frequently Asked Questions (FAQ)
What It Is: The Mechanics of Stencil Printing

Printing tattoo stencils at home is the process of taking a digital design—usually created on an iPad using Procreate—and transferring it onto a physical medium that can adhere to human skin. The physical medium relies on a chemical compound, historically methyl violet, which temporarily stains the epidermis when activated by a specialized stencil application fluid (like Stencil Stuff or INKSOUL gel).
Standard home printers use standard document ink, which is toxic, prone to immediate smearing, and will not adhere to skin. Therefore, you must bridge the gap between your digital file and skin-safe carbon paper. Understanding what kind of printer you need for tattooing is the first step in avoiding catastrophic hardware purchases. You are not buying a printer to print on paper; you are buying a machine to manipulate specialized carbon.
How It Works: Thermal vs. Inkjet
There are two dominant technologies dominating the private studio space: Thermal and Inkjet.
Thermal Printing: This technology uses a printhead comprising hundreds of tiny heating elements. As the specialized thermal transfer paper feeds through the machine, the micro-heaters activate, melting the carbon layer of the paper directly onto the transfer sheet. This requires absolutely no ink or toner. To dig deeper into the material science, read our guide on what tattoo stencil paper is made of.
Modified Inkjet Printing: This process uses a piezoelectric printhead. Instead of heat, it uses electrical currents to force microscopic droplets of liquid stencil ink onto tracing paper. This method requires purchasing a brand-new, empty Epson EcoTank printer and filling the reservoirs with aftermarket stencil ink instead of standard printer ink.
The 6 Ways to Print Stencils at Home
1. Dedicated Thermal Stencil Printers
This is the workhorse of the industry. From our experience, 90% of professional artists rely on thermal copiers. You feed your master design (or connect via Bluetooth) and the thermal paper into the machine, and it spits out a ready-to-apply stencil in ten seconds. They are robust, do not suffer from clogged ink nozzles, and are practically maintenance-free. If you are serious about your craft, exploring the best tattoo stencil printers in the thermal category is your primary objective.
2. Modified Inkjet Printers (EcoTank)
For artists specializing in micro-realism or highly detailed portraiture, modified inkjets offer unparalleled DPI (dots per inch). Because it prints liquid ink, it can capture soft shading and intricate gradients that a thermal printer might render as a solid block of purple. However, it requires constant maintenance to prevent the printheads from drying out.
3. Wireless Portable Thermal Printers
A sub-category of thermal printers, these devices are battery-operated and rely exclusively on Bluetooth connectivity to a smartphone or tablet. They use continuous roll thermal paper. If you are doing guest spots or working in a highly compact home studio, a wireless tattoo stencil printer eliminates cable clutter and streamlines the iPad-to-stencil workflow.
4. Standard Laser Printers (Specialized Paper)
Many artists wonder if they can use their home office equipment. We frequently answer the question: can a normal printer print tattoo stencils? Yes, but only a laser printer, and strictly with specialized laser stencil paper (like Pacon). You cannot put standard thermal spirit paper through a laser printer; the fuser will melt the carbon, destroying the printer and creating a massive fire hazard.
5. The "Inkjet Hack" (Standard Inkjet + Hand Tracing)
If you only have a standard inkjet filled with normal ink, your only option is to print your design on regular copy paper, place it over a sheet of manual transfer paper, and trace it firmly with a ballpoint pen. For those asking can I use a regular printer for tattoo transfer paper directly—the answer is no, it will not work.
6. Hand Tracing Over a Lightbox
The traditional method. You place your printed design on an LED lightbox, tape manual transfer paper over it, and draw every line by hand. While it builds muscle memory, it is agonizingly slow for large pieces and highly prone to human error when reproducing geometric mandalas or perfectly symmetrical designs.
Benefits of Upgrading Your Setup
In most professional situations, time is literally money. Upgrading to a digital thermal or modified inkjet setup reclaims the hours you previously spent hand-tracing. Furthermore, digital printing guarantees structural perfection. Circles are perfectly round, straight lines are flawlessly straight, and client sizing adjustments take three seconds on an iPad rather than thirty minutes of re-drawing.
Limitations to Consider
Thermal printers struggle with soft shading and gradients. They excel at hard outlines. Modified inkjets excel at shading but require constant use; if you leave stencil ink sitting in an EcoTank for three weeks without printing, the nozzles will clog, effectively ruining the machine. Additionally, printing tattoo stencils at home requires a steady supply of high-quality carbon paper, which is an ongoing consumable cost.
Who Should Use It & Who Does Not Need It
For beginners: If you are just starting your apprenticeship or practicing on synthetic skin, investing in a basic thermal printer will accelerate your learning curve. Check out our guide on tattoo machines for beginners to complete your setup.
For commercial users: Private studio owners doing multiple clients a day must have a robust, high-speed thermal or touch-screen printer. Hand-tracing while a client waits in the chair is unprofessional and cuts into your hourly rate.
Who does not need it: Hobbyists who only tattoo once every six months. The initial hardware investment is unjustified if the machine will simply gather dust. Stick to hand-tracing.
Common Mistakes During Transfer
The hardware is only half the battle. In our testing, the most common reason a perfectly printed stencil fails to stick is poor skin preparation. If you do not shave and aggressively degrease the skin with alcohol or green soap before applying the stencil gel, the carbon will float on the skin's natural oils and wipe away during the first pass. To master this, consult our detailed walkthrough on how to use tattoo transfer paper.
Another catastrophic error is failing to mirror the image before printing. If your design features text or specific directional elements, it will appear backward on the skin if you do not flip the image horizontally in your software prior to sending it to the printer.
Commercial Buying Considerations
When selecting your hardware, apply commercial judgment. Do not buy cheap, unbranded thermal copiers from generic marketplaces; they frequently overheat, causing the carbon to bleed and create blurry, unusable lines. Look for machines with high-resolution thermal heads (203 DPI or higher) and anti-overheating technology. For heavy-duty applications, we recommend exploring the professional tattoo machines ecosystem, ensuring your printer matches the caliber of your rotary tools.
Data and Decision Matrices
Quick Summary Table: Printer Types
| Printer Technology | Best Application | Maintenance Level |
|---|---|---|
| Thermal Stencil Printer | Hard linework, traditional, neo-traditional, lettering. | Very Low (No ink needed) |
| Modified Inkjet (EcoTank) | Micro-realism, smooth shading, intricate portraiture. | High (Requires frequent use to prevent clogs) |
| Standard Laser Printer | Budget setups with specialized laser transfer paper. | Medium (Toner replacement) |
Pros and Cons Table: Thermal vs Modified Inkjet
| Technology | Pros | Cons |
|---|---|---|
| Thermal Copiers | Instant output, highly reliable, zero ink clogs, portable options available. | Cannot easily print soft shading or complex greyscale gradients. |
| Modified Inkjet | Incredible high-resolution detail, captures shading perfectly, very cheap cost-per-page. | High initial setup cost, voids printer warranty, extreme risk of printhead clogs. |
Buying Guide Table: Key Features to Evaluate
| Feature | Why It Matters | Our Recommendation |
|---|---|---|
| Connectivity | Determines your workflow. Cables clutter a small studio desk. | Opt for Bluetooth/Wi-Fi models to print directly from Procreate on your iPad. |
| Anti-Wrinkle Technology | Cheap rollers chew up expensive transfer paper. | Look for printers with tension-adjusted silicone rollers. |
| Shadow Printing Mode | Standard thermal printers just print solid black. | Select models with dedicated "Photo" or "Shadow" modes for better gradients. |
Expert Recommendation & INKSOUL Spotlight
Explain not only WHAT something is, but WHETHER it is actually worth using, buying, or upgrading. If you are operating a private studio or taking your apprenticeship seriously, upgrading to a dedicated thermal printing system is not an option; it is a mandatory investment. Hand-tracing costs you hours of billable time and introduces unacceptable margins of error. We strongly advise against the "Inkjet Hack" or trying to force standard printers to do a specialized job.
In our testing, the absolute most efficient way to handle printing tattoo stencils at home is by adopting a fully integrated ecosystem. This ensures your printer, paper, and transfer gel are chemically formulated to work together. For this, we point directly to the INKSOUL Transfer Workflow.

INKSOUL Transfer Workflow
This comprehensive bundle eliminates the guesswork of matching disparate brands. It includes the advanced touch screen tattoo printer (T08FD), which offers seamless connectivity and precise thermal control. By combining the printer with INKSOUL's proprietary stencil paper and application gel, you guarantee a dark, crisp transfer that will survive long, heavy-duty sessions without wiping away.
- Includes the advanced T08FD printer.
- Comes with Stencil Paper x2 and Stencil Gel x4.
- "For All" bundle: T08FD + SP100 + LP100 + Gel x4.
- "For Shadows" bundle: T08FD + SP100 + Roll Paper + Gel x4.
- Optimized combination for clean, precise stencil transfers.
Once you have secured your stencil workflow, ensure your machinery is up to par by reviewing our insights on the thermal tattoo printer market and pairing it with equipment from the top tattoo machine brands.
Frequently Asked Questions
Can I use regular printer paper for tattoo stencils?
No. Regular printer paper does not contain the methyl violet carbon required to transfer a design onto human skin. You must use specialized tattoo transfer paper (often called spirit paper) designed to release its carbon layer when exposed to heat or specialized liquid ink.
Why is my thermal stencil printing out blurry?
Blurry thermal stencils are usually caused by a dirty printhead, feeding the paper in at a crooked angle, or using a digital design with extremely low resolution. Ensure your digital canvas is set to at least 300 DPI, and clean the thermal printhead regularly with isopropyl alcohol.
Do I need a computer to print tattoo stencils?
Not anymore. Modern wireless thermal printers can connect directly to your iPad or smartphone via Bluetooth. You can draw your design in Procreate, hit print, and have a ready-to-use stencil in seconds without ever touching a desktop computer.
Authoritative References
To ensure our operational guidance aligns with health and engineering standards, we reference the following authorities:
- National Institutes of Health (NIH) - Dermatological impact and contact dermatitis related to tattoo transfer papers.
- IEEE Xplore Digital Library - Engineering mechanics and thermodynamic properties of thermal printhead technology.
- Centers for Disease Control and Prevention (CDC) - NIOSH Workplace Safety and Health Topics: Body Art Professionals.