新闻
freehand stencil
How to Draw on Tattoo Transfer Paper
Yes — you can draw directly on tattoo transfer paper with a ballpoint pen or a stylus, no printer needed. Draw on the top sheet with firm, even pressure and the carbon layer underneath copies every line onto the sheet that touches the skin.
Hand drawing is the fastest way to make a one-off stencil — a walk-in flash piece, a freehand adjustment, a design that only exists in your head. It is also the slowest way to make a complicated one. This guide covers the paper, the pen, the pressure, and when to stop drawing and print instead.
What you are actually drawing on
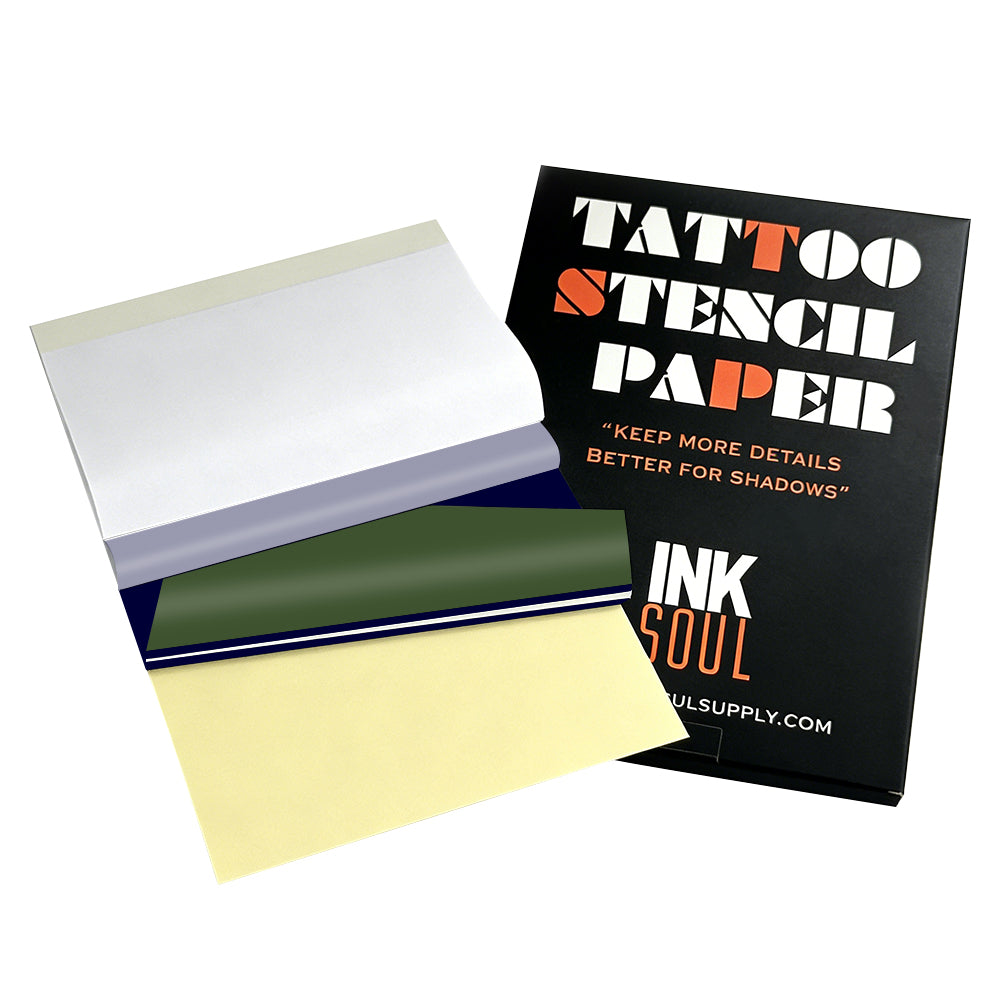
A sheet of tattoo transfer paper is a stack, and each layer has one job:
Top sheet (master sheet): the white sheet you draw on. Your pen never touches anything else.
Carbon layer: the purple or blue sheet in the middle. Your pen's pressure pushes its pigment onto the back of the top sheet — that back becomes the stencil.
Protective tissue (onion sheet): a thin separator that keeps the carbon from marking the top sheet in storage. Remove it for the darkest transfer (see step 2).
Backing sheet: the bottom layer. Leave it in place — it keeps the stack aligned and the carbon off your desk.
Two types of paper take hand drawing. Freehand (hectograph) paper is made for it: its carbon layer is pressure-activated and forgiving of uneven strokes. Thermal paper is made for heat. It also takes a pen, but the lines come out lighter and less consistent — its carbon layer is tuned for the printhead, not your hand. Use a stylus and firm pressure. For printed work the paper choice matters more: our SP100 is made for shadow work and the LP100 for line work, both $38.88 for 100 A4 sheets.
The right pen (and the wrong ones)
The pen is not leaving ink on the paper — it is pressing pigment through three layers. What works:
Medium-tip ballpoint pen: the studio standard. A firm, round tip presses evenly without cutting the top sheet. This is the tool to reach for first.
Stylus or hectograph pencil: purpose-built for this job. A stylus gives the most consistent line weight over a long session — the tip never goes soft or scratchy.
Fine-tip ballpoint: good for detail and lettering, but keep pressure light — a sharp tip tears the top sheet faster than a medium one.
What does not work: a soft graphite pencil (6B and softer). Graphite smears under your palm, and a soft lead cannot press the carbon evenly — grey smudge on top, faint broken line underneath. The final pass on transfer paper should always be pen or stylus.
How to draw on tattoo transfer paper: step by step
1. Set up a hard, flat surface
Carbon transfer needs resistance underneath. A clipboard or a hard table works. A soft surface — a sketchbook, a bed, your thigh — absorbs the pressure and your lines come out uneven. Tape the top corners down so it cannot shift mid-drawing.
2. Remove the tissue layer
Peel out the thin protective tissue between the top sheet and the carbon for the darkest transfer. Drawing through it still works, but the lines come out lighter — some artists keep it in while sketching, then remove it for the final pass. Keep the backing sheet underneath.
3. Draw on the top sheet, in one confident pass
Draw the design on the top white sheet, as you want it on the skin. Use smooth strokes and steady, even pressure — not a death grip. Work top to bottom (left to right if you are left-handed) so your palm never rests on lines already drawn; hand oils and friction smear fresh carbon.
4. Check the transfer before you commit
Halfway through, lift a corner and check the underside: lines should be solid purple and continuous. Faint or broken lines mean too light; a torn top sheet means too hard. Adjust now, while you can still redraw.
5. Trim close to the lines
Cut close to the design, leaving a small margin. Less loose paper means less chance of shifting or creasing when you press it to skin, and easier positioning on curved areas like ribs or forearms. Store finished stencils flat with the tissue slipped back in — heat and pressure in a bag smudge the carbon.
6. Prep the skin, then apply
Shave if needed, wash with antibacterial soap, wipe with alcohol, then apply a thin, even layer of stencil gel. Wait until it turns tacky — about 30 seconds to a minute — then place the stencil face down and press firmly for 30 to 60 seconds without sliding it. Peel from one corner. If a line looks weak, do not press the paper back down — it will double-print. Redraw instead. If the whole placement is wrong, wipe it off with green soap and water and start over — never tattoo over a stencil you cannot trust.
7. Let it dry before you tattoo
Give the stencil 5 to 15 minutes to dry fully — starting too soon turns a crisp stencil into a smudge halfway through the outline. For the full routine, see our guide on using stencil gel so the transfer stays sharp all session.
Do you need to draw it backwards?
No — the image flips twice. Your pen presses the carbon onto the back of the top sheet, which mirrors the drawing — then that back goes face down on the skin, which mirrors it again. The stencil lands the right way round. Draw normally, exactly as you want it to look.
The same applies when tracing a printed reference: trace what you see. A printed design that looks reversed is a printer problem, not a drawing problem — see which side of transfer paper faces up.
Pressure and line weight: the part that separates clean stencils from muddy ones
Hand-drawn lines come out on skin slightly heavier than they look on paper — the carbon spreads a fraction under pressure and the gel softens the edge. Two adjustments fix most muddy stencils:
Draw fine lines thinner than the final tattoo line. If the tattoo needs a 0.35 mm line, draw it like a 0.25 mm line — the transfer fattens it for you. Draw at full weight and the stencil looks bold before the needle touches skin.
Keep pressure even, not hard. Past a point, pressing harder does not darken the stencil — it tears the top sheet and embosses a trench that prints as a thick, blurred line. If lines are faint, make a second slow pass over the same stroke.
Shading is the hard limit of hand drawing: you cannot print grey wash with a pen. Map shadow areas as boundary lines and shade freehand with the machine. If the design lives or dies on smooth gradients, that is a printing job.
Hand-drawn vs printed: when to put the pen down
Hand-drawn on transfer paper
Printed (thermal stencil printer)
Best for
One-off designs, walk-in flash, freehand adjustments
Repeat designs, large pieces, fine-line detail
Speed
Minutes for simple designs; hours for complex ones
Seconds per sheet once the file is ready
Line consistency
Depends on your hand that day
Identical every time
Shading
Boundary lines only — shade with the machine
Prints shadow gradients (SP100 paper)
Gear needed
Paper + a ballpoint pen
Printer + paper + phone app
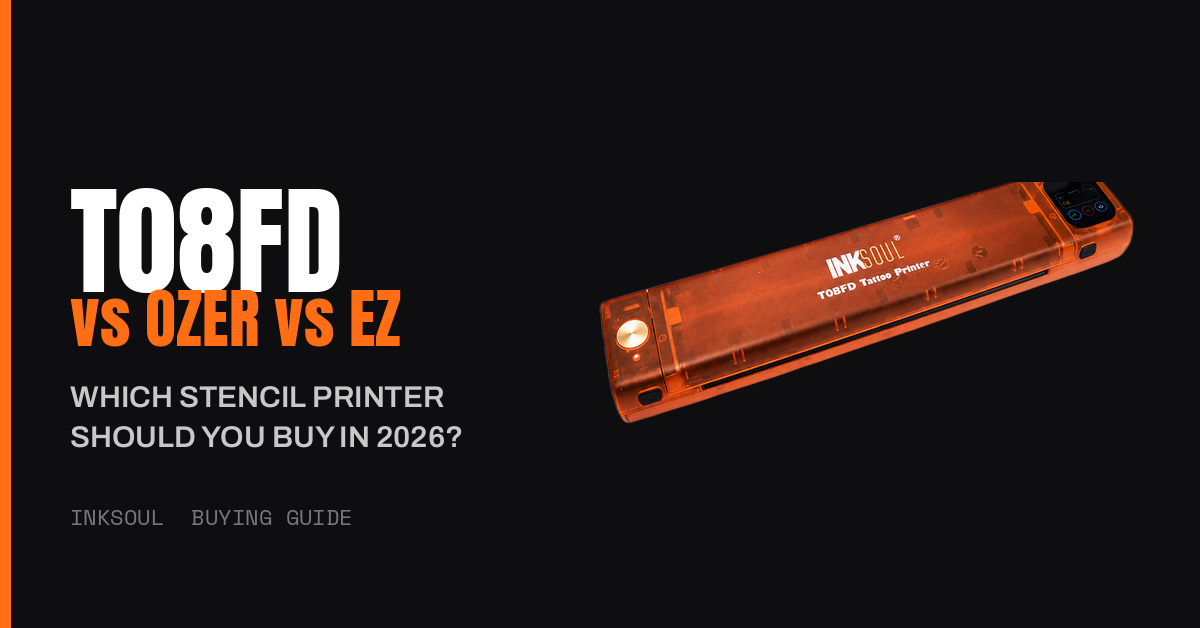
When you are redrawing the same design for the third time, printing starts paying for itself. Our pick is the INKSOUL T08FD ($188.88): its touchscreen lets you preview and size the design before it prints — the second look hand drawing cannot give you. The T08FS ($168.88) is the classic wireless model if you print from your phone. The transfer workflow bundle ($288.88) pairs the T08FD with LP100 and SP100 paper plus stencil gel. Our full comparison is in the best tattoo stencil printer for professional use.
5 mistakes that ruin a hand-drawn stencil
Mistake
What happens
Fix
Drawing through the tissue layer
Lighter lines than a direct pass
Remove the tissue for the final pass; keep it in only while sketching
Soft pencil instead of ballpoint
Grey smudge on top, broken line underneath
Sketch in pencil on scrap; final pass in pen or stylus
Resting your palm on drawn lines
Hand oils and friction smear the carbon
Work top to bottom; keep the drawing hand floating
Re-pressing a weak line
Double-printed ghost lines
Never re-press; redraw a fresh stencil
Trying to erase a wrong line
Correction fluid and alcohol smear the carbon
Start a fresh sheet; keep the spoiled one for practice
Tattooing before the stencil dries
Lines smudge under the first wipe
Wait 5–15 minutes; test with a light touch first
FAQ
Can you draw on thermal transfer paper by hand?
Yes, but not as well as on freehand paper. Thermal paper's carbon layer is thinner and tuned for heat, so hand-drawn lines come out lighter and less consistent — use a stylus and firm pressure. Freehand (hectograph) paper is the better choice if you are buying paper to draw on: its carbon is made for pressure transfer and more forgiving of uneven strokes.
What pen do you use to draw on tattoo transfer paper?
A medium-tip ballpoint pen is the studio standard: firm, even pressure without tearing the top sheet. A stylus or hectograph pencil works just as well and holds line weight better over a long session. Avoid soft graphite pencils — they smear and cannot press carbon evenly.
Do you draw on the carbon side or the white side?
Draw on the white top sheet, never directly on the carbon. Your pen's pressure pushes the carbon pigment onto the back of the top sheet, and that back is what transfers to the skin. Remove the protective tissue first; leave the backing sheet in place.
Why is my hand-drawn stencil too faint?
Usually one of three things: you drew through the tissue layer, the pressure was too light, or the paper sat on a soft surface that absorbed the force. Check by lifting a corner mid-drawing — the underside should show solid, continuous purple lines. If lines are broken, slow down and make a second pass over the same stroke instead of pressing harder.
Is it better to draw a stencil by hand or print it?
For a one-off design or a freehand adjustment, drawing is faster — paper and a pen, no file prep. For anything you will repeat, anything large, or anything with fine-line detail or smooth shading, print it: a thermal printer reproduces the same lines every time, and the T08FD's screen lets you check size and placement first.
stencil guide
纹身师怎么让转印稿场次中不花?
转印稿整场贴住四样:转印前皮肤干净干燥、对的转印介质薄涂、10–15 分钟真晾干、擦拭手法把色料往已纹线条外带。酒精湿巾和湿搓擦是场次中途杀转印稿的元凶——不是转印稿本身。
转印稿为啥花:真正出问题的是啥
转印稿不是纹身。设计坐皮肤上,薄层复写染料加转印介质粘着。三样场次中途溶解或掀掉这粘合:
溶剂。酒精快速重新溶解转印染料。酒精湿巾几秒擦掉转印稿就这——绿皂原液直接上,几遍擦就软化它。
潮加摩擦。湿擦加压让染料层重新水化拖过皮肤。湿毛巾轻过没事,泡透搓不行。
热。染料受体温影响。工作手长压转印稿上,染料从客户身上蹭到您身上。老手学着把手撑在已完工区。
这篇每个预防技巧归一:粘合一次粘合牢,场次结束前 化学和机械损伤能少最少。
第 1 步——备皮备对
转印稿只能粘住它贴的面。皮肤油、乳液残留、细毛都隔在染料和皮肤之间:
剃毛,觉得没毛也剃。毛把转印介质从皮肤上吸走,染料粘着软毛一起剥落。
清洁,然后真晾干。酒精或绿皂去油——然后等皮肤摸上去全干,酒精全挥发(约 30–60 秒)再上转印介质。啫喱下残留酒精破坏您要建的粘合。
转印前不保湿。护理膏和凡士林隔离层留转印稿干后。
第 2 步——啫喱对棒对 Speed Stick:转印介质定很多
转印介质就是胶水。皮肤和纸之间放啥,定染料粘得多牢、多耐造。三类主导:
介质
粘合强度
容错
适合
专业转印啫喱(如 INKSOUL 转印啫喱)
最强
层匀,干得可预测
长场次、细节活、擦得多的人
棒状(胶棒式转印棒)
好
容易涂多
快小件、出差配置
Speed Stick / 走珠止汗(DIY 经典)
中等
大面积不均
预算凑合,只限假皮
每种介质两规则:薄赢。薄匀层粘得牢,厚层一直发粘染料浮在里面掉。介质到发粘——不湿不干再压纸。那发粘窗口染料抓得最牢。
Speed Stick 诚实一句:能用,半个行业拿它学的。但它为腋下设计的,不是为四小时场次固定住细线曼陀罗——棒状止汗也不是专业皮肤产品标准,真皮肤上只能凑合。转印稿老失败,升级专用啫喱如我们 INKSOUL 转印啫喱(4 fl oz / 120 ml,长场次加反复绿皂擦拭认证)是最便宜先修的变量。
第 3 步——晾干时间:别湿转印稿上开纹
人人吵的数。来源说法不一——学徒卡片说 5–10 分钟,tattooing101 和 Neebol 说 10–15,Joker Tattoo 说 15–20——所以 按情况定的答案真管用的:
最少 10 分钟针碰皮肤前,屋潮风扇帮忙。
大面积加时。整臂后背一件压的,纸下潮气比手腕件存得久。给 15–20。
指尖测试。设计不重要角摸——指尖带下紫/蓝,还没干。
过早开工三倍代价:转印稿第一擦就花,边缘洇开,线条徒手画您已经付过定位费的。等就是活。
第 4 步——救转印稿的擦拭手法
这步手册不写,区分转印稿扛八小时和三小时就重贴的纹身师:
往已纹转印稿外擦。永远从已完工区往已完工区擦。已纹的晕不开——但一擦把色料拖上没碰的线,再一擦清理,转印稿连色料一起擦掉。
工作方向重要。右手纹身师右下往左上,左手镜像。规划好手永不压明天的线。
蒸馏水或重稀释绿皂。这组合去色料血,伤转印稿比原液绿皂少得多。这阶段不用酒精湿巾——酒精是最快转印稿杀手。
转印稿干后铺凡士林隔离层。整设计薄层,机器多余色料不渗进转印稿周围皮肤,擦的是擦掉不是透过线条染色。
走线考虑干擦。走线换干纸巾,每条线干净利落。客户略不舒服,但干擦和重贴转印稿他们天天选干擦。
纹身师社区再一招:粘毛滚新转印稿上轻压,浮在皮肤上的松散多余染料粘走,粘住的线条不扰动。听着怪,管用——只有站别人椅子后才学到的那种。
第 5 步——还贴不住:诊断源头
上面全做了转印稿还失败,问题在上游。快速症状排查:
症状
可能原因
修法
第一小时内转印稿擦没
转印介质太多,或没干就开工
层涂薄,10–15 分钟等满
发虚、斑块转印——一开始就有线缺
纸压不均,或反面贴皮肤
均匀压力重压,染料面朝下再确认
细线留住打雾区没了
打印转印稿一开始太淡
打印机黑度往上调——多数热敏打印机有 Darkness/Deepness 控制(细线要浅端,粗活要深端)——看我们 转印稿太淡或太深修复指南
某品牌纸突然比以前差
配方变化时有发生——我们曾直说告诉客户某纸老配方做不出来了,原材料停产。染料颜色也有影响:很多纹身师反映紫染料纸比蓝色耐擦,场次长的值得试
新批次重测晾干时间和介质厚度,别以为技术坏了
串起来的工作流
转印稿扛住场次是链条每环都结实:打印干净、纸对、介质专用。我们 Transfer Workflow 套装当一系统卖就这——T08FD 打印机(我们的选择:触屏、INKSOUL 专属色、故障率比老款低得多)、我们 线条纸和 打雾纸,加转印啫喱。经典 T08FS(近千条评价社区信任)配同样纸啫喱,老机器派选它。
打印机、纸、啫喱——再技术。链对了转印稿不再是场次中途担心的东西。
FAQ
转印稿贴上多久开纹?
至少 10 分钟,大件或多段 15–20。指尖测试定:设计角摸——手指带下染料,没干透。
绿皂为啥比清水更快弄花我转印稿?
绿皂是表面活性剂,原液每擦松动染料粘合。场次中用重稀释绿皂或纯蒸馏水,原液皂留护理清洁。
Speed Stick 能代专业转印啫喱吗?
能,很多纹身师这起步——小件假皮粘得够。长场次细活,专用啫喱保持得肉眼可见久、上得更匀。
转印稿油皮汗皮上老消失咋办?
手臂内侧、脖子、汗大的客户是硬骨头。剃净去油彻底,啫喱涂薄发粘更快到,晾干时间给满,那段走线干擦。极油皮肤,第一遍发粘后第二遍薄涂换来更强粘合。
转印稿晾透还花为啥?
那粘合一开始弱——介质太多、转印时皮肤潮、打印太淡扛不住擦。修上游步骤(第 5 步症状表),别只等。
fine line tattoo
转印稿在皮肤上印太黑了怎么调浅?
转印稿落太黑不是打印机坏——是转印链问题。三处减淡:打印机打 Deepness 最浅档,转印啫喱薄涂晾到发粘再贴纸,撕下立刻粘毛滚或干净纸巾压掉多余染料。还像涂色书页,重打。别顶着纹。
转印稿为啥太黑
每个"太黑"转印稿追到六个原因之一。先诊断后修——多数时候打印机是链上最不该背锅的。
原因
咋回事
修法
打印浓度太高
Deepness 在重线档(一般标 II),或应用内黑度滑杆拉满
降到 Deepness I / 最浅档,先打 2–3 cm 测试条
转印啫喱太湿
厚湿啫喱把染料从纸上冲下来——头号常见原因
薄涂,晾到手摸发粘再贴转印稿
纸压太久
接触越久染料往皮肤迁越多
一次放准,均匀压力约 10 秒,撕一次
源文件墨太重
参考图重阴影热敏头一读压成实色染料
打印前转印应用里降对比/提高阈值
深色染料纸
紫色 hectograph 染料皮肤上看着比蓝色染料纸黑
换纸,或当它一档"黑度",打印设置浅一档找补
打印头脏
染料残留碳积在打印头上让它过热——头比设定打得更热,全出来黑
关机晾凉,棉签蘸异丙醇轻擦头条,干透再打。常用几周一次
打印前修:最快杠杆
市面几乎每台热敏转印打印机复印机两档热量——常标 Deepness I 和 Deepness II。命名很多纹身师觉得反直觉:Deepness I 是浅转印,细线细节用;Deepness II 重的,粗犷线条扛得住长场次擦拭用。转印稿老黑,先查在哪个档再说别的。"打印机坏了"投诉惊人多,II 翻到 I 结束。
区分在干纹身师和干着急的习惯:第一张不直接打整张。打 2–3 cm 条——设计一角——转自己前臂内侧或假皮上。三十秒测试胜过废整张转印稿加客户看您重来。
硬件这也重要。有屏机器浓度变化看得见调得准,纯按键机器两档粗调靠猜。我们工作站的选择 INKSOUL T08FD,打印前屏幕上控——它代替老款成我们天天主力机的原因之一(触屏、INKSOUL 专属配色、故障率远低于上代)。老 T08FS 还是经典主力机,纹身师评价库厚,但老跟黑度较劲,预浓度控制是真解的那个功能。
上法那修:黑转印稿多半这出的
扎心的真相:多数"打印机打太黑"是啫喱问题。厚湿转印啫喱不只固定转印稿——主动溶下纸上多余染料怼进皮肤。转印稿一直干净浅的纹身师都做同样无聊的事:
啫喱薄涂。一角硬币量,匀开,范围略超。表面看着潮不湿。
晾到发粘。戴手套指尖摸——微抓不滑。这步人人跳过。湿啫喱=黑花转印,发粘啫喱=干净可控转印。
一次放准,均匀压,别滑。结实均匀压力约十秒。纸滑动染料横蹭,边缘变黑。
慢撕,一气。撕完几分钟别动,让转印稿定住再周围擦拭。
还有两上法细节,比想的重要。第一,先剃毛酒精擦——油和细毛表面不平,染料斑块抓,花的地方看着"太黑"。第二,假皮规则略反:合成皮不像真皮吸收,多余染料浮表面看着黑。假皮上试黑度,预期比客户身上重约一档。
撕后修:粘毛滚技巧
全做对转印稿还重,别急着重打——多余染料能从皮肤上提走,线条不动:
粘毛滚。干净粘毛滚新转印稿上轻滚,表面染料提走,转印线条留着。书里最快修法,不花钱——在干纹身师那来的,不是说明书。
干纸巾压。折干纸巾盖转印稿上,结实压几秒,直上直下提。松散浮染料吸走。
点,别擦。非用潮的东西碰转印稿,点。擦把染料拖过皮肤,能修的黑转印变糊转印。
酒精最后手段。酒精棉轻过,转印稿下去一大截——细线一起下去。滚子选择性减淡,细节没了重打那件更划算。
凑合干还是重打
黑转印稿不都要修。判断看要纹啥:
粗犷传统 / 重黑风格:黑转印稿可行,有时还帮忙——线条扛得住长场次擦拭,反正饱和色料盖过去。
细线 / 单针 / 微写实:重打浅的。细线活重转印稿是恢复后发灰的隐形原因之一——粗紫引导线渗入您对真线位置的感知,线纹偏了。转印稿像涂色书,恢复的线也像。
人像写实:轮廓线都不要别说黑的。打雾引导点刺或点(tattooing101 转印纸指南推荐),打印浅——转印稿是打雾地图不是画本身。
经验:转印稿线条间看不见裸露皮肤,粗犷活以外都太黑。
转印稿黑度控制清单
贴工作站,成肌肉记忆:
Deepness 设置配线重(细线 I,粗犷 II)
整张前废纸或自己手臂上打测试条
啫喱薄涂晾到发粘——绝不湿
一次放准,均匀压力约 10 秒,慢撕一次
工作站备粘毛滚,撕后微调
清单跑完——打印头也擦干净——最浅档还黑,极限大概率硬件本身:有的预算机两档粗浓度没预览,最浅档细线活还太热。到这步该知道细控制买啥:T08FD 屏幕上确认前预览浓度,看到变浅不猜——同纸同啫喱,唯一变的变量是控制。
延伸阅读:镜像问题——转印稿打太淡——看我们 转印稿锐利度指南,打印机完全不认纸看 纸识别排查指南。
FAQ
皮肤上转印稿不撕能减淡吗?
能。干净粘毛滚轻滚提表面染料,或折干纸巾压几秒。都去多余不扰转印线条。用潮的东西点——绝不擦。
打印机最浅档转印稿还太黑咋办?
动另两杠杆:啫喱更薄晾到发粘(真最常见原因),压的时间短。查源文件——重阴影压成实色染料。三处都调到位还黑,机器最浅档就是太热,硬件局限,值得升级掉。
黑转印稿影响恢复吗?
转印稿染料本身不影响恢复,但黑转印稿改变您下针:细线写实活,重引导线骗您线落偏真设计,恢复后现的就是这偏。粗犷活,转印稿黑度跟恢复结果无关。
为啥有的客户身上转印稿更黑?
肤质备皮不一。油皮细毛染料抓不均,花斑看着黑——先剃毛酒精擦。很白的皮肤对比强,同转印稿看着重。啫喱薄厚压的时间按客户调,别一套流程打天下。