The foundation of any breathtaking tattoo is a flawless stencil. Before a single drop of ink penetrates the dermal layer, the artist must successfully transfer their meticulous design from a two-dimensional medium onto the complex, contoured, and dynamic canvas of the human body. Learning the exact methodology and steps to print a tattoo on skin is arguably as critical as mastering the shading or lining process itself. Without a crisp, highly visible, and durable stencil, executing a precise piece becomes an exercise in frustration and guesswork.

From our experience supplying elite studios worldwide, the transition from a digital or hand-drawn sketch to a physical stencil on the client's body requires specialized equipment, chemical adherence, and precise physical technique. When you attempt to print a tattoo on skin, you are essentially performing a localized chemical transfer using carbon-based pigments and specialized transfer gels. We recommend approaching this process with the utmost attention to detail, as a stencil that bleeds, smudges, or rubs off mid-session can severely compromise the final artwork. In this comprehensive, authoritative guide, we will break down the professional protocol required to print a tattoo on skin flawlessly, ensuring your stencil holds strong from the first line to the final highlight.
Table of Contents
- 1. The Anatomy of a Perfect Stencil Transfer
- 2. Essential Equipment Needed to Print a Tattoo on Skin
- 3. Step-by-Step Guide: How to Print a Tattoo on Skin
- 4. Troubleshooting Common Stencil Transfer Issues
- 5. Alternatives: Temporary and Cosmetic Applications
- 6. Post-Transfer: The Transition to Tattooing
- 7. Summary Table: Stencil Transfer Process at a Glance
- 8. Frequently Asked Questions (FAQs)
- 9. Authoritative References
1. The Anatomy of a Perfect Stencil Transfer
To consistently and accurately print a tattoo on skin, one must understand the interaction between the transfer paper, the transfer medium (gel or fluid), and the human epidermis. The stratum corneum, the outermost layer of the skin, is naturally coated in sebaceous oils, dead skin cells, and microscopic hairs. If a stencil is applied directly to an unprepared surface, the carbon pigment will not bond to the tissue, resulting in immediate flaking or wiping away during the tattoo process.
The goal when you print a tattoo on skin is to create a semi-permanent bond that can withstand the friction of green soap, continuous wiping, and the mechanical vibration of high-performance rotary and coil machines. This requires stripping the skin of its natural barriers and replacing them with a tacky, molecularly receptive transfer solution. Furthermore, the environment must be highly controlled; the quality of your INKSOUL adjustable, flicker-free LED studio lighting plays a crucial role in ensuring the stencil is aligned perfectly with the musculature and natural flow of the client's body.
2. Essential Equipment Needed to Print a Tattoo on Skin
Professional results demand professional tools. Attempting to print a tattoo on skin using inferior paper or generic deodorants as a transfer medium is a recipe for disaster. We recommend equipping your studio with the following INKSOUL-approved essentials to guarantee a flawless transfer process:
- Tattoo Transfer Printers: The cornerstone of modern stenciling. We highly recommend utilizing reliable thermal and wireless printers capable of rendering ultra-crisp lines. Models such as the INKSOUL T08FS, Phomemo TP31, and XIRU XR3 are engineered specifically for tattoo artists, ensuring dense carbon deposits on the transfer sheet.
- Tattoo Stencil Paper: High-contrast, smudge-resistant transfer paper is non-negotiable. INKSOUL provides premium stencil paper compatible with both thermal and ink-based systems, ensuring that every microscopic detail of your design is captured.
- Skin Preparation Solutions: Medical-grade green soap, 70% isopropyl alcohol, and sterile disposable razors are required to create a sterile, oil-free canvas.
- Professional Transfer Gel: A high-quality stencil application gel (often referred to as stencil stuff or transfer fluid) is the chemical bridge that allows you to print a tattoo on skin effectively. It activates the carbon on the paper and bonds it to the epidermis.
- Tattoo Lighting Supply: Proper visibility is critical. Our adjustable, flicker-free LED lights are tailored for studio visibility and color accuracy, allowing you to identify any anatomical distortions during stencil placement.
3. Step-by-Step Guide: How to Print a Tattoo on Skin
Executing a flawless transfer is a sequential process. Rushing any of these stages will result in a compromised stencil. Follow these professional guidelines to print a tattoo on skin with precision and longevity.
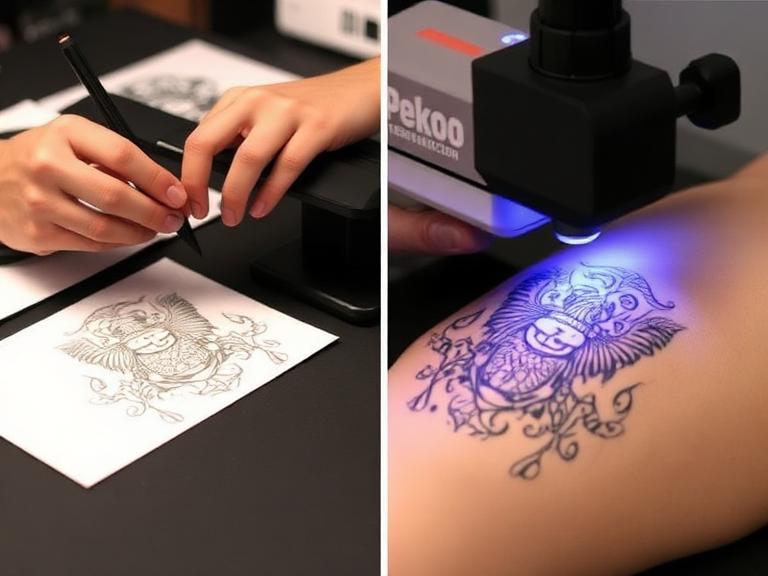
Step 1: Design Preparation and Thermal Printing

The process begins at the workstation. Whether you have hand-drawn the design or created it digitally on a tablet, the image must be converted into a thermal carbon copy. Insert your high-contrast INKSOUL stencil paper into your thermal printer (such as the INKSOUL T08FS or Phomemo TP31). Ensure that the machine's heat settings are calibrated correctly; if the heat is too high, the carbon will melt and bleed, resulting in blurry lines. If the heat is too low, the carbon deposit will be insufficient to properly print a tattoo on skin. Once printed, carefully cut around the design, leaving a small border. Cutting away excess paper allows the stencil to curve naturally around cylindrical body parts like arms and legs without creasing.
Step 2: Skin Preparation and Sterilization

You cannot print a tattoo on skin that is covered in hair, lotion, or natural oils. Begin by cleansing the target area with a professional green soap solution to remove surface dirt. Next, using a sterile, single-use disposable razor, shave the area completely, extending several inches beyond the planned perimeter of the tattoo. Shaving not only provides a smooth surface for the stencil but also prevents the tattoo needles from driving microscopic hairs into the dermis, which can cause severe infections. After shaving, aggressively wipe the area with 70% isopropyl alcohol. The alcohol acts as an astringent, stripping away all sebaceous oils and completely dehydrating the immediate surface of the stratum corneum, creating an ideal receptive surface.
Step 3: Applying the Transfer Solution
With a sterile, gloved hand, dispense a dime-sized amount of professional transfer gel. Massage the gel into the prepped skin. From our experience, the most common mistake artists make when trying to print a tattoo on skin is applying too much transfer solution. The skin should not be wet or slippery; it should feel slightly tacky to the touch, almost like the adhesive backing of a high-quality sticker. If the skin is too wet, the carbon will immediately liquefy and blur upon contact. If it is too dry, the carbon will not release from the paper.
Step 4: Placement, Pressing, and Peeling
This is the critical moment of execution. Under the illumination of your INKSOUL studio lighting, align the stencil carefully. Have the client stand or sit in a natural, relaxed posture to ensure the design does not warp when their muscles are at rest. Gently lay the center of the stencil onto the tacky skin, and then smoothly roll the edges outward to prevent air bubbles from trapping underneath the paper.
Once the paper makes contact, do not shift, slide, or adjust it. To effectively print a tattoo on skin, apply firm, even, downward pressure with a dry paper towel for approximately 5 to 10 seconds. The heat from your hand combined with the pressure forces the carbon to bond with the transfer gel. To remove the paper, peel it away starting from one corner in a smooth, continuous motion. Do not pull it straight up, as this can create a suction effect that lifts the carbon off the skin.
Step 5: Drying and Curing the Stencil
A beautifully placed stencil is useless if it wipes away during the first pass of your liner. Once you have successfully managed to print a tattoo on skin, you must allow the stencil to cure. We recommend letting the client sit for a minimum of 10 to 15 minutes before touching the area. This curing period allows the transfer gel to evaporate entirely, locking the carbon pigment into the microscopic crevices of the epidermis. A fully cured stencil will withstand hours of wiping, green soap applications, and the friction of your hands during the procedure.
4. Troubleshooting Common Stencil Transfer Issues
Even seasoned professionals encounter issues when attempting to print a tattoo on skin. Here are the most common problems and their immediate solutions:
- The Stencil is Blurry or Bleeding: This occurs when too much transfer gel was applied. The excess moisture liquefies the carbon, causing it to bleed laterally across the skin. Solution: Wipe the area clean with alcohol, allow it to dry, apply a significantly lighter coat of gel, and use a fresh stencil print.
- The Stencil is Too Light or Spotty: This usually indicates that the skin was too dry, or the thermal printer settings (like on an older XIRU XR3 model) were not set to a dense enough carbon deposit. Solution: Re-print the stencil with a darker thermal setting and ensure the transfer gel is sufficiently tacky before application.
- The Stencil Distorts with Movement: If the stencil looks perfect when the client is sitting but warps when they stand, the placement was executed in the wrong posture. Always print a tattoo on skin while the client is in a neutral, weight-bearing position.
5. Alternatives: Temporary and Cosmetic Applications

Not every transfer is destined for the permanent insertion of ink. The principles required to print a tattoo on skin are heavily utilized in the cosmetic and temporary body art industries. For clients who are hesitant about permanent modifications, or for artists looking to test a design's placement, exploring temporary options is highly beneficial.
You can discover excellent inspiration in our guide to temporary tattoo ideas, which outlines the best commitment-free ink options available today. For freehand artists, reading our comprehensive temporary tattoo pens review will help you select skin-safe markers that hold their pigment. Furthermore, if you are working without thermal equipment at home, learning how to make temporary tattoos provides a foundational understanding of carbon transfer techniques. Finally, for event artists and festival applications, our glitter tattoo guide explores an entirely different, adhesive-based method of skin decoration.
6. Post-Transfer: The Transition to Tattooing and Healing
Once you successfully print a tattoo on skin and the stencil is fully cured, the true artistry begins. Utilizing INKSOUL's high-performance rotary or coil machines, equipped with our full selection of round liners, shaders, and magnums, you will trace and fill the design, driving ink into the dermis.
The responsibility of the artist extends beyond the physical application of the ink. Educating your client on the biological process of recovery is mandatory. We recommend instructing every client to read our detailed breakdown of the tattoo healing stages to ensure their artwork heals cleanly without infection or ink fallout. Additionally, for professional artists evaluating their business models and hourly rates, our tattoo pricing guide offers an honest, industry-standard breakdown of studio economics and valuation.
7. Summary Table: Stencil Transfer Process at a Glance
| Process Stage | Action Required | Recommended INKSOUL Product | Critical Warning |
|---|---|---|---|
| Design Printing | Convert digital/hand-drawn design to thermal carbon copy. | INKSOUL T08FS Printer & INKSOUL Stencil Paper | Do not overheat the thermal printer; carbon will melt and blur. |
| Skin Preparation | Shave, wash with green soap, and degrease with 70% alcohol. | Medical-grade studio supplies | Failure to remove skin oils will cause the stencil to wipe away instantly. |
| Gel Application | Apply a micro-thin layer of transfer gel until skin is tacky. | Professional Transfer Solution | Too much gel will cause the carbon to bleed across the skin. |
| Placement | Align under proper lighting, roll onto skin, apply firm pressure. | INKSOUL Adjustable LED Studio Lighting | Do not shift or slide the paper once it makes contact with the gel. |
| Curing | Allow the stencil to dry completely for 10-15 minutes. | Ambient Studio Air | Do not begin tattooing or wiping before the gel has fully evaporated. |
8. Frequently Asked Questions (FAQs)
Why does my stencil wipe off so easily while I am tattooing?
From our experience, premature stencil loss is caused by three main factors: inadequate skin preparation (failing to remove all oils with alcohol), applying too much transfer gel, or failing to let the stencil cure for at least 10 to 15 minutes before beginning the tattoo procedure. Always allow the carbon to lock into the epidermis completely.
Can I use regular printer paper to print a tattoo on skin?
No. Standard printer paper and standard inkjet or laser toner are entirely incompatible with human skin and transfer gels. Furthermore, printer toner is highly toxic and should never be introduced to an open wound. You must use specialized, skin-safe, high-contrast tattoo stencil paper containing cosmetic-grade carbon.
What is the difference between thermal stencil paper and freehand stencil paper?
Thermal stencil paper is engineered to react to the heat elements inside machines like the Phomemo TP31 or INKSOUL T08FS, melting the carbon onto the transfer sheet. Freehand paper does not require heat; it transfers carbon onto the tracing sheet through the sheer physical pressure of a pen or stylus pressing down on it. We supply both variants for artists depending on their preferred workflow.
9. Authoritative References
For further reading on maintaining the highest standards of safety, sterilization, and procedural technique in a professional tattoo environment, we recommend consulting the following authoritative organizations:
- Centers for Disease Control and Prevention (CDC) - Body Art Safety and Infection Control
- Occupational Safety and Health Administration (OSHA) - Bloodborne Pathogens Standard
- Alliance of Professional Tattooists (APT) - Health and Safety Guidelines
```