If you cannot perfectly see the surface of the skin you are working on, your art is being compromised before the needle even penetrates the dermis. Many tattoo artists willingly spend thousands of dollars on high-end rotary machines, premium cartridges, and the finest inks on the market, yet they inexplicably settle for cheap, flickering desk lamps or basic social media ring lights. This is a critical error that not only degrades the quality of the final tattoo but actively destroys the artist's eyesight over time.
Working as a professional tattoo artist requires extreme, microscopic precision for hours on end. The canvas you work on—human skin—is uniquely challenging to illuminate. It is curved, it moves, it bleeds, and it is constantly coated in reflective ointments, glides, and green soap. A standard domestic light source simply cannot cut through this environmental glare. You need a dedicated professional light for tattooing that provides a shadowless work area, renders color with absolute accuracy, and drastically reduces ocular fatigue.

Quick Answer: What You Need to Know
A true professional light for tattooing must feature a High Color Rendering Index (CRI of 95 or above) to guarantee accurate color saturation, adjustable Kelvin temperatures (typically spanning 3200K to 5600K) to match your working environment, and advanced diffusion technology to eliminate the harsh, blinding glare caused by wet skin. From our experience, standard selfie ring lights are functionally obsolete for actual tattooing due to their aggressive center-shadowing effect. We strongly recommend upgrading to a specialized reflective dome light or a multi-functional LED workstation bench. To view industry-standard illumination options that actually protect your eyes, browse our curated collection of tattoo lighting equipment.
Table of Contents
- What Defines a Professional Light for Tattooing?
- How Advanced Studio Lighting Actually Works
- The Unignorable Benefits of Upgrading
- Limitations of Standard Lighting Setups
- The 6+ Best Professional Light for Tattooing Setups
- Who Should Upgrade (And Who Can Wait)
- Common Lighting Mistakes Artists Make
- Complete Buying Considerations
- The INKSOUL Expert Recommendation
- Frequently Asked Questions (FAQ)
What Defines a Professional Light for Tattooing?
| Lighting Feature | Standard Domestic Light | Professional Tattoo Light | Why It Matters for Artists |
|---|---|---|---|
| Color Rendering Index (CRI) | Usually 70 - 80 | Strictly 95+ | Ensures your red inks look truly red, not muddy or brown. |
| Light Diffusion | Direct, raw bulbs | Softened, bounced, or filtered | Stops the blinding glare reflecting off tattoo glide and fresh plasma. |
| Shadow Management | Creates harsh, deep shadows | Wraps around obstructions | Prevents your machine hand from casting a dark shadow over your needle. |
| Heat Emission | Can run hot, drying skin | Ultra-cool LED technology | Keeps the client comfortable and prevents the stencil from sweating off. |
A professional light for tattooing is not just a bright bulb; it is a meticulously engineered illumination system designed specifically for the rigorous visual demands of dermal body art. When you evaluate a potential lighting setup, you are not merely looking for raw brightness (lumens). You are searching for optical clarity. If you find yourself constantly straining to distinguish the subtle structural differences when choosing between rs vs rl tattoo needles during a session, your current lighting setup is actively holding back your technical progression.
How Advanced Studio Lighting Actually Works
High-end tattoo illumination works by manipulating three core scientific principles of light physics: advanced diffusion, adjustable color temperature, and supreme color rendering accuracy.
The Science of Diffusion: Bare LED diodes create a harsh, highly focused beam. When this pinpoint light hits wet skin, it creates a "hotspot"—a blinding reflection that completely obscures the skin underneath. Professional setups utilize frosted acrylic diffusion panels or reflective bounce materials to scatter the light rays outward. This creates a soft, wrapping blanket of light that effortlessly bypasses the deep shadows generated by your hands or your machine.
Mastering Color Temperature (Kelvin): Measured in Kelvin (K), color temperature is a vital metric. A professional light for tattooing allows you to adjust the warmth or coolness of the beam. When packing heavy reds, yellows, or executing delicate skin-tone portraits, an artist must see the true pigment. If your light is too warm (3000K), the skin will look artificially red, making it impossible to judge skin trauma or exact color saturation. If the light is too cool (6500K), the tattoo looks sterile, blue, and washed out.
Color Rendering Index (CRI) Mastery: This index dictates how accurately a light source reveals the true, inherent colors of your ink compared to natural, midday sunlight. A CRI rating under 90 will make your carefully mixed colors look muddy and dead. This is precisely why we advise apprentices who are just learning the ropes and choosing their first tattoo ink for beginners to ensure their lighting is not deceiving them about how the ink actually looks in the dermis.
The Unignorable Benefits of Upgrading
In most professional situations, upgrading your overhead illumination is the single most impactful studio improvement you can make, often yielding better immediate results than buying a new machine. The benefits extend far beyond just "being able to see better."
- Drastic Reduction in Eye Strain: Staring intensely at a high-contrast, glaring, bloody surface for eight straight hours physically degrades your vision over time. Proper diffusion prevents retinal fatigue, allowing you to work longer without debilitating end-of-day headaches.
- Flawless Precision Lining: Seeing exactly where your needle grouping makes contact with the skin prevents blowouts and wobbly lines. If you are ever unsure about your hardware setup, you can review our guide on do all needles fit tattoo machines, but remember: even the most perfectly matched cartridge and machine are useless if you cannot clearly see the needle tip.
- Instagram-Ready Photography: In the modern tattoo industry, your social media portfolio is your livelihood. The light you work under should ideally be the light you photograph under. High-CRI lighting means your photos require zero artificial color correction, presenting your art authentically to potential clients.
Limitations of Standard Lighting Setups
We must address the elephant in the tattoo studio: standard photography ring lights. While they are incredibly popular due to their cheap price point, they have severe limitations for the actual application of tattoos. Ring lights were engineered to be placed directly in front of a face for makeup tutorials or vlogging, projecting light evenly onto a flat, vertical plane.
When you angle a ring light downward toward a horizontal tattoo bed, the physical design creates a massive flaw: it casts a shadow precisely in the center ring where your needle operates. Furthermore, cheap consumer-grade LEDs degrade rapidly, losing their color accuracy and brightness within a few short months of heavy daily use. They are acceptable for a quick photo, but they are a liability for a full-day session.
The 6+ Best Professional Light for Tattooing Setups
In our testing, we rigorously evaluate lights based on their real-world workstation viability. Here are the distinct structural types of lighting setups you will encounter in the industry, complete with our professional assessments and recommendations.
1. The Multi-Functional Workstation Bench Light
For heavy-duty applications, a light that is structurally integrated into your workstation is the absolute pinnacle of studio efficiency. It removes hazardous cord clutter from the floor, secures your expensive light source, and puts your entire setup within an arm's reach.

TAIDU PROMOTION MULTI-FUNCTIONAL DOUBLE HOLDER TATTOO BENCH WITH LIGHT
This unit represents an exceptional example of combining pure utility with premium illumination. The integrated, highly adjustable LED overhead light ensures there is zero footprint taken up on your studio floor by flimsy tripods. Meanwhile, the double holders keep your machines, power supplies, and inks perfectly organized. The light casts a wide, heavily diffused net over the client bed, minimizing hand shadows entirely and streamlining your workflow.
View Bench Details2. The Reflective Dome & Panel Light Kit
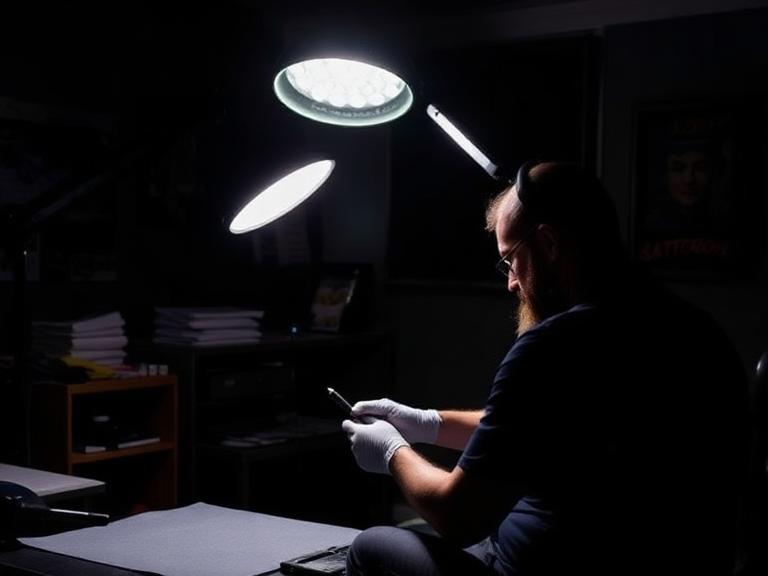
Reflective lights utilize a brilliant mechanical design: instead of shining LEDs directly at the client, the light is fired backward into a highly textured, reflective interior dome, which then bounces the light back down onto the skin. This completely neutralizes the harsh glare generated by A&D ointment, Vaseline, or Hustle Butter. It is arguably the best professional light for tattooing when executing micro-realism, smooth black and grey portraits, or heavy blackwork photography.

INKSOUL® Tattoo Removal Reflective Work & Photography Light Kit
Designed specifically to combat surface glare, this comprehensive kit serves as both an elite workstation light and a flawless photography setup. By indirectly reflecting the light, it drastically reduces eye fatigue over an 8-hour day. Whether you are tattooing, performing intricate laser removal work, or capturing portfolio shots for social media, the color accuracy (CRI) and shadow-wrapping capabilities of this unit are completely unmatched in this price bracket.
View Lighting Kit3. The Dual-Arm Flexible LED Light
Flexible, dual-wand setups allow you to position two entirely separate beams of light that intersect directly at the tattoo site. Because the light is entering the workspace from two distinctly different angles simultaneously, it effectively eliminates hand and machine shadows entirely.
4. The Overhead Ceiling Halo System
Massive, ceiling-mounted halo lights offer incredible, soft ambient light for large, open-concept studios. They look incredibly aesthetic and professional to walking-in clients. However, they lack the focused, directional intensity needed for fine line work and must be used in conjunction with a direct workstation light.
5. Headlamps and Wearable Loupe Lights
Used primarily by permanent makeup (PMU) artists and extreme micro-realism specialists, these devices put a highly concentrated beam of light exactly where your eyes are looking. While excellent for tiny details, they force the artist to keep their head completely still, which can cause severe neck strain over time. They also cast harsh direct glare on wet skin.
6. Portable Magnetic Tube Lights
For the traveling artist who frequently does guest spots at unfamiliar shops or works at crowded tattoo conventions, a portable, magnetic LED tube light is an absolute necessity. Space is limited when packing your Pelican case. Just as you strictly monitor your wireless tattoo gun battery life while on the road, you should carry a rechargeable, high-CRI tube light to guarantee you are never at the mercy of a guest studio's poor, flickering ceiling lights.
Pros and Cons of Upgrading to Professional Studio Lighting
| Pros of Professional Lighting | Cons to Consider |
|---|---|
| Drastically reduces severe eye strain, migraines, and long-term vision degradation. | Requires a higher initial financial investment compared to consumer lamps. |
| Provides portfolio-ready, color-accurate photography straight from the chair without editing. | Heavy-duty stands and boom arms take up physical space in smaller, cramped studios. |
| Perfect color rendering guarantees vibrant inks are packed efficiently and solidly. | Complex, multi-light setups require careful positioning and occasional readjustment as the client moves. |
| Effectively eliminates the blinding glare from tattoo glides, plasma, and green soap. | Requires access to reliable, surge-protected power sources near your station. |
Who Should Upgrade (And Who Can Wait)
Who Should Upgrade Immediately: Full-time professional artists executing color realism, intricate fine-line work, or dense color packing. Artists who suffer from end-of-day headaches or blurred vision. Studio owners wanting to elevate their brand's internal aesthetics. Furthermore, anyone who relies heavily on Instagram or TikTok for client acquisition must upgrade immediately—your photos demand a professional light for tattooing to stand out in a saturated algorithm.
Who Does Not Need It Yet: Traditional apprentices who are still strictly practicing their depth on silicone fake skin do not need to drop hundreds of dollars on a lighting system immediately. If you are still referencing a basic tattoo needle sizes guide to understand grouping applications, a basic desk lamp is acceptable until you make the transition to live human canvas.
Common Lighting Mistakes Artists Make
From our experience working with thousands of studios, we witness artists making the same three critical mistakes continuously:
- Using warm lights for black and grey: Warm light (3000K-3500K) makes irritated skin look incredibly red and inflamed. This makes it practically impossible to judge smooth, buttery grey-wash gradients. You must use neutral daylight settings (around 5000K-5500K) for accurate contrast.
- Placing the light directly behind the machine hand: If you are right-handed and place the light over your right shoulder, your hand and the bulky tattoo machine will cast a dense shadow directly over the needle tip. Always position your primary light source opposite your working hand, or use a dual-arm setup.
- Relying on overhead fluorescent ceiling lights: Office-style fluorescent lights are notoriously terrible for tattooing. They flicker at a rapid rate that your conscious eye cannot see but your brain registers, causing massive ocular fatigue. Furthermore, they typically have abysmal CRI ratings, making colors look sickly and green.
Complete Buying Considerations
When you are finally ready to purchase a professional light for tattooing, you must look past the marketing jargon. Use this technical checklist to inform your buying decision:
- Verify the CRI Rating: This is non-negotiable. Never buy a light with a CRI lower than 95 if you plan to do color work.
- Understand Lumens vs. Lux vs. Dimming: Ensure the light output is smoothly adjustable via a dimmer switch. You need maximum intensity for post-tattoo photography, but you need a slightly lower, softer intensity for an 8-hour tattoo session to save your retinas from burning out.
- Assess Stand Stability: For commercial users, heavy-duty applications require solid, weighted bases. A cheap camera tripod will inevitably be tipped over by a tripping client or a rolling stool, potentially destroying your equipment or, worse, falling on the tattoo area.
- Consider Studio Integration: Can the light seamlessly attach to your existing furniture setup? If you utilize a rotating tattoo ink display rack or maintain a dedicated tattoo mixer supply prep station, make sure your new light stand's footprint will not crowd your daily workflow or tangle with your power supply cords.
The INKSOUL Expert Recommendation
From our experience at INKSOUL®: We strongly advise professional artists to abandon standard ring lights for the actual physical application of tattoos. While ring lights undoubtedly have their place in taking a quick, flattened video for TikTok, they are actively detrimental to the physical act of tattooing due to center-shadowing and harsh glare.
We recommend investing heavily in a diffused, reflective panel light or a fully integrated workstation bench light. The INKSOUL® Reflective Work & Photography Light Kit offers the absolute best of both worlds. It provides the soft, wrapping light necessary to cut through surface glare while maintaining absolute color integrity for your inks. It is an investment that pays for itself in the first month by saving your eyesight, preventing technical mistakes, and drastically elevating the high-definition presentation of your portfolio.
Frequently Asked Questions (FAQ)
What specific color temperature (Kelvin) is optimal for tattooing?
For general tattooing applications, a neutral daylight setting between 4500K and 5500K is considered optimal by industry professionals. This range provides a crisp, perfectly clean light that renders both smooth black/grey washes and vibrant color packing accurately, without introducing the artificial warmth that exacerbates the look of skin redness.
Why does my finished tattoo look drastically different in natural sunlight compared to my studio light?
If your tattoo looks dull or the colors shift when the client walks outside, your studio light has a low Color Rendering Index (CRI). Cheap LEDs are missing parts of the color spectrum. Upgrading to a professional light for tattooing with a verified 95+ CRI will ensure your studio lighting perfectly mimics natural, full-spectrum sunlight.
Are intense LED lights completely safe to use on fresh, open tattoos?
Yes, absolutely. Professional LED lighting setups do not emit harmful UV rays and generate very little ambient heat compared to older halogen or incandescent bulbs. This makes them completely safe for prolonged, close-range exposure on raw, tattooed skin, and ensures the client remains comfortable without sweating off the stencil.
Do I actually need two separate lights to tattoo effectively?
While not strictly mandatory for beginners, using two separate light sources (or investing in a specialized dual-arm LED light) positioned at intersecting angles is the most effective way to completely eliminate the shadows cast by your hands and your machine during the intricate tattoo process. It is a game-changer for visibility.
Authoritative References & Industry Standards
To further understand the critical importance of proper illumination, ocular health, and workplace ergonomics in precision environments, consult these authoritative resources:
- Illuminating Engineering Society (IES) - National Standards for Workplace Lighting and Accurate Color Rendering
- American Optometric Association (AOA) - Clinical Guidelines on Protecting Vision and Reducing Digital/LED Eye Strain
- Occupational Safety and Health Administration (OSHA) - Ergonomics and Illumination Requirements in Precision Work Environments