Introduction: The Evolution of Tattoo Stenciling
As the tattoo industry continually evolves, the tools and hardware we rely on dictate the efficiency, hygiene, and precision of our daily craft. For decades, tattoo artists painstakingly hand-traced complex designs over fluorescent lightboxes, a tedious process that consumed valuable hours and inevitably introduced human error. Today, modern thermal printing technology offers a vastly superior solution. Learning how to properly use a tattoo stencil printer is no longer a luxury; it is an indispensable foundational skill for any serious professional in the body art industry.

Table of Contents
- Introduction: The Evolution of Tattoo Stenciling
- Step 1: Preparing and Optimizing Your Digital Design
- Step 2: Properly Setting Up the Thermal Transfer Paper
- Step 3: Configuring the Hardware and Smart Settings
- Step 4: Executing the Print for Maximum Clarity
- Step 5: Flawless Application to the Skin Canvas
- Hardware Spotlight: INKSOUL® T08FD Tattoo Transfer Printer Touch Screen
- Summary Table: The 5-Step Stencil Workflow
- Frequently Asked Questions (FAQs)
- Industry References
From our experience, the transition from manual carbon tracing to digital thermal printing not only saves immeasurable time but drastically improves the accuracy of complex line work, intricate geometric patterns, and hyper-realistic portraits. When you use a tattoo stencil printer correctly, you guarantee that the digital masterpiece on your tablet translates perfectly to the client's skin. We recommend that every professional studio integrates high-quality thermal technology into their daily workflow to maximize client turnover and artistic accuracy. In this comprehensive, expert-led guide, we will walk you through the exact five-step process to perfectly use a tattoo stencil printer, ensuring crisp, long-lasting transfers that will survive the longest and most grueling tattoo sessions.
Step 1: Preparing and Optimizing Your Digital Design

Before you even power on the hardware, you must understand a fundamental truth: the quality of your physical stencil is entirely dependent on the digital file you feed into the machine. When you prepare to use a tattoo stencil printer, you must actively optimize your design for thermal printing physics. Thermal printers do not recognize soft grayscale gradients in the same way a standard inkjet office printer does; they rely on directed heat to melt and transfer carbon, which means high contrast is absolute king.
We recommend using professional digital illustration software on your tablet or computer to refine your line weight before printing. You must increase the image contrast, brighten the background layer to pure white, and darken the primary linework to absolute black. From our experience, removing unnecessary soft shading from the reference image and converting it into a pure, hard-line drawing yields the cleanest and most readable stencils. If your design features extensive soft gray washes, you run the risk of the thermal printer reading them as solid black blocks, which can create a muddy, unreadable stencil on the skin. A meticulously optimized, high-contrast digital file is the foundational secret to successfully use a tattoo stencil printer.
Step 2: Properly Setting Up the Thermal Transfer Paper

To professionally use a tattoo stencil printer, you must possess a thorough understanding of the physical medium: the 4-ply thermal transfer paper. Professional tattoo transfer paper is typically composed of four distinct layers that serve very specific functions. The top white layer is the master sheet where the design will ultimately be printed. The second layer is a semi-transparent protective tissue, often referred to in the industry as the onion skin. The third layer is the heavily pigmented purple or black carbon sheet, and the bottom layer is the thick yellow backing sheet.

INKSOUL® TATTOO STENCIL PAPER (best for shadow)
We recommend immediately removing the protective tissue layer (the onion skin) before inserting the paper into the machine. If you mistakenly leave the onion skin inside the stack, it will inevitably jam the printer rollers and completely ruin the carbon transfer process. From our experience, smoothing out any creases in the master sheet and ensuring the carbon sheet sits perfectly flat guarantees an even distribution of heat during the printing process. When you use a tattoo stencil printer, loading the paper perfectly straight into the feed slot is critical to avoid skewed, stretched, or distorted stencils.
Step 3: Configuring the Hardware and Smart Settings
The specific hardware you choose to invest in significantly impacts your daily workflow. When you use a tattoo stencil printer equipped with modern technology, the configuration phase becomes incredibly streamlined. Unlike older, clunky thermal copiers that rely on manual dials, unreliable optical eyes, and confusing button combinations, modern devices utilize highly intuitive digital interfaces.
We recommend utilizing the advanced smart touch screen feature found on premium models. With fingertip sliding parameters, you can easily adjust the printing density, mirror image settings, and photo/line modes directly on the device's interface. From our experience, setting the machine to "line mode" is optimal for traditional tattoos, neo-traditional designs, and script, while "photo mode" is better suited for realism pieces that require subtle dot-work tracking. Furthermore, understanding the connectivity of your device is vital. To efficiently use a tattoo stencil printer, you should leverage its wireless capabilities. Seamlessly connecting via Bluetooth or Wi-Fi means you can beam your design straight from your drawing tablet to the printer without the hassle of tangled cords or USB drives.
Step 4: Executing the Print for Maximum Clarity
Once the digital file is fully optimized, the 4-ply paper is correctly loaded, and the density settings are dialed in, it is time to execute the thermal print. To successfully use a tattoo stencil printer without causing hardware damage, you must initiate the print command and allow the machine to feed the paper at its own factory-calibrated pace. High-quality printers operate at a highly efficient, regulated speed of 10-15mm/s.
We recommend that you never pull, tug, or push the transfer paper while it is actively feeding through the machine's thermal head. Pulling the paper manually will cause the heated carbon to smear, resulting in thick, blurry lines that are impossible to tattoo over cleanly. Because modern machines print instantly, fast and convenient operations are guaranteed, but patience during the actual extrusion is a professional necessity. From our experience, supporting the paper gently with a flat palm as it exits the printer prevents it from curling back onto itself. Once the print is complete, open the release latch, remove the paper, and carefully peel the white master sheet away from the carbon backing to reveal your flawless, high-resolution stencil.
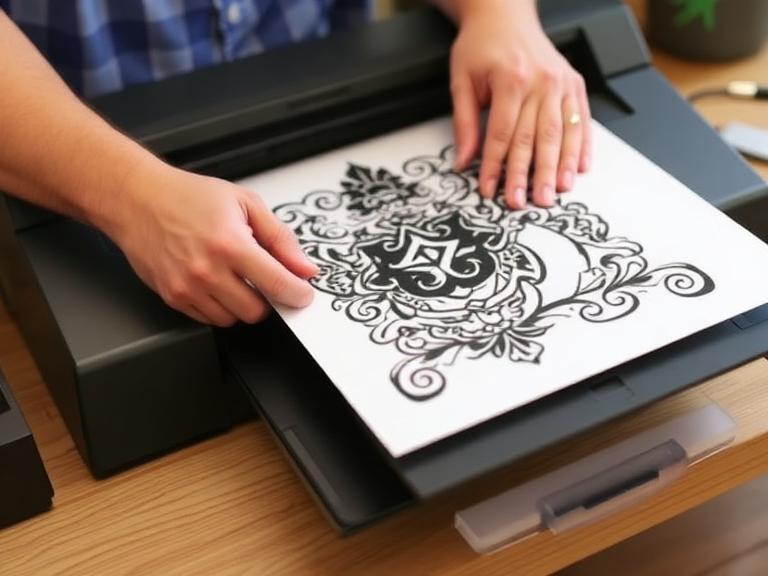
Step 5: Flawless Application to the Skin Canvas
Knowing how to use a tattoo stencil printer is only half the battle; transferring that perfect thermal print to the human canvas requires meticulous skin preparation. First, shave the targeted area completely with a disposable razor, even if the body hair is fine, to ensure maximum surface contact. Next, sanitize the skin vigorously using rubbing alcohol or a surgical prep solution to strip away all natural oils and dead skin cells.
We recommend applying a high-quality, professional stencil application gel evenly across the skin. The layer should be thin and tacky, not soaking wet. From our experience, if the skin is too wet, the carbon will bleed, pool, and blowout; if it is too dry, the stencil will simply not adhere. Carefully align the printed stencil and press it firmly onto the skin. Do not rub or slide your hands across the paper, as this will immediately smear the intricate design. Press evenly for five to ten seconds, then peel the paper away in one smooth, fluid motion from corner to corner. Allow the stencil to dry completely for at least ten to fifteen minutes before you begin tattooing.
Hardware Spotlight: INKSOUL® T08FD Tattoo Transfer Printer Touch Screen

To execute the steps above with absolute perfection, the quality of your hardware is paramount. At INKSOUL, we have engineered the ultimate tool for modern tattoo artists: the INKSOUL® T08FD tattoo transfer printer touch screen. Designed to eliminate the frustrations of traditional thermal copiers, this device represents the pinnacle of stencil technology.
- Smart touch screen: Navigate effortlessly with a 2-inch Touchscreen featuring fingertip sliding parameters for precise density and mode adjustments.
- Unmatched Efficiency: Engineered to print instantly, offering a fast and convenient workflow that keeps your client in the chair and your focus on the art.
- Ultimate Connectivity: Whether you design on an iPad or a desktop, computer and mobile phone can be connected seamlessly.
- Precision Specifications: Operating at an optimal speed of 10-15mm/s, it ensures perfect carbon transfer on standard 210-216mm print widths using compatible tattoo transfer paper.
- Portability and Power: Featuring a robust 1200mAh battery, ultra-compact dimensions of 325x67x40mm, and a featherlight weight of 745g, it is perfect for traveling artists and bustling studios alike.
Summary Table: The 5-Step Stencil Workflow
To assist both apprentices and seasoned veterans in standardizing their studio workflow, we have compiled this responsive summary table detailing the essential steps to use a tattoo stencil printer.
| Step | Action | Expert Recommendation |
|---|---|---|
| 1. Digital Prep | Optimize line weight and contrast. | Remove soft gray shading; ensure linework is absolute black on a pure white background. |
| 2. Paper Setup | Load 4-ply thermal transfer paper. | Always remove the protective tissue (onion skin) before inserting the paper to prevent hardware jams. |
| 3. Configuration | Adjust printer density and connection. | Use the smart touch screen on the INKSOUL T08FD to select between line or photo modes. |
| 4. Execution | Print the thermal stencil. | Allow the machine to feed at 10-15mm/s. Never pull the paper, as this causes catastrophic smearing. |
| 5. Application | Transfer the design to the skin. | Shave, sanitize, apply stencil gel until tacky, press firmly, and allow 10-15 minutes of drying time. |
Frequently Asked Questions (FAQs)
Can I use standard office printer paper in a tattoo stencil printer?
No. You cannot use standard inkjet or laser printer paper. To properly use a tattoo stencil printer, you must use specialized 4-ply thermal tattoo transfer paper. The machine uses a heated thermal head to melt the carbon layer onto the master sheet; it does not use liquid ink or toner cartridges.
Why is my printed stencil coming out wrinkled or jammed?
From our experience, paper jams and wrinkles occur for two main reasons. First, the protective tissue layer (onion skin) was not removed prior to printing. Second, the paper was fed into the machine at a crooked angle. Always ensure the paper is perfectly aligned and smoothed out before initiating the print sequence on your INKSOUL T08FD.
How do I clean and maintain the thermal head of my printer?
Over time, excess carbon can build up on the thermal print head, causing faint lines or blank spots. We recommend turning off the device, letting it cool down completely, and gently wiping the thermal element with a lint-free cloth lightly dampened with 99% isopropyl alcohol. Regular maintenance is crucial to consistently use a tattoo stencil printer at peak performance.
Industry References
To further expand your knowledge on tattoo safety, equipment sanitation, and professional stenciling techniques, we recommend consulting the following authoritative resources:

