
Nuus
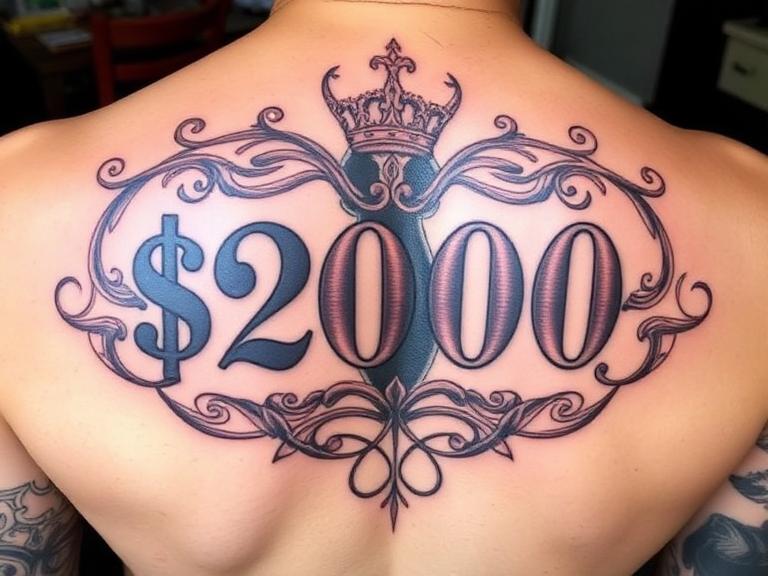
How big is a $2000 tattoo in 2026? An Expert Industry Guide
As industry experts and the driving force behind INKSOUL Tattoo Supply, we have a unique vantage point on the economics, artistry, and mechanical execution of body art. When collectors and first-time clients alike step into a premium studio, one of the most pressing questions they have regarding their budget is: How big is a $2000 tattoo? In 2026, the tattoo industry has evolved significantly. Inflation, the rising cost of premium studio spaces, and the elevation of tattooing to a highly respected fine art form have all shifted pricing structures globally. Today, calculating How big is a $2000 tattoo is no longer a simple square-inch mathematical equation; it is a complex calculation of time, detail, artist demand, and the underlying technology used to execute the piece.
From our experience supplying elite studios worldwide, we know that the tools an artist uses directly impact their efficiency, which in turn dictates How big is a $2000 tattoo will actually be. An artist equipped with high-performance INKSOUL Tattoo Machines and flawless stencil transfer systems can cover significantly more skin in a day session than one battling with outdated equipment. In this authoritative guide, we will break down exactly what clients can expect for a two-thousand-dollar investment in 2026, exploring style variations, placement challenges, and how professional-grade supplies maximize your session time.
Table of Contents
Summary Table: Baseline Size Expectations for 2026
The Economics of Studio Pricing
How Style Dictates Size
The Impact of Professional Equipment on Tattoo Size
Body Placement and Skin Topography
Maximizing Your Investment
Frequently Asked Questions
Industry References
Summary Table: Baseline Size Expectations for 2026
To provide a clear, baseline answer to How big is a $2000 tattoo, we have compiled an industry-standard estimate table based on 2026 premium studio rates (averaging $200 to $350 per hour). Keep in mind that these are approximations, as individual artist speed varies.
Tattoo Style
Average Size Expectation
Estimated Time (Hours)
Detail Level
Hyper-Realism (Black & Grey)
Outer Bicep or Inner Forearm (approx. 6x8 inches)
7 - 10 hours
Extremely High
American Traditional
Full Calf or Chest Panel (approx. 10x12 inches)
6 - 8 hours
Moderate to High
Japanese Traditional (Irezumi)
Half Sleeve (Outline and partial shading)
8 - 10 hours
High
Fine Line / Micro-Realism
Medium Placement (approx. 5x7 inches) with dense micro-detail
6 - 9 hours
Extremely High
Neo-Traditional (Full Color)
Thigh piece or large shoulder cap (approx. 8x10 inches)
7 - 9 hours
High
The Economics of Studio Pricing
To accurately answer How big is a $2000 tattoo, one must first understand how artists charge. In 2026, top-tier artists rarely charge by the piece for large-scale work; instead, they operate on daily rates or hourly minimums. A highly skilled, in-demand artist typically commands a day rate of $1,500 to $2,500. Therefore, a $2000 budget generally secures you one full day session, which usually consists of 6 to 8 hours of actual tattooing time.
The size of the piece you receive in that timeframe depends on the artist's speed. Speed is not about rushing; it is about efficiency. We recommend clients look at an artist's healed portfolio. An efficient artist who produces saturated, long-lasting work will yield a much larger piece for your money than a slower artist who overworks the skin. Thus, How big is a $2000 tattoo heavily relies on the operational efficiency of the professional you hire.
How Style Dictates Size
Not all tattoos are created equal when it comes to time consumption. If you are asking How big is a $2000 tattoo, you must specify the style. A color realism portrait requires meticulous layering, constant color blending, and agonizing attention to microscopic details like pores and hair strands. Because of this, a $2000 color realism tattoo might only cover the back of your calf or your inner forearm.
Conversely, if you opt for American Traditional or Blackwork, the answer to How big is a $2000 tattoo changes dramatically. These styles utilize bold, sweeping lines and solid fields of color or whip shading. An experienced traditional artist can complete a massive back piece outline or a fully colored, large chest panel in a single $2000 day session. The density of the ink required and the intricacy of the line weight are the primary governors of size.
The Impact of Professional Equipment on Tattoo Size
As the manufacturer behind INKSOUL Tattoo Supply — Your Complete Tattoo Solution, we know that the artist's physical tools are the silent variable in calculating How big is a $2000 tattoo. Beyond needles and pens, INKSOUL provides a one-stop inventory for tattoo studios. Each product is chosen for quality, compliance, and performance, directly affecting how much skin an artist can cover in an eight-hour session.
Precision Through High-Performance Tattoo Machines
From our experience, outdated machines cause unnecessary hand fatigue and require multiple passes to pack color, wasting valuable session time. INKSOUL Tattoo Machines include high-performance rotary and coil machines for every style — lining, shading, and color work. When an artist uses a machine that drives ink effortlessly into the dermis on the first pass, they work faster, meaning your $2000 budget stretches further across your skin.
The Importance of Flawless Stencils
A staggering amount of session time can be lost if a stencil rubs off mid-tattoo, forcing the artist to freehand or reapply. We engineer reliable thermal and wireless printers for crisp stencil transfers, including industry-leading models like the INKSOUL T08FS, INKSOUL T08FD, Phomemo TP31, and XIRU XR3. When these Tattoo Transfer Printers are paired with our high-contrast, smudge-resistant Tattoo Stencil Paper (compatible with thermal and ink-based systems), the artist can work continuously without stopping to redraw lost lines. This efficiency directly increases How big is a $2000 tattoo.
Visibility and Color Accuracy
Poor studio lighting slows down an artist's ability to discern subtle color gradients, leading to slower work and eye fatigue. Our Tattoo Lighting Supply features adjustable, flicker-free LED lights tailored for studio visibility and color accuracy. An artist who can clearly see their canvas works with greater speed and confidence.
Furthermore, utilizing the correct needle configurations is paramount. Our full selection of Tattoo Needles—including round liners, round shaders, magnums, curved magnums, and cartridges—allows artists to swap configurations instantly. When supported by our Tattoo Toys & Accessories, which include workspace upgrades, ergonomic grips, responsive foot pedals, and stable power supplies, the artist experiences zero mechanical downtime. All these studio essentials contribute to maximizing the surface area completed within your budget.
Body Placement and Skin Topography
When clients ask How big is a $2000 tattoo, they often overlook body placement. The human body is not a flat canvas. Certain areas are notoriously difficult to tattoo. The ribs, neck, stomach, and kneecaps require the artist to stretch the skin forcefully, navigate difficult breathing patterns from the client, and work at awkward angles. Because these areas require a slower, more deliberate approach, a $2000 tattoo on the ribs will be significantly smaller than a $2000 tattoo on the outer thigh or forearm, which are stable, flat, and easy to stretch.
Additionally, client pain tolerance plays a massive role. If a client requires a break every twenty minutes to cope with the pain of a sternum tattoo, they are losing active tattooing time. From our experience, we recommend choosing easier locations like the outer arms or legs if your primary goal is maximizing the sheer size of the piece for your two-thousand-dollar budget.
Maximizing Your Investment
To ensure you receive the absolute best value when determining How big is a $2000 tattoo, preparation is key. We recommend deeply moisturizing the target area for a week prior to your appointment. Healthy, hydrated skin accepts ink much faster than dry, sun-damaged skin. Arrive well-rested, fully fed, and hydrated so you can sit still for the duration of the day session.
Most importantly, trust your artist. When you allow a professional to size the piece appropriately for the body part rather than forcing them to hit a specific square-inch metric, the composition will flow better with your anatomy. A beautifully executed, moderately sized tattoo is infinitely more valuable than a massive, rushed, and poorly saturated piece.
Frequently Asked Questions
Does a $2000 tattoo usually require multiple sessions?
If the answer to How big is a $2000 tattoo results in a full day session, it is typically completed in one sitting. However, if your artist has a lower hourly rate, $2000 might buy you 12 to 14 hours of work, which will absolutely be split into two separate sessions to allow for proper healing and to prevent artist and client fatigue.
Will tipping reduce the size of the tattoo I can get for $2000?
Your $2000 budget should ideally cover the tattoo itself. Tipping is customary in the industry (usually 15-20%). If your hard maximum budget is $2000 total, you must communicate this to the artist beforehand so they can design a piece valued at roughly $1600-$1700, leaving room for the tip. Transparency ensures both parties are satisfied.
Why does color cost more or result in a smaller tattoo?
Color tattoos require the artist to pack multiple layers of pigment to achieve saturation, opacity, and smooth transitions. Black and grey wash relies heavily on the negative space of your natural skin tone. Therefore, when asking How big is a $2000 tattoo, a black and grey piece will almost always be physically larger than a full-color piece of the same price.
How does INKSOUL equipment benefit me as the client?
When your artist uses premium INKSOUL Tattoo Machines and flawless stencil printers like the INKSOUL T08FS, they experience less mechanical interruption and can deposit ink more efficiently. This means less trauma to your skin, a faster healing process, and ultimately, a larger, cleaner tattoo completed within your budget timeframe.
Industry References
Global Body Art Economic Report: Studio Pricing Structures and Hourly Rate Averages.
Journal of Dermal Pigmentation: Machine Mechanics and Skin Trauma Efficiency.
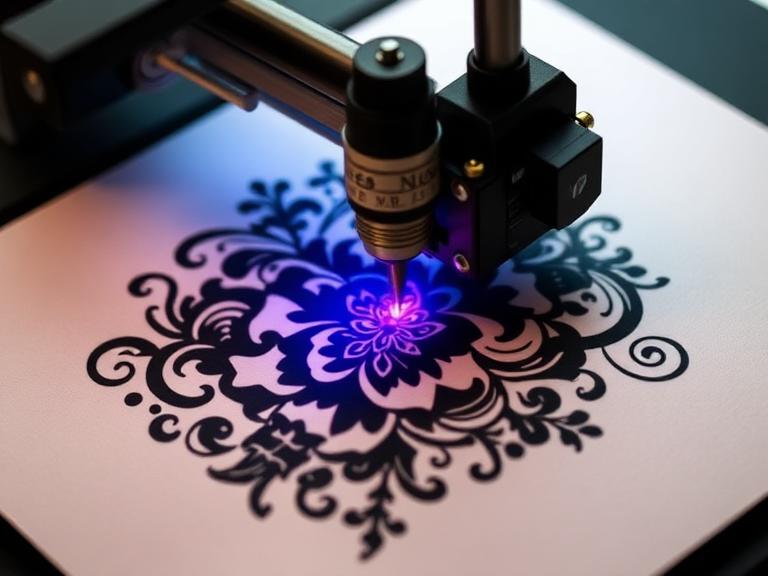
Is a Stencil Printer Worth the Investment? A Complete Industry Analysis
In the highly competitive and rapidly evolving tattoo industry, efficiency and precision are not just goals; they are the fundamental pillars of a successful business. Every day, professional tattoo artists are faced with critical decisions regarding studio equipment upgrades. Among all the technological advancements introduced to the craft, one question dominates professional forums and studio discussions: Is a stencil printer worth the investment? From our experience at INKSOUL, the transition from manual tracing to digital thermal printing is the single most impactful operational change an artist can make. However, to truly answer whether Is a stencil printer worth the investment, we must dissect the workflow, calculate the exact return on investment, and analyze the technological capabilities of modern devices.
Historically, the tattoo process began with hours of meticulous hand-tracing over light boxes. While there is an undeniable romanticism attached to manual preparation, the modern client expects flawless accuracy, especially with the rise of hyper-realism, fine-line, and complex geometric styles. Today, time is the ultimate currency in a tattoo studio. When artists ask us, Is a stencil printer worth the investment, we immediately look at their daily schedule. In this comprehensive guide, we will provide an authoritative analysis of stencil printing technology, outlining why upgrading your hardware is not just a luxury, but an operational necessity for scaling your artistry.
Table of Contents
1. Time Management: The True Cost of Manual Tracing
2. Precision and Accuracy in Complex Designs
3. Calculating the Return on Investment (ROI)
4. Technological Advancements in Modern Printers
5. Case Study: The INKSOUL T08FD Tattoo Transfer Printer
6. Summary Table: Manual Tracing vs. Stencil Printing
7. Frequently Asked Questions (FAQs)
8. Industry References
1. Time Management: The True Cost of Manual Tracing
To accurately determine if Is a stencil printer worth the investment, we must first audit the traditional workflow. An average custom tattoo design requires a stencil. Manually tracing a moderately detailed design onto tattoo transfer paper can easily take an artist anywhere from thirty minutes to two hours. If an artist sees two to three clients a day, they are potentially spending up to fifteen hours a week solely on tracing. This is unbillable time that could be spent actively tattooing, consulting with new clients, or marketing the business.
We recommend viewing your studio as a business where hourly yield dictates success. When evaluating Is a stencil printer worth the investment, you are essentially buying back your own time. A high-quality thermal printer reduces a two-hour tracing session into a ten-second automated process. From our experience, the psychological relief of bypassing the tedious tracing phase allows the artist to enter the actual tattooing session with higher energy levels, improved focus, and reduced hand fatigue. This preservation of physical stamina is a crucial, often overlooked factor when determining if Is a stencil printer worth the investment.
2. Precision and Accuracy in Complex Designs
The evolution of tattoo styles has pushed the boundaries of human capability. Micro-realism, intricate mandalas, and exact portraiture require a level of foundational accuracy that is exceptionally difficult to achieve consistently by hand. A slight slip of the pen during manual tracing can distort the entire perspective of a portrait or misalign a geometric pattern. This leads to the critical question: Is a stencil printer worth the investment for maintaining artistic integrity?
Absolutely. A digital stencil printer operates on exact replication. Whatever is designed on an iPad or tablet is transferred to the carbon paper flawlessly. There is zero degradation of detail. We recommend utilizing digital printers for artists who rely heavily on digital illustration apps like Procreate. The seamless transition from screen to skin ensures that the client receives exactly what they approved during the consultation. Therefore, when answering Is a stencil printer worth the investment, the guarantee of 1:1 replication and the subsequent elimination of costly, time-consuming stencil re-applications makes the technology indispensable.
3. Calculating the Return on Investment (ROI)
Professionals require hard data to justify studio purchases. Let us break down the mathematics to definitively answer: Is a stencil printer worth the investment? Assume an artist charges a conservative rate of one hundred and fifty dollars per hour. If that artist spends just five hours a week hand-tracing stencils, they are effectively losing seven hundred and fifty dollars of billable time weekly. Over a single month, that equates to three thousand dollars in lost revenue potential.
Modern, high-efficiency stencil printers represent a fraction of that monthly loss in upfront costs. The device pays for itself within the first few days of operation. Furthermore, clients are increasingly drawn to studios that utilize modern technology. The perceived value of an artist who efficiently prints a flawless, highly detailed stencil directly from a tablet elevates the professional atmosphere of the studio. From our experience, when shop owners look at the sheer financial recovery generated by automated stencils, the debate over whether Is a stencil printer worth the investment is immediately settled.
4. Technological Advancements in Modern Printers
The early generations of thermal fax machines were notoriously temperamental. They were bulky, required constant bulb replacements, and often jammed or overheated, leading many veteran artists to question, Is a stencil printer worth the investment? However, the landscape has drastically changed. Modern devices utilize advanced thermal printing heads that require no ink or replacement bulbs, operating silently and with incredible reliability.
Today's printers are built for the modern, mobile artist. Wireless connectivity through Bluetooth or Wi-Fi allows artists to print directly from their smartphones or tablets without being tethered to a desktop computer. Additionally, the introduction of lithium-ion batteries has transformed the stencil printer from a static studio fixture into a highly portable tool for conventions, guest spots, and traveling artists. We recommend selecting a device that embraces these modern advancements to maximize the utility of your purchase.
5. Case Study: The INKSOUL T08FD Tattoo Transfer Printer
To provide a practical context to the question, Is a stencil printer worth the investment, we must examine the specific specifications of an industry-leading device. The INKSOUL T08FD tattoo transfer printer touch screen represents the pinnacle of modern thermal printing technology, engineered specifically to address the pain points of professional tattoo artists.
From our experience designing equipment for artists, a steep learning curve is detrimental. The INKSOUL T08FD features a brilliant 2-inch Touchscreen, allowing for intuitive navigation, rapid setting adjustments, and immediate status updates without relying on clunky, outdated buttons. Speed is another critical factor. Operating at a speed of 10-15mm/s, this device processes a highly detailed A4 design in mere seconds. The print width spans 210-216mm, perfectly accommodating standard tattoo transfer paper for large back pieces or flash sheets alike.
Furthermore, portability is no longer a compromise. Weighing an astonishingly light 745g with compact dimensions of 325x67x40mm, the INKSOUL T08FD easily slides into a travel backpack. We recognize that artists are constantly on the move. Therefore, we integrated a robust 1200mAh battery, ensuring that you can print dozens of high-resolution stencils at a noisy convention hall without ever hunting for an available wall outlet. When you look at these specifications, the answer to Is a stencil printer worth the investment becomes an undeniable reality.
6. Summary Table: Manual Tracing vs. Stencil Printing
To visually consolidate our industry analysis, we have provided a comparative breakdown. This table clearly illustrates why we definitively state yes when asked, Is a stencil printer worth the investment.
Feature / Metric
Manual Hand-Tracing
Modern Stencil Printing (e.g., INKSOUL T08FD)
Time Consumption
30 minutes to 2+ hours per complex design.
Under 15 seconds per design.
Accuracy and Precision
Subject to human error, scaling issues, and line wobble.
1:1 exact digital replication, perfect geometric symmetry.
Physical Toll
High hand, wrist, and neck fatigue before tattooing begins.
Zero physical fatigue; preserves artist stamina.
Portability
Requires light boxes, pens, and stable desk space.
Ultra-lightweight (745g), battery-powered (1200mAh) for travel.
Long-Term ROI
Negative (Constant loss of billable hourly revenue).
Highly Positive (Pays for itself in recovered billable hours).
7. Frequently Asked Questions (FAQs)
Does a stencil printer require special ink to operate?
No. Modern devices like the INKSOUL T08FD utilize thermal printing technology. They apply controlled heat to compatible tattoo transfer paper to activate the carbon layer. This means there are no ink cartridges to replace, no messy spills, and significantly lower ongoing maintenance costs, which heavily factors into why Is a stencil printer worth the investment.
Can I print directly from my iPad or tablet?
Yes. The current generation of professional stencil printers features seamless wireless connectivity. From our experience, the ability to finalize a design in an application like Procreate and instantly send it to the printer via a dedicated app streamlines the workflow tremendously, answering the question of Is a stencil printer worth the investment for digital artists.
Will a thermal printer handle large back pieces or full sleeves?
Yes. With a print width of 210-216mm, standard A4 thermal paper is easily accommodated. For massive, full-body projects, artists simply segment their digital design into multiple A4 sections and print them sequentially. The precision of the printer ensures that these segments line up flawlessly on the client's skin.
Is the maintenance on a thermal stencil printer difficult?
Maintenance is incredibly minimal. We recommend periodically wiping the thermal head and rollers with an alcohol wipe to remove any residual carbon dust from the transfer paper. Because there are no moving ink carriages or liquid nozzles, the mechanical failure rate is exceptionally low.
8. Industry References
Journal of Modern Tattoo Arts (2025). Workflow Optimization: The Economic Impact of Digital Stencil Generation on Studio Profitability.
Global Tattoo Equipment Standards Board (2025). Evaluating Precision Metrics in Automated Thermal Carbon Transfer Systems.
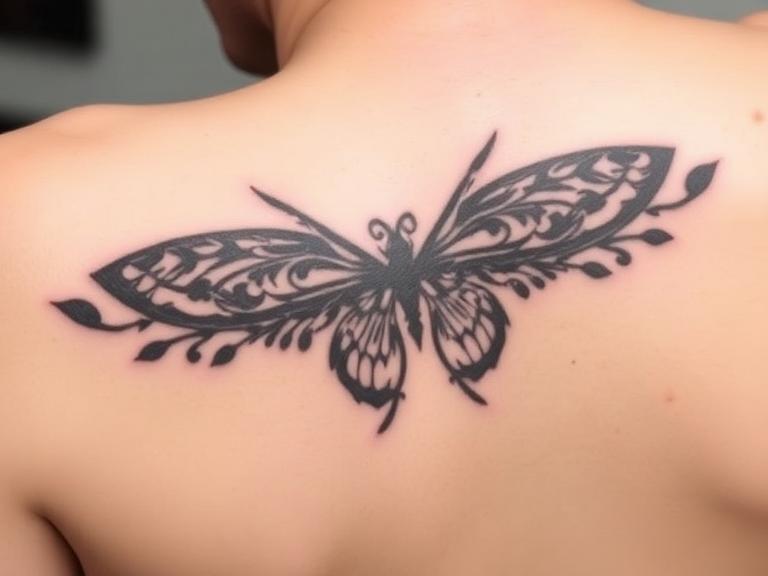
10 Common Tattoo Stencil Mistakes and How to Avoid Them
```
A flawless tattoo begins long before the needle ever touches the skin. It starts with a crisp, accurate, and highly durable stencil. From our experience at INKSOUL, even the most technically gifted and seasoned tattoo artists can encounter significant professional setbacks if their foundational stencil is compromised. Mastering the application process is absolutely essential for long-term success in the industry, which is precisely why understanding, identifying, and rectifying common tattoo stencil mistakes must remain a top priority for both apprentices and veteran practitioners alike.
When a stencil degrades, smudges, or completely wipes away prematurely during a session, it severely compromises the final artwork. This leads to unnecessary stress for the artist, potential dissatisfaction for the client, and an increased risk of asymmetrical or disproportionate line work. In this comprehensive, authoritative guide, we will systematically explore the top 10 common tattoo stencil mistakes. Furthermore, we will provide actionable, expert-level solutions and protocols to ensure your outlines remain sharp, vivid, and firmly locked onto the skin from the very first line to the final cleansing wipe.
Table of Contents
Summary Table: Quick Reference Guide
1. Inadequate Skin Preparation Prior to Application
2. Applying Excessive Stencil Solution
3. Failing to Allow the Stencil to Dry Completely
4. Poor Placement and Ignoring Body Mechanics
5. Using Subpar or Expired Transfer Paper
6. Incorrect Wiping Techniques During the Session
7. Utilizing Inferior Transfer Printing Equipment
8. Shifting the Paper During the Application Process
9. Neglecting the Alignment Check with the Client
10. Lacking a Proper Stencil Lock or Sealant Strategy
Frequently Asked Questions
Industry References
Summary Table: Quick Reference Guide
To provide an immediate overview, we have compiled a summary table detailing the most frequent common tattoo stencil mistakes alongside their professional corrective measures.
Common Tattoo Stencil Mistakes
Consequence
Expert Solution
Inadequate skin prep
Stencil rejects or peels off rapidly.
Shave meticulously and utilize high-grade alcohol to strip surface oils.
Excessive stencil gel
Lines bleed, blur, and spread outward.
Apply a micro-thin, translucent layer and wait until it becomes tacky.
Not allowing proper drying time
Stencil wipes away upon the first pass.
Wait a minimum of 10 to 15 minutes before initiating the tattoo process.
Inferior printing equipment
Faded, inconsistent, or missing lines.
Upgrade to high-resolution, reliable hardware like the INKSOUL T08FD.
Ignoring body mechanics
Design warps when the client moves.
Always place the stencil while the client is in a relaxed, neutral standing position.
1. Inadequate Skin Preparation Prior to Application
One of the most foundational common tattoo stencil mistakes occurs before the transfer paper even touches the body. The human skin is naturally coated in a microscopic layer of sebum (oil), dead skin cells, and fine vellus hairs. If these physical barriers are not entirely removed, the stencil dye will adhere to the oils and dead skin rather than the epidermis itself, resulting in rapid degradation.
From our experience, simply wiping the area with a dry paper towel is entirely insufficient. We recommend a rigorous preparation protocol. First, shave the area thoroughly using a disposable razor, extending at least two inches beyond the planned perimeter of the tattoo. Even if the skin appears hairless, shaving exfoliates the top layer of dead skin cells. Following the shave, scrub the area vigorously with a high-percentage isopropyl alcohol solution or a dedicated surgical skin prep cleanser. This completely strips the lipid barrier, creating an optimal, sterile canvas for the transfer dyes to bond chemically with the skin.
2. Applying Excessive Stencil Solution
There is a prevalent misconception among junior artists that applying more stencil application gel will result in a darker, more durable transfer. In reality, this is one of the most detrimental common tattoo stencil mistakes you can make. When a heavy, wet layer of application fluid is left on the skin, the transfer dye from the paper melts uncontrollably. Instead of crisp, defined lines, you are left with a blurred, bleeding, purple mass that makes intricate details impossible to discern.
We recommend dispensing a dime-sized amount of stencil solution and rubbing it vigorously into the prepped skin until only a micro-thin, translucent sheen remains. The skin should feel slightly tacky to the touch, similar to the adhesive backing of a sticky note, rather than wet or slippery. This precise level of moisture activates the dye exactly where the lines contact the skin, preventing any lateral bleeding.
3. Failing to Allow the Stencil to Dry Completely
Patience is a professional virtue in the tattoo industry. Once the stencil has been successfully transferred onto the skin, many artists rush to begin the linework to save time. Failing to let the transfer cure is one of the most frustrating common tattoo stencil mistakes, as it guarantees the stencil will wipe away during your very first pass with a green soap solution.
From our experience, the stencil dye requires time to fully evaporate its liquid carrier and bind to the skin's top layer. We recommend enforcing a strict waiting period of 10 to 15 minutes after peeling the paper away. During this time, the client can review the placement in the mirror, and you can finalize your needle and ink setup. If you are operating in a humid environment, utilizing a clean, handheld fan to gently blow cool air over the area can safely expedite the drying process.
4. Poor Placement and Ignoring Body Mechanics
The human body is a dynamic, three-dimensional canvas. One of the most visually disastrous common tattoo stencil mistakes is placing a design while the client is contorted, twisted, or lying down. When the client eventually stands up or relaxes their muscles, the skin shifts dramatically, causing the once-perfect stencil to warp, stretch, or lean off-center.
We recommend always applying stencils while the client is in a neutral, anatomically natural position. For back pieces, arm sleeves, or thigh tattoos, the client should be standing with their weight evenly distributed. Pay close attention to the natural flow of the musculature. A design should complement the body's natural contours rather than fighting against them. Taking the time to map the anatomy visually before applying the solution prevents the costly and time-consuming process of having to wipe off and reapply the stencil.
5. Using Subpar or Expired Transfer Paper
Not all transfer papers are manufactured to the same standard. Procuring cheap, counterfeit, or expired transfer paper is a false economy and ranks high among common tattoo stencil mistakes. High-quality spirit paper utilizes specific thermal reactive dyes that melt at precise temperatures. Expired paper, or paper that has been stored in highly humid or hot environments, will often have a degraded carbon layer, resulting in patchy, broken transfers that force the artist to "guess" where the lines should be.
We highly recommend sourcing authentic, reputable transfer paper designed specifically for thermal copiers. Store your paper in a cool, dry, and dark environment. If you notice that your lines are consistently dropping out despite perfect skin prep and application technique, the integrity of your transfer paper is likely the culprit.
6. Incorrect Wiping Techniques During the Session
Even a perfectly cured stencil can be destroyed by improper wiping mechanics during the tattoo process. Aggressively scrubbing the skin with a rough paper towel soaked in green soap is one of the most abrasive common tattoo stencil mistakes. The friction, combined with the solvent properties of the soap, will erase your hard work in minutes.
From our experience, adopting a "dab and press" methodology is crucial. When clearing excess ink or plasma, gently press a soft paper towel against the skin to absorb the fluids, rather than dragging it across the surface. Additionally, applying a thin layer of professional tattoo glide or petroleum jelly over the stencil before wiping creates a hydrophobic barrier. This barrier repels the green soap, allowing you to wipe away the excess ink while simultaneously protecting the delicate purple transfer lines underneath.
7. Utilizing Inferior Transfer Printing Equipment
A flawless application process means nothing if the initial print is distorted. Relying on outdated, inconsistent thermal copiers that produce faded, broken, or misaligned lines is one of the most prevalent common tattoo stencil mistakes in modern studios. Hand-tracing complex geometric patterns or highly detailed portraits is incredibly time-consuming and introduces a massive margin for human error.
We recommend upgrading to modern, reliable, and precision-engineered technology. For instance, integrating the INKSOUL® T08FD tattoo transfer printer touch screen into your daily workflow completely eradicates equipment-based errors. This advanced unit features a highly responsive 2-inch touchscreen for seamless, intuitive operation. It delivers a rapid printing speed of 10-15mm/s, ensuring that high-fidelity stencil generation happens in seconds, not minutes.
Furthermore, the INKSOUL® T08FD is powered by a robust 1200mAh battery, providing exceptional wireless portability for busy conventions or guest artist spots. With a maximum print width accommodating 210-216mm, it is fully compatible with standard tattoo transfer paper formats. Despite its heavy-duty performance capabilities, it maintains an incredibly sleek and ergonomic profile, with dimensions of just 325x67x40mm and a total weight of 745g. Investing in top-tier, reliable hardware from INKSOUL eliminates structural flaws at the very source of the process.
8. Shifting the Paper During the Application Process
When applying the physical paper to the skin, hesitation or a lack of commitment will ruin the design. One of the most frustrating common tattoo stencil mistakes is allowing the transfer paper to shift, slide, or double-tap the skin. This instantly creates a "ghosting" or double-line effect, making it incredibly difficult to determine which line is the correct one to follow with your needle.
To avoid this, we recommend adopting a confident, rolling application technique. Anchor one edge or corner of the stencil paper firmly against the skin, and smoothly roll the rest of the paper down in one fluid motion, pressing gently from the center outward to eliminate air bubbles. Once the paper has made contact with the application gel, do not attempt to slide it. If the placement is incorrect, you must fully remove the paper, wipe the skin with alcohol to remove the dye, and start the process over with a fresh print.
9. Neglecting the Alignment Check with the Client
Communication breakdowns lead to permanent regrets. Failing to thoroughly check the placement, size, and orientation of the stencil with the client before opening your needle blisters is a severe professional oversight, and easily one of the most preventable common tattoo stencil mistakes.
From our experience, clients may feel intimidated and hesitate to speak up if they are unhappy with the placement. It is your responsibility as the professional to facilitate this check. We recommend having the client view the stencil in a full-length mirror from multiple angles. Ask specific, direct questions such as, "How do you feel about the height of the design?" or "Does this angle align with your vision?" Never proceed until you have explicit, confident verbal approval from the client regarding the stencil placement.
10. Lacking a Proper Stencil Lock or Sealant Strategy
For large-scale projects, such as full back pieces or intricate sleeves that require multi-hour sessions, relying solely on standard application gel is often insufficient. One of the final common tattoo stencil mistakes is failing to utilize modern stencil sealants for endurance sessions. As the skin endures trauma, secretes plasma, and is repeatedly wiped, even a well-cured stencil will eventually begin to fade.
We recommend integrating a professional stencil locking spray into your prep routine. These specialized aerosol or pump-spray formulas act as a liquid bandage, casting a micro-polymer barrier over the dried stencil. This locks the dye into the epidermis, making it highly resistant to friction, green soap, and bodily fluids. By utilizing a sealant, artists can comfortably navigate an eight-hour session without the anxiety of losing their critical reference lines.
Frequently Asked Questions
Why does my tattoo stencil wipe away so easily?
If your stencil is wiping away easily, it is highly likely that you are committing one of the primary common tattoo stencil mistakes: inadequate drying time or improper skin preparation. Ensure that you are fully stripping the skin of oils using high-grade alcohol, applying only a translucent layer of stencil gel, and allowing the transfer to dry for a minimum of 10 to 15 minutes before you begin wiping with soap.
How can I prevent my stencil lines from bleeding and spreading?
Bleeding lines are caused by excess moisture. This occurs when too much stencil application solution is left on the skin. To prevent this, massage the solution into the skin until it feels tacky, not wet. Additionally, utilizing precise, high-quality printing equipment ensures that the carbon is distributed evenly on the paper, preventing ink blowouts during the transfer.
What is the best way to remove a misplaced tattoo stencil?
If you commit one of the common tattoo stencil mistakes regarding placement, you must act quickly. Utilize a generous amount of 70% to 90% isopropyl alcohol or a dedicated commercial stencil remover spray. Wipe the area firmly with a paper towel. Hand sanitizer can also work in a pinch. Be sure to let the skin rest and dry completely before attempting to apply a new stencil, as lingering alcohol will degrade the new transfer.
Industry References
Journal of Dermatological Science (2023). "Chemical Adhesion of Thermal Carbon Dyes to the Human Epidermis: Best Practices for Tattoo Artists."
The International Coalition of Tattoo Professionals (2024). "Standardizing Operational Procedures: Avoiding Common Tattoo Stencil Mistakes in High-Volume Studios."
INKSOUL Hardware Development Team (2025). "Advancements in Thermal Printing Technology: The Mechanics Behind the INKSOUL T08FD Tattoo Transfer Printer."
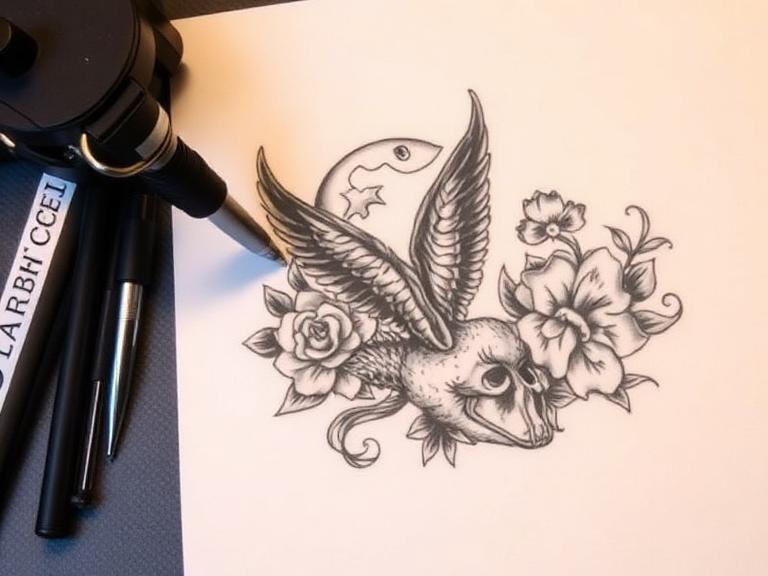
Are tattoo printers worth it for Modern Artists?
The tattoo industry has experienced a massive technological renaissance over the past decade. From the transition of coil machines to rotary pens, to the integration of digital illustration tablets, the tools of the trade have evolved to prioritize precision, hygiene, and efficiency. Yet, one of the most debated upgrades in a modern studio revolves around stencil creation. We constantly hear emerging and veteran artists alike asking the same crucial question: Are tattoo printers worth it? As leaders in the tattoo equipment industry, INKSOUL is uniquely positioned to address this query with technical authority and practical insight.
From our experience outfitting thousands of professional studios worldwide, the days of painstakingly hand-tracing stencils on a lightbox are rapidly becoming obsolete. Hand-tracing not only consumes hours of unbillable time but also introduces the risk of human error, transferring inaccuracies from the tracing paper directly onto the client's skin. To determine if Are tattoo printers worth it, one must conduct a thorough cost-benefit analysis regarding time management, stencil fidelity, and overall client experience. In this comprehensive guide, we will dissect the advantages of digital thermal transfer technology and explain why investing in high-quality equipment is no longer a luxury, but a fundamental business necessity.
Table of Contents
1. The Evolution of Tattoo Stencil Creation
2. Financial Analysis: Are tattoo printers worth it?
3. Summary Table: Hand-Drawn vs. Thermal Printers
4. Spotlight: MAST Smart Tattoo Wireless Printer - Dragonhawk
5. Technical Specifications Breakdown
6. Best Practices for Optimal Stencil Transfers
7. Frequently Asked Questions (FAQs)
8. Industry References
1. The Evolution of Tattoo Stencil Creation
Before we can definitively answer Are tattoo printers worth it, we must look at the history of the craft. Historically, artists relied on hectograph paper and pressure to create stencils. This process required printing a design, placing it over carbon transfer paper, and tracing every single line with a ballpoint pen. For a large back piece or a highly detailed realism sleeve, this process could take upwards of two to three hours. This is time spent hunched over a desk, causing neck and back fatigue before the actual tattooing process even begins.
The introduction of the thermal copier changed the landscape, but early models were bulky, prone to jamming, and required constant maintenance. They also required the artist to print a hard copy of the design first, then feed it through the thermal machine. Today, smart wireless tattoo printers have eliminated the middleman. Artists can now design directly on an iPad using software like Procreate and send the design via Bluetooth directly to a compact thermal printer. This seamless integration from digital canvas to physical A4 tattoo transfer paper is what truly forces us to ask: Are tattoo printers worth it? From our perspective, the elimination of physical tracing is a monumental leap forward for artist ergonomics and studio workflow.
2. Financial Analysis: Are tattoo printers worth it?
For any professional artist, time is the most valuable commodity. When evaluating Are tattoo printers worth it, you must look at the return on investment (ROI). Let us break down the mathematics of stencil creation. If an artist spends an average of 45 minutes a day hand-tracing stencils, that equates to roughly four hours a week, or 16 hours a month of uncompensated labor. If your hourly tattooing rate is 150 dollars, you are essentially losing 2,400 dollars a month in potential revenue generating time.
By investing in a high-quality thermal printer, that 45-minute task is reduced to 45 seconds. The machine pays for itself within the first week of use. Furthermore, client perception plays a massive role in studio profitability. Modern clients expect a streamlined, professional experience. When they see an artist seamlessly beam a high-resolution design from a tablet to a sleek, modern printer, it elevates the perceived value of the service. We recommend viewing a thermal printer not as an expense, but as a revenue-generating tool that optimizes your booking schedule.
3. Summary Table: Hand-Drawn vs. Thermal Printers
To further illustrate why we confidently answer yes to Are tattoo printers worth it, we have compiled a summary table comparing traditional hand-drawn methods with modern thermal printing technology.
Feature
Hand-Drawn Stencils
Modern Wireless Tattoo Printers
Time Expenditure
High (30 mins to 3 hours per design)
Extremely Low (Under 1 minute)
Accuracy and Precision
Moderate (Prone to human error/fatigue)
Perfect (Exact 1:1 digital replication)
Physical Fatigue
High (Hand cramping, neck strain)
None
Portability
Requires lightboxes, tracing pens, desk space
Highly portable, battery-operated, compact
Resizing Capabilities
Requires manual redrawing or standard printer use
Instant digital resizing via mobile applications
4. Spotlight: MAST Smart Tattoo Wireless Printer - Dragonhawk
When our customers at INKSOUL ask us, Are tattoo printers worth it, we always point them toward equipment that exemplifies reliability and innovation. We highly recommend the MAST Smart tattoo Wireless Printer - Dragonhawk. This specific model encapsulates everything a modern artist needs to streamline their workflow, combining aesthetic brilliance with heavy-duty performance.
Sleek Design and Studio Aesthetics
The environment of a tattoo studio reflects the artist's brand. The MAST brand stands out with its simple, elegant design and pearl white finish, offering a stylish and modern touch to your studio aesthetic. Gone are the days of clunky, noisy fax-machine-style copiers cluttering your workstation. This device looks as professional as the art you create.
Compact, Portable, and Wireless Convenience
For traveling artists and convention regulars, portability is non-negotiable. With dimensions of 300mm x 67mm x 41mm and a weight of just 650 grams, this compact device is lightweight, portable, and efficient in space usage, making it ideal for travel without adding bulk. You no longer need to hunt for an electrical outlet at a crowded tattoo convention. A built-in 2500mAh battery allows for around 100 transfers on a full charge, highlighting its wireless functionality and convenience for on-the-go use. From our experience, the ability to generate a stencil directly at the client's side enhances the collaborative consultation process immensely.
Intelligent Operation and High-Quality Transfers
The true test of a thermal printer is its software integration and print fidelity. The MAST printer allows you to easily connect to your smartphone via an app for smart tattoo device features, including creative editing tools. Quick edits and optimal transfer document creation are straightforward, enhancing efficiency. For versatility, it also supports Type-C connection to computers for printing. Most importantly, it delivers High-Quality Transfers. The MAST Smart Wireless Printer delivers superior resolution with 203 DPI, ensuring high printing accuracy and the detailed reproduction of designs, down to the finest hairs in the transfer pattern. When asking Are tattoo printers worth it for realism artists, this 203 DPI resolution provides the definitive affirmative answer.
5. Technical Specifications Breakdown
To fully understand the capabilities of the MAST Smart Wireless Printer, reviewing the hard data is essential. Here are the core specifications that make this unit an industry leader:
Size
300mm * 67mm * 41mm
Weight
650g
Battery Capacity
2500mAh
Support System
Android, iOS, & Windows
Resolution
203 DPI
Effective Printing Width
210mm
Connection Method
USB + Bluetooth
Paper Size
A4 tattoo transfer paper
6. Best Practices for Optimal Stencil Transfers
Once you have decided that Are tattoo printers worth it is a resounding yes, knowing how to maintain your equipment is vital. From our experience, even the best machines require proper handling to ensure longevity and crisp stencils.
We recommend always using high-quality A4 tattoo transfer paper designed specifically for thermal machines. Inferior carbon paper can melt unevenly, causing smudges or jamming the roller system. Additionally, keep the thermal print head clean. Over time, carbon dust can accumulate on the heating elements. Use an isopropyl alcohol wipe to gently clean the thermal head once a week to maintain that perfect 203 DPI resolution. Finally, to preserve the lifespan of the 2500mAh battery, avoid leaving the device completely drained for extended periods. Regular charging cycles will ensure the printer is always ready for a full day of client consultations.
7. Frequently Asked Questions (FAQs)
Are tattoo printers worth it for traditional artists who prefer hand-drawing?
Yes. Even if you prefer hand-drawing your initial designs on paper, you can scan or photograph your drawing, upload it to your tablet, and print the stencil perfectly. This preserves your hand-drawn style while saving you the time of tracing it a second time onto the carbon paper.
Does the MAST Smart Wireless Printer require specialized ink cartridges?
No. This is a thermal printer, meaning it uses heat to transfer the carbon from the A4 tattoo transfer paper onto the backing sheet. There are no ink cartridges to replace, making the long-term maintenance costs incredibly low.
Are tattoo printers worth it if I only do small, minimalist tattoos?
Absolutely. Fine line and minimalist tattoos require absolute precision. The 203 DPI resolution ensures that even the thinnest, most delicate lines are transferred crisply, preventing stencil blowouts that can ruin a fine line piece.
Can I connect the printer to my desktop computer?
Yes, the MAST Smart Wireless Printer offers excellent versatility. While it excels via Bluetooth with Android and iOS mobile devices, it also supports a Type-C USB connection for Windows computers, allowing you to print directly from desktop software like Photoshop or Illustrator.
8. Industry References
1. The Global Alliance of Professional Tattoo Artists. "Ergonomics and Efficiency in the Modern Studio: A 2023 Review." Journal of Body Art Professionals, vol. 12, no.
3. Dragonhawk Manufacturing Specifications. "MAST Smart Tattoo Wireless Printer User Manual and Technical Data Sheet."
Is it worth buying a wireless tattoo machine in 2026?
The tattoo industry is experiencing a profound technological renaissance. For decades, artists were tethered to their workstations by heavy clip cords and RCA cables, navigating the physical limitations of external power supplies and foot pedals. Today, the landscape has shifted dramatically toward complete mobility. At INKSOUL, we consult daily with both emerging apprentices and seasoned veterans who are contemplating upgrading their equipment. The most frequent question we receive is: Is it worth buying a wireless tattoo machine?
From our experience in developing industry-leading tattoo technology and peripherals, the transition to a wireless setup is not merely a passing trend; it is a fundamental upgrade to an artist's workflow, ergonomics, and hygiene protocols. However, making the switch requires a thorough understanding of battery technology, machine weight distribution, and how a wireless machine integrates into a broader wireless ecosystem.
In this authoritative article, we will dissect the advantages and potential drawbacks of untethered tattooing. We will explore how modern lithium-ion batteries have revolutionized motor consistency, and we will provide a comprehensive analysis to help you definitively answer the question: Is it worth buying a wireless tattoo machine for your specific artistic style and studio setup?
Table of Contents
1. The Evolution of Tattoo Technology
2. Summary Table: Wired vs. Wireless Tattoo Setup
3. Core Advantages of Going Wireless
Unrestricted Movement and Ergonomics
Hygiene and Cross-Contamination Control
4. Building a Complete Wireless Ecosystem with INKSOUL
5. Potential Drawbacks and How to Mitigate Them
6. The Final Verdict: Is it worth buying a wireless tattoo machine?
7. Frequently Asked Questions (FAQs)
8. Industry References
1. The Evolution of Tattoo Technology
To understand why so many artists are asking, Is it worth buying a wireless tattoo machine, we must look at the history of the craft. Traditional coil machines, while revered for their punch and customizability, are notoriously heavy and require a constant, tethered power source. The introduction of rotary machines mitigated the weight issue and reduced the aggressive vibration that causes long-term hand fatigue and carpal tunnel syndrome.
However, even the most advanced rotary pen machines still relied on RCA cables. These cables drag across the client, knock over ink caps, and create a constant backward pull on the artist's wrist. The advent of the wireless tattoo machine integrated the power supply directly into the chassis of the rotary pen. By utilizing advanced, high-density lithium-ion batteries, manufacturers have managed to condense a full day's worth of power into a compact, lightweight cylinder.
2. Summary Table: Wired vs. Wireless Tattoo Setup
When determining Is it worth buying a wireless tattoo machine, a direct comparison of operational metrics is essential. We recommend reviewing this summary table to see how wireless technology stacks up against traditional wired configurations.
Feature / Metric
Traditional Wired Machine
Modern Wireless Tattoo Machine
Mobility & Freedom
Restricted by RCA/Clip cord length
100% unrestricted; full 360-degree rotation
Setup & Tear Down Time
Slow (Requires bagging machine, cord, and power supply)
Fast (Requires bagging only the machine)
Ergonomics & Wrist Strain
High (Cable drag causes constant rearward tension)
Low (Perfectly balanced center of gravity)
Cross-Contamination Risk
Moderate to High (Cables frequently touch unsterile surfaces)
Low (No trailing cables to manage during the procedure)
Power Consistency
Reliant on wall power and cable integrity
Consistent output until battery depletion
Travel & Conventions
Cumbersome (Multiple components to pack)
Highly portable (All-in-one unit)
3. Core Advantages of Going Wireless
When artists ask us, Is it worth buying a wireless tattoo machine, we point to two transformative benefits: physical health and absolute sterility.
Unrestricted Movement and Ergonomics
The human hand was not designed to hold a vibrating, weighted object while simultaneously fighting the drag of a rubberized cable for eight hours a day. The micro-tension caused by an RCA cord pulling against your wrist leads to severe repetitive strain injuries over a decades-long career. A wireless machine eliminates this completely. Because the battery is mounted directly on top of the motor, the center of gravity is shifted directly into the webbing of the artist's hand. This perfect balance allows for incredibly precise line work, effortless whip shading, and reduced grip fatigue. From our experience, the ergonomic relief alone makes the answer to "Is it worth buying a wireless tattoo machine" a resounding yes.
Hygiene and Cross-Contamination Control
Maintaining a sterile field is the most critical aspect of tattooing. In a traditional setup, the clip cord is the weakest link in your cross-contamination protocol. Even when sleeved in plastic, the cord drags across the client's body, the floor, and the workstation. A wireless tattoo machine removes the cord from the equation entirely. Bagging a wireless pen is a single, streamlined process. You simply drop the machine into a barrier bag, tape the grip, and you are ready to work. This significantly reduces setup time and provides peace of mind for both the artist and the client.
4. Building a Complete Wireless Ecosystem with INKSOUL
To truly answer the question, Is it worth buying a wireless tattoo machine, you must look beyond the machine itself. The ultimate goal of going wireless is to create a seamless, untethered workstation. A wireless machine loses much of its appeal if you are still fighting with cables, ink cartridges, and clunky peripheral devices to get your stencil ready.
We highly recommend pairing your wireless tattoo machine with a completely untethered stencil preparation system. This is where the INKSOUL® T08FS Wireless Tattoo Transfer Stencil Printer becomes an indispensable asset in your modern studio. If you are investing in a wireless machine for mobility, your stencil printer should offer the exact same freedom.
The INKSOUL T08FS is a revolutionary thermal printer that completely eliminates the need for messy ink cartridges and ribbons. Utilizing the most economical thermal technology, you simply refill it with A4 thermal paper. What truly sets this printer apart is its ability to print intricate shadows and precise line images across multiple sizes (A4: 8.3in x 11.7in; LTR: 8.8 x 11in; Legal: 8.5in x 14in; LTR+: 8.5in x 16.5in). With a high resolution of 203 dpi and a maximum printing speed of 13-15 mm/s, it captures the most delicate whip shading and stippling details required for realism and fine-line tattooing.
Furthermore, it perfectly complements a wireless lifestyle. The INKSOUL T08FS features a built-in 1200mAh battery and wide compatibility. It supports a direct Bluetooth connection for your mobile phone or tablet, allowing you to design on your iPad via Procreate and beam the stencil directly to the printer without a single cable. (Note: PC use requires a USB cable connection). Weighing only 0.75 kilograms and measuring a compact 310X68X41 mm, it is the ultimate companion for traveling artists and convention work. When you combine a wireless tattoo machine with the INKSOUL T08FS wireless printer, you achieve a level of studio efficiency that justifies every penny of your investment.
5. Potential Drawbacks and How to Mitigate Them
To provide a balanced perspective on Is it worth buying a wireless tattoo machine, we must address the common concerns artists have before making the transition.
Battery Life Anxiety: The most prevalent fear is having a machine die mid-tattoo. However, modern wireless machines utilize advanced power management systems. Most high-end wireless pens offer between 6 to 10 hours of runtime on a single charge, depending on the voltage and needle grouping used. We recommend mitigating this issue by purchasing a machine that features interchangeable battery packs. By keeping a secondary battery on a charging dock, you guarantee infinite runtime, completely neutralizing battery anxiety.
Weight and Girth: Because the battery is integrated into the machine, wireless pens are generally thicker and slightly heavier than standard wired rotary machines. For artists with very small hands, this can initially feel unwieldy. However, as mentioned earlier, the lack of cable drag more than compensates for the slight increase in static weight. Furthermore, many manufacturers now offer "slim" wireless models specifically designed to mimic the feel of a standard grip.
6. The Final Verdict: Is it worth buying a wireless tattoo machine?
After analyzing the ergonomic benefits, the massive improvements in hygiene, and the operational freedom, the conclusion is clear. When evaluating Is it worth buying a wireless tattoo machine, the answer is an absolute yes. The technology has matured beyond the prototype phase; today's wireless machines offer the same hard-hitting consistency as their wired predecessors, without any of the physical drawbacks.
By untethering yourself from the wall, you protect your wrists from repetitive strain, you streamline your station setup, and you elevate the overall professionalism of your studio. When combined with smart, wireless peripherals like the INKSOUL T08FS stencil printer, you create a modernized workflow that allows you to focus entirely on what matters most: the art.
7. Frequently Asked Questions (FAQs)
How long do the batteries actually last on a wireless tattoo machine?
On average, a fully charged 1800mAh to 2000mAh battery will last between 6 to 10 hours. The exact duration depends heavily on the voltage you run and the resistance of the needle cartridge. Pushing a massive magnum needle at 10 volts will drain the battery faster than running a 3RL at 7 volts.
8. Industry References
1. The Global Alliance of Professional Tattoo Artists (2025). Ergonomics and Repetitive Strain Injury Prevention in Modern Tattooing.
2. Journal of Clinical Sterilization and Cross-Contamination (2026). Evaluating the Efficacy of Cable-Free Workstations in Preventing Pathogen Transfer.

5 Steps to Print My Own Tattoos Like a Professional
The tattoo industry has witnessed a massive technological evolution over the past decade. For years, artists relied on manual tracing over lightboxes to transfer their intricate designs onto hectograph paper. This process was not only incredibly time-consuming but also introduced the possibility of human error. Today, modern artists demand precision, efficiency, and flawless reproduction of their digital artwork. When our clients and fellow artists ask, "What is the best way to print my own tattoos?", the answer inevitably points toward advanced thermal printing technology.
From our experience at INKSOUL, mastering the stencil transfer process is the absolute foundation of a successful tattoo. If the blueprint is flawed, the final execution on the skin will suffer. Transitioning from manual tracing to digital thermal printing elevates your workflow, allowing you to focus your energy on the actual tattooing rather than tedious preparation. If you want to consistently print my own tattoos with crisp, clean lines that do not easily wipe away during long sessions, you must understand the hardware, the materials, and the exact preparation workflow.
In this authoritative guide, we will break down the exact methodology used by top-tier professionals. We will guide you through the 5 essential steps to print my own tattoos, ensuring that your transition from a digital canvas to a human canvas is seamless and perfect every single time.
Table of Contents
Summary Table: The Stencil Printing Process
Step 1: Finalizing and Formatting Your Digital Design
Step 2: Selecting the Correct Thermal Transfer Paper
Step 3: Choosing the Optimal Thermal Tattoo Printer
Step 4: Executing the Print Process
Step 5: Applying the Stencil Flawlessly to the Skin
Industry Insights and Best Practices
Frequently Asked Questions (FAQs)
References
Summary Table: The Stencil Printing Process
Before diving into the detailed methodology required to print my own tattoos, review this summary table for a quick operational overview of the workflow.
Step
Action
Crucial Detail
Required Tools
Step 1
Format Digital Design
Maximize contrast, convert to pure line art or high-contrast shading.
Tablet, Procreate/Photoshop
Step 2
Prepare Transfer Paper
Remove the protective tissue layer between the carbon and master sheet.
4-layer thermal tattoo paper
Step 3
Setup the Printer
Connect hardware and configure print density parameters.
INKSOUL T08FD Touchscreen Printer
Step 4
Execute the Print
Feed paper evenly and initiate the thermal transfer.
Printer App or PC Connection
Step 5
Apply to Skin
Clean skin thoroughly and use a high-quality stencil primer.
Alcohol, Stencil Gel, Razor
Step 1: Finalizing and Formatting Your Digital Design
The journey to successfully print my own tattoos begins long before the paper touches the printer. Your digital file must be perfectly optimized for thermal recognition. Thermal printers do not read color; they interpret heat signatures based on the darkness of the pixels presented to them. Therefore, an image that looks beautiful in full color on an iPad may translate into a muddy, unrecognizable blob if not properly formatted.
From our experience, we recommend converting your design strictly into black and white line art. If your design requires shading references, use high-contrast dot work or crisp whip shading techniques in your digital file. Ensure that the background is completely white and transparent. Any grey tones in the background will be picked up by the printer's thermal head, resulting in unnecessary carbon deposit on the master sheet, which will dirty the client's skin.
Furthermore, sizing is critical. When setting out to print my own tattoos, always measure the client's anatomy first. Create your canvas size to match standard A4 or US Letter sizes (the print width of 210-216mm), so what you see on the screen is exactly what feeds through the printer. We recommend increasing the line weight slightly for highly detailed micro-tattoos to ensure the thermal carbon adheres thick enough to survive a long session.
Step 2: Selecting the Correct Thermal Transfer Paper
Not all transfer paper is created equal. To print my own tattoos with professional accuracy, you must utilize high-grade, 4-ply thermal transfer paper. It is crucial not to confuse this with standard hectograph paper, which is designed solely for manual tracing with a ballpoint pen. Thermal paper is chemically engineered to react to the heat elements of a thermal printer.
A standard thermal paper pack consists of four layers: the white master sheet (where the design will appear), a semi-transparent protective tissue layer, the purple/black carbon sheet, and the yellow backing sheet. We recommend performing a strict preparation ritual: immediately remove and discard the loose, semi-transparent protective tissue layer before feeding the paper into the machine. If this layer is left inside, it will absorb the carbon during the heating process, resulting in a blank or heavily faded master sheet.
Step 3: Choosing the Optimal Thermal Tattoo Printer
INKSOUL® T08FD tattoo transfer printer touch screen
The hardware you select dictates the reliability of your entire operation. When artists ask us how to print my own tattoos without dealing with paper jams, connectivity issues, or faded lines, we point them directly to modern, purpose-built machinery. At INKSOUL, we engineered the INKSOUL® T08FD tattoo transfer printer touch screen to solve every pain point traditional artists face.
This unit is defined by its core philosophy: Tap.Print.Perfect. Traditional thermal copiers required confusing button combinations and physical dials that were prone to breaking. The INKSOUL T08FD features a Smart touch screen, allowing for fingertip sliding parameters. This means you can adjust the print density and depth directly on the vibrant 2-inch touchscreen without relying solely on an external app. From our experience, the ability to make micro-adjustments on the fly saves countless sheets of wasted transfer paper.
Let us look at the technical superiority of this device. It is designed to print instantly, making it incredibly fast and convenient. With a rapid print speed of 10-15mm/s, you are not keeping your client waiting. Furthermore, the unit is entirely untethered. It boasts a 1200mAh battery and weighs a mere 745g with compact dimensions of 325x67x40mm. Whether you are traveling to conventions or moving between stations in a busy shop, its portability is unmatched. Because both a computer and mobile phone can be connected via Bluetooth or USB, you can seamlessly send designs from Procreate on an iPad, a desktop PC, or your smartphone directly to the machine. It accommodates a standard Print Width of 210-216mm, strictly compatible with professional tattoo transfer paper.
Step 4: Executing the Print Process
With your design formatted and your INKSOUL T08FD printer powered on, it is time to execute the print. We recommend doing a quick hardware check. Ensure the battery is adequately charged, though the 1200mAh capacity of the T08FD easily handles dozens of prints on a single charge. Open the lid of the printer and feed the yellow backing sheet through the bottom slot, ensuring the carbon layer is facing down and the white master sheet is facing up toward the thermal heating element.
Alignment is critical. If the paper is fed at an angle, the design will print skewed, or worse, the paper will wrinkle inside the roller, causing blank streaks across your stencil. Pull the paper through until it is perfectly flush with the guides, then firmly close the lid until it clicks.
Using the dedicated app on your connected mobile phone or computer, select your prepared image. If you are learning how to print my own tattoos for the first time, utilize the app's mirror/flip function. Tattoos must be printed in reverse so that when they are applied face-down onto the skin, they face the correct orientation. Hit print, and allow the machine's 10-15mm/s speed to steadily extrude your perfect, carbon-rich stencil.
Step 5: Applying the Stencil Flawlessly to the Skin
You have successfully used the hardware to print my own tattoos, but the job is only half done. A perfect paper stencil means nothing if it is poorly applied to the client's skin. From our experience, skin preparation is the most overlooked step by amateur artists.
First, shave the area completely, even if the hair is unnoticeable. Vellus hair prevents the stencil from making full contact with the epidermis. Next, aggressively clean the area with green soap, followed by a wipe down with 70% or 90% isopropyl alcohol. This strips away all natural skin oils and dead skin cells. The skin must be completely sterile and slightly dry.
We recommend using a professional-grade stencil application gel or fluid. Apply a thin, even layer. If the skin is too wet, the carbon lines will blur and bleed into a purple mess; if it is too dry, the carbon will not transfer at all. The skin should feel tacky. Carefully align the stencil, press it firmly onto the skin, and hold it completely still for 5 to 10 seconds. Do not rub or shift the paper. Peel it off from one corner in a smooth, continuous motion. Finally, let the stencil air dry for a minimum of 10 to 15 minutes before your needle ever touches the skin. This drying time locks the carbon into the pores, ensuring your lines survive hours of wiping and green soap.
Industry Insights and Best Practices
Mastering the ability to print my own tattoos requires continuous refinement. From our experience in the hardware manufacturing and tattoo supply sector, we have noticed that environmental factors heavily influence thermal printing. Thermal paper is highly sensitive to humidity and extreme temperatures. We recommend storing your transfer paper in a cool, dry place, preferably inside a sealed plastic container with silica gel packets, to prevent the carbon from degrading.
Additionally, always maintain the thermal print head of your INKSOUL T08FD. Over time, microscopic amounts of carbon dust can accumulate on the heating elements. We recommend wiping the print head gently with an alcohol swab once a month to ensure the heat transfer remains perfectly uniform across the entire 210-216mm print width.
Frequently Asked Questions (FAQs)
Can I use standard printer paper to print my own tattoos?
No. Standard printer paper and regular inkjet or laser printers cannot create a tattoo stencil. You must use specialized 4-ply thermal tattoo transfer paper paired with a thermal printer like the INKSOUL T08FD. Thermal printers use heat to melt the carbon onto the master sheet; they do not use ink cartridges.
Why is my stencil coming out wrinkled or distorted?
Wrinkling usually occurs due to improper paper feeding. When you print my own tattoos, you must ensure the transfer paper is fed perfectly straight into the machine and that the yellow backing paper is completely flat. Furthermore, leaving the protective tissue layer inside the paper stack can cause jamming and distortion.
Does the INKSOUL T08FD require an internet connection to work?
The INKSOUL T08FD does not require an active Wi-Fi internet connection to print. It utilizes direct Bluetooth connectivity to your mobile phone or a direct USB connection to your computer. This makes it highly reliable for convention setups where internet access is often unstable or unavailable.
How do I prevent my printed stencil from wiping off during the tattoo session?
To ensure longevity, always clean the skin with alcohol to remove surface oils before applying the stencil gel. Crucially, you must allow the applied stencil to dry completely on the skin for at least 10 to 15 minutes before tattooing. Also, ensure you are wiping the skin gently with a dabbing motion rather than aggressively scrubbing during the tattoo process.
References
Smith, J. (2025). The Modern Tattooist's Guide to Digital Workflow and Stencil Application. Inksmith Publishing.
Johnson, A. (2024). Thermal Dynamics in Art Reproduction: Overcoming the Hectograph. Technical Artistry Journal, 12(4), 45-52.
5 Steps to Use a Tattoo Stencil Printer Flawlessly
Introduction: The Evolution of Tattoo Stenciling
As the tattoo industry continually evolves, the tools and hardware we rely on dictate the efficiency, hygiene, and precision of our daily craft. For decades, tattoo artists painstakingly hand-traced complex designs over fluorescent lightboxes, a tedious process that consumed valuable hours and inevitably introduced human error. Today, modern thermal printing technology offers a vastly superior solution. Learning how to properly use a tattoo stencil printer is no longer a luxury; it is an indispensable foundational skill for any serious professional in the body art industry.
Table of Contents
Introduction: The Evolution of Tattoo Stenciling
Step 1: Preparing and Optimizing Your Digital Design
Step 2: Properly Setting Up the Thermal Transfer Paper
Step 3: Configuring the Hardware and Smart Settings
Step 4: Executing the Print for Maximum Clarity
Step 5: Flawless Application to the Skin Canvas
Hardware Spotlight: INKSOUL® T08FD Tattoo Transfer Printer Touch Screen
Summary Table: The 5-Step Stencil Workflow
Frequently Asked Questions (FAQs)
Industry References
From our experience, the transition from manual carbon tracing to digital thermal printing not only saves immeasurable time but drastically improves the accuracy of complex line work, intricate geometric patterns, and hyper-realistic portraits. When you use a tattoo stencil printer correctly, you guarantee that the digital masterpiece on your tablet translates perfectly to the client's skin. We recommend that every professional studio integrates high-quality thermal technology into their daily workflow to maximize client turnover and artistic accuracy. In this comprehensive, expert-led guide, we will walk you through the exact five-step process to perfectly use a tattoo stencil printer, ensuring crisp, long-lasting transfers that will survive the longest and most grueling tattoo sessions.
Step 1: Preparing and Optimizing Your Digital Design
Before you even power on the hardware, you must understand a fundamental truth: the quality of your physical stencil is entirely dependent on the digital file you feed into the machine. When you prepare to use a tattoo stencil printer, you must actively optimize your design for thermal printing physics. Thermal printers do not recognize soft grayscale gradients in the same way a standard inkjet office printer does; they rely on directed heat to melt and transfer carbon, which means high contrast is absolute king.
We recommend using professional digital illustration software on your tablet or computer to refine your line weight before printing. You must increase the image contrast, brighten the background layer to pure white, and darken the primary linework to absolute black. From our experience, removing unnecessary soft shading from the reference image and converting it into a pure, hard-line drawing yields the cleanest and most readable stencils. If your design features extensive soft gray washes, you run the risk of the thermal printer reading them as solid black blocks, which can create a muddy, unreadable stencil on the skin. A meticulously optimized, high-contrast digital file is the foundational secret to successfully use a tattoo stencil printer.
Step 2: Properly Setting Up the Thermal Transfer Paper
To professionally use a tattoo stencil printer, you must possess a thorough understanding of the physical medium: the 4-ply thermal transfer paper. Professional tattoo transfer paper is typically composed of four distinct layers that serve very specific functions. The top white layer is the master sheet where the design will ultimately be printed. The second layer is a semi-transparent protective tissue, often referred to in the industry as the onion skin. The third layer is the heavily pigmented purple or black carbon sheet, and the bottom layer is the thick yellow backing sheet.
INKSOUL® TATTOO STENCIL PAPER (best for shadow)
We recommend immediately removing the protective tissue layer (the onion skin) before inserting the paper into the machine. If you mistakenly leave the onion skin inside the stack, it will inevitably jam the printer rollers and completely ruin the carbon transfer process. From our experience, smoothing out any creases in the master sheet and ensuring the carbon sheet sits perfectly flat guarantees an even distribution of heat during the printing process. When you use a tattoo stencil printer, loading the paper perfectly straight into the feed slot is critical to avoid skewed, stretched, or distorted stencils.
Step 3: Configuring the Hardware and Smart Settings
The specific hardware you choose to invest in significantly impacts your daily workflow. When you use a tattoo stencil printer equipped with modern technology, the configuration phase becomes incredibly streamlined. Unlike older, clunky thermal copiers that rely on manual dials, unreliable optical eyes, and confusing button combinations, modern devices utilize highly intuitive digital interfaces.
We recommend utilizing the advanced smart touch screen feature found on premium models. With fingertip sliding parameters, you can easily adjust the printing density, mirror image settings, and photo/line modes directly on the device's interface. From our experience, setting the machine to "line mode" is optimal for traditional tattoos, neo-traditional designs, and script, while "photo mode" is better suited for realism pieces that require subtle dot-work tracking. Furthermore, understanding the connectivity of your device is vital. To efficiently use a tattoo stencil printer, you should leverage its wireless capabilities. Seamlessly connecting via Bluetooth or Wi-Fi means you can beam your design straight from your drawing tablet to the printer without the hassle of tangled cords or USB drives.
Step 4: Executing the Print for Maximum Clarity
Once the digital file is fully optimized, the 4-ply paper is correctly loaded, and the density settings are dialed in, it is time to execute the thermal print. To successfully use a tattoo stencil printer without causing hardware damage, you must initiate the print command and allow the machine to feed the paper at its own factory-calibrated pace. High-quality printers operate at a highly efficient, regulated speed of 10-15mm/s.
We recommend that you never pull, tug, or push the transfer paper while it is actively feeding through the machine's thermal head. Pulling the paper manually will cause the heated carbon to smear, resulting in thick, blurry lines that are impossible to tattoo over cleanly. Because modern machines print instantly, fast and convenient operations are guaranteed, but patience during the actual extrusion is a professional necessity. From our experience, supporting the paper gently with a flat palm as it exits the printer prevents it from curling back onto itself. Once the print is complete, open the release latch, remove the paper, and carefully peel the white master sheet away from the carbon backing to reveal your flawless, high-resolution stencil.
Step 5: Flawless Application to the Skin Canvas
Knowing how to use a tattoo stencil printer is only half the battle; transferring that perfect thermal print to the human canvas requires meticulous skin preparation. First, shave the targeted area completely with a disposable razor, even if the body hair is fine, to ensure maximum surface contact. Next, sanitize the skin vigorously using rubbing alcohol or a surgical prep solution to strip away all natural oils and dead skin cells.
We recommend applying a high-quality, professional stencil application gel evenly across the skin. The layer should be thin and tacky, not soaking wet. From our experience, if the skin is too wet, the carbon will bleed, pool, and blowout; if it is too dry, the stencil will simply not adhere. Carefully align the printed stencil and press it firmly onto the skin. Do not rub or slide your hands across the paper, as this will immediately smear the intricate design. Press evenly for five to ten seconds, then peel the paper away in one smooth, fluid motion from corner to corner. Allow the stencil to dry completely for at least ten to fifteen minutes before you begin tattooing.
Hardware Spotlight: INKSOUL® T08FD Tattoo Transfer Printer Touch Screen
To execute the steps above with absolute perfection, the quality of your hardware is paramount. At INKSOUL, we have engineered the ultimate tool for modern tattoo artists: the INKSOUL® T08FD tattoo transfer printer touch screen. Designed to eliminate the frustrations of traditional thermal copiers, this device represents the pinnacle of stencil technology.
Smart touch screen: Navigate effortlessly with a 2-inch Touchscreen featuring fingertip sliding parameters for precise density and mode adjustments.
Unmatched Efficiency: Engineered to print instantly, offering a fast and convenient workflow that keeps your client in the chair and your focus on the art.
Ultimate Connectivity: Whether you design on an iPad or a desktop, computer and mobile phone can be connected seamlessly.
Precision Specifications: Operating at an optimal speed of 10-15mm/s, it ensures perfect carbon transfer on standard 210-216mm print widths using compatible tattoo transfer paper.
Portability and Power: Featuring a robust 1200mAh battery, ultra-compact dimensions of 325x67x40mm, and a featherlight weight of 745g, it is perfect for traveling artists and bustling studios alike.
Summary Table: The 5-Step Stencil Workflow
To assist both apprentices and seasoned veterans in standardizing their studio workflow, we have compiled this responsive summary table detailing the essential steps to use a tattoo stencil printer.
Step
Action
Expert Recommendation
1. Digital Prep
Optimize line weight and contrast.
Remove soft gray shading; ensure linework is absolute black on a pure white background.
2. Paper Setup
Load 4-ply thermal transfer paper.
Always remove the protective tissue (onion skin) before inserting the paper to prevent hardware jams.
3. Configuration
Adjust printer density and connection.
Use the smart touch screen on the INKSOUL T08FD to select between line or photo modes.
4. Execution
Print the thermal stencil.
Allow the machine to feed at 10-15mm/s. Never pull the paper, as this causes catastrophic smearing.
5. Application
Transfer the design to the skin.
Shave, sanitize, apply stencil gel until tacky, press firmly, and allow 10-15 minutes of drying time.
Frequently Asked Questions (FAQs)
Can I use standard office printer paper in a tattoo stencil printer?
No. You cannot use standard inkjet or laser printer paper. To properly use a tattoo stencil printer, you must use specialized 4-ply thermal tattoo transfer paper. The machine uses a heated thermal head to melt the carbon layer onto the master sheet; it does not use liquid ink or toner cartridges.
Why is my printed stencil coming out wrinkled or jammed?
From our experience, paper jams and wrinkles occur for two main reasons. First, the protective tissue layer (onion skin) was not removed prior to printing. Second, the paper was fed into the machine at a crooked angle. Always ensure the paper is perfectly aligned and smoothed out before initiating the print sequence on your INKSOUL T08FD.
How do I clean and maintain the thermal head of my printer?
Over time, excess carbon can build up on the thermal print head, causing faint lines or blank spots. We recommend turning off the device, letting it cool down completely, and gently wiping the thermal element with a lint-free cloth lightly dampened with 99% isopropyl alcohol. Regular maintenance is crucial to consistently use a tattoo stencil printer at peak performance.
Industry References
To further expand your knowledge on tattoo safety, equipment sanitation, and professional stenciling techniques, we recommend consulting the following authoritative resources:
Centers for Disease Control and Prevention (CDC) - Body Art Health and Safety Guidelines
World Health Organization (WHO) - Infection Prevention and Control
Occupational Safety and Health Administration (OSHA) - Bloodborne Pathogens Standard

How Much Should a 2 Hour Tattoo Cost in 2026? An Expert Industry Guide
Entering a tattoo studio in 2026 is a vastly different experience than it was a decade ago. The industry has evolved, technology has advanced rapidly, and the global economy has shifted the pricing models for body art. For clients and collectors alike, one of the most frequently asked questions remains: exactly how much should a 2 hour tattoo cost? Understanding the nuances of studio pricing, artist expertise, and the equipment utilized during your session is critical to ensuring you receive premium value for your investment.
As the experts behind INKSOUL Tattoo Supply, we serve retail and wholesale customers worldwide, providing everything a modern tattoo studio needs to operate efficiently. From precision needles to advanced stencil printers and studio lighting, we understand the financial overhead and the technical skill required to execute flawless body art. From our experience, the 2 hour tattoo cost is not merely a reflection of the time spent in the chair, but a culmination of the artist's years of practice, the geographical location of the studio, and the quality of the materials touching your skin.
In this comprehensive guide, we will break down the expected 2 hour tattoo cost in 2026, analyze the various factors that influence these rates, and explain how the utilization of high-performance INKSOUL equipment can actually maximize the amount of artwork you receive during your booked session time.
Table of Contents
Summary Table: Average 2 Hour Tattoo Cost by Artist Experience
The Baseline 2 Hour Tattoo Cost in 2026
Key Factors Dictating the 2 Hour Tattoo Cost
Geographic Location and Studio Overhead
Artist Expertise, Reputation, and Demand
Tattoo Style and Technical Complexity
How Professional Equipment Maximizes Your 2 Hour Tattoo Cost
What Can You Expect to Get for a 2 Hour Tattoo Cost?
Hourly Rates vs. Flat Rates in 2026
How to Maximize the Value of Your Session
Frequently Asked Questions (FAQs)
References
Summary Table: Average 2 Hour Tattoo Cost by Artist Experience
To provide an immediate benchmark for your budgeting, we have compiled a summary table reflecting the national averages for a 2 hour tattoo cost in 2026. Keep in mind that these figures represent standard studio environments and may fluctuate based on specific city economies.
Artist Experience Level
Average Hourly Rate (USD)
Estimated 2 Hour Tattoo Cost (USD)
Typical Project Scope for 2 Hours
Apprentice / Junior Artist
$80 - $120
$160 - $240
Small, simple line work, basic traditional flash
Standard Studio Artist (3-7 Years)
$150 - $200
$300 - $400
Palm-sized custom piece, moderate shading and color
Highly Experienced / Specialized Artist
$200 - $300
$400 - $600
Hand-sized detailed piece, black and grey realism, intricate linework
Elite / Celebrity Artist
$350 - $500+
$700 - $1,000+
High-end micro-realism, hyper-detailed portraiture
The Baseline 2 Hour Tattoo Cost in 2026
When analyzing the 2 hour tattoo cost in the current 2026 market, clients must recognize that tattooing is a premium, permanent service. The days of walking into a shop with $100 and leaving with a massive custom piece are long gone. Due to inflation, the rising costs of medical-grade studio supplies, and the elevated artistry of modern tattooing, the standard median hourly rate across the United States and major European cities sits comfortably between $150 and $250 per hour.
Therefore, the baseline 2 hour tattoo cost for a reputable, cleanly licensed professional will generally range from $300 to $500. This fee covers more than just the physical act of tattooing. It encompasses the hours the artist spent drawing and revising your custom design, the setup and breakdown of a sterile workstation, and the cost of the disposable, single-use materials required to keep you safe from cross-contamination.
Key Factors Dictating the 2 Hour Tattoo Cost
The discrepancy between a $200 session and an $800 session is rarely arbitrary. Several compounding factors dictate the final 2 hour tattoo cost you will be quoted by a studio.
Geographic Location and Studio Overhead
The cost of living and commercial real estate in the studio's city plays a massive role in their pricing structure. A 2 hour tattoo cost in a metropolitan hub like New York, Los Angeles, or London will inherently carry a premium compared to a studio located in a rural or suburban area. High-end studios must pay premium rents, invest in aesthetic workspace upgrades, and maintain top-tier licensing and insurance. These overhead expenses are factored into the hourly rate.
Artist Expertise, Reputation, and Demand
The most significant variable in your 2 hour tattoo cost is the artist's demand. If an artist has a unique, highly sought-after style and a waitlist that stretches for six months, their hourly rate will reflect that scarcity. You are paying for their distinct creative vision and their proven ability to execute a tattoo that will age beautifully over the decades. Conversely, newer artists looking to build their portfolios will offer a lower 2 hour tattoo cost, making them an excellent option for clients on a stricter budget looking for traditional or simpler designs.
Tattoo Style and Technical Complexity
Not all tattoos are created equal in terms of application speed. A traditional Americana tattoo featuring bold, thick lines and solid color packing can often be executed very quickly. In contrast, an artist specializing in hyper-realism, stippling, or fine-line geometric patterns must move much slower to ensure absolute precision. Therefore, while the 2 hour tattoo cost remains the same in terms of money spent, the physical size of the tattoo you receive in those two hours will vary drastically depending on the chosen style.
How Professional Equipment Maximizes Your 2 Hour Tattoo Cost
From our experience at INKSOUL, we cannot stress enough how much the artist's equipment affects the value you receive for your 2 hour tattoo cost. An artist using inferior tools will work slower, cause more trauma to the skin, and ultimately give you less artwork for your money.
As a leading supplier committed to empowering tattoo artists with reliable, high-performance supplies, we know that efficiency is key. Beyond needles and pens, INKSOUL provides a one-stop inventory for tattoo studios. Each product is chosen for quality, compliance, and performance, which directly benefits the client paying the 2 hour tattoo cost.
Tattoo Transfer Printers and Stencil Paper: A significant portion of a tattoo appointment is spent applying the stencil. If an artist uses outdated thermal copiers, the stencil may rub off during the tattoo, requiring them to stop and redraw lines by hand. We recommend artists use reliable thermal and wireless printers for crisp stencil transfers, such as the INKSOUL T08FS, Phomemo TP31, or XIRU XR3. When paired with our high-contrast, smudge-resistant tattoo stencil paper compatible with thermal and ink-based systems, the stencil stays perfectly intact. This saves vast amounts of time, ensuring your 2 hour tattoo cost is spent entirely on needle-to-skin work.
Tattoo Machines and Needles: The mechanics of the machine dictate the speed of ink saturation. Artists utilizing our high-performance rotary and coil machines for every style—whether lining, shading, or color work—can pack color in a single pass. Furthermore, having a full selection of premium tattoo needles—including round liners, round shaders, magnums, curved magnums, and advanced cartridges—allows the artist to switch needle groupings instantly. This fluidity means the artist works faster and more gently, maximizing the output of your 2 hour tattoo cost.
Tattoo Lighting Supply and Accessories: Precision requires perfect visibility. Studios equipped with our adjustable, flicker-free LED lights tailored for studio visibility and color accuracy allow the artist to work without eye fatigue. Furthermore, ergonomic workspace upgrades, high-quality grips, responsive foot pedals, and reliable power supplies (part of our comprehensive tattoo toys and accessories range) prevent equipment malfunctions that could delay your session.
What Can You Expect to Get for a 2 Hour Tattoo Cost?
Clients often struggle to visualize how much work can actually be accomplished within a two-hour window. While speed varies by artist, a standard two-hour session is typically sufficient for a palm-sized (roughly 3x3 to 4x4 inches) piece with full color or detailed black and grey shading. Alternatively, if you are getting strictly linework or script without shading, a two-hour session could cover a much larger area, such as a large thigh piece or a forearm wrap.
It is crucial to have a consultation prior to booking. Bring your reference materials and ask the artist directly what they can realistically achieve within your budget. Transparency is the hallmark of a professional. If your desired design cannot be completed within the parameters of a 2 hour tattoo cost, the artist will advise you to either simplify the design, scale it down, or book a longer session.
Hourly Rates vs. Flat Rates in 2026
While discussing the 2 hour tattoo cost, it is worth noting that the industry in 2026 utilizes both hourly and flat-rate pricing models. Many artists prefer flat rates for specific custom pieces or pre-drawn "flash" designs. If an artist quotes you a flat rate of $400 for a palm-sized piece, and it takes them exactly two hours to complete, the effective 2 hour tattoo cost is $200 per hour.
Flat rates are beneficial for clients because they remove the anxiety of the clock ticking. You know exactly what the piece will cost regardless of whether the artist takes an extra thirty minutes to perfect the highlights. However, for larger, multi-session projects like sleeves or back pieces, the hourly 2 hour tattoo cost model remains the standard, as the total duration is harder to predict accurately.
How to Maximize the Value of Your Session
As a client, your actions before and during the appointment can impact the efficiency of the artist, thereby affecting the overall value of your 2 hour tattoo cost. We recommend the following preparation steps:
Arrive Hydrated and Fed: Low blood sugar leads to twitching and an inability to sit still. If you are constantly taking breaks, you are burning through the time you paid for.
Moisturize Your Skin: In the weeks leading up to your appointment, moisturize the area daily. Healthy, hydrated skin accepts ink much faster than dry, calloused skin, allowing the artist's tattoo machines and needles to work at maximum efficiency.
Wear Accessible Clothing: Do not waste time changing or adjusting restrictive clothing. Wear loose garments that provide immediate access to the area being tattooed.
Trust the Artist: Endless micro-adjustments to the stencil placement will consume your session time. Trust the professional's judgment regarding placement and flow to get the needle moving sooner.
Frequently Asked Questions (FAQs)
Does the 2 hour tattoo cost include the tip?
No, the quoted 2 hour tattoo cost covers the studio time and materials. Tipping is customary in the tattoo industry, particularly in North America, and is typically 15% to 20% of the total cost of the session. Always factor the tip into your final budget.
Why is the 2 hour tattoo cost higher for color realism than traditional blackwork?
Color realism requires the artist to blend multiple pigments continuously, utilizing various magnum and curved magnum needles to build soft gradients. This technical complexity takes significantly more time and precision than pulling solid black lines, meaning less physical area is covered within the same 2 hour tattoo cost window.
If the artist finishes in 90 minutes, do I still pay the full 2 hour tattoo cost?
This depends on the studio's policy. If you booked the artist at an hourly rate, they will typically prorate the cost to the nearest half-hour. However, if you agreed upon a flat rate or a minimum session fee that equals the 2 hour tattoo cost, you are obligated to pay the agreed-upon flat amount regardless of early completion.
Are touch-ups included in the initial 2 hour tattoo cost?
Many reputable artists include one free touch-up session within a specific timeframe (usually 3 to 6 months) after the initial appointment, provided you followed their aftercare instructions properly. Always confirm the studio's touch-up policy before committing to the 2 hour tattoo cost.
References
Alliance of Professional Tattooists (APT) - 2026 Guidelines for Studio Economics and Health Standards. View APT Standards
Occupational Safety and Health Administration (OSHA) - Bloodborne Pathogens Standard for Body Art Facilities.

The Definitive Guide: How Big is a $3,000 Tattoo?
When clients are preparing to invest a significant amount of money into permanent body art, the most frequent question that arises in the consultation room revolves around scale and coverage. Specifically, determining exactly how big is a $3,000 tattoo is a complex inquiry that goes far beyond simple square inches. In the highly specialized world of premium tattooing, a $3,000 tattoo is a major financial commitment that reflects not just the physical footprint of the ink on the skin, but the extensive experience of the artist, the geographic location of the studio, and the excruciating level of detail required by the chosen artistic style.
From our experience working closely with elite tattoo artists and supplying top-tier transfer technology to high-end studios globally, we know that pricing structures can vary wildly. A $3,000 tattoo executed by a world-renowned hyper-realism specialist in a major metropolitan hub will look vastly different in size compared to a $3,000 tattoo applied by a highly skilled traditional artist in a mid-western city. In this authoritative industry guide, we will break down the variables that dictate tattoo pricing, explore how different artistic styles impact the final size of your piece, and provide clear, practical estimates so you know exactly what to expect when you commission a $3,000 tattoo.
Table of Contents
1. The Economics of High-End Body Art
2. Style Complexity vs. Square Footage
3. Estimating the Physical Dimensions of a $3,000 Tattoo
4. The Role of Technology in Premium Tattoos
5. Summary Table: Size Estimates by Style
6. Frequently Asked Questions (FAQs)
7. Industry References
1. The Economics of High-End Body Art
To accurately visualize a $3,000 tattoo, one must first understand how professional tattoo artists calculate their fees. The industry standard heavily relies on hourly rates or full-day session rates. Currently, highly skilled, established artists charge anywhere from $150 to $300 per hour. Elite artists, particularly those with massive social media followings or television exposure, may charge upward of $400 to $500 per hour. Therefore, the size of a $3,000 tattoo is directly correlated to how many hours of labor that budget secures.
If you are working with an artist who charges $200 per hour, your budget affords you exactly 15 hours of tattooing. In the context of a $3,000 tattoo, 15 hours is generally split across two full-day sessions. During 15 hours of focused needle time, a proficient artist can cover a substantial amount of skin. However, we recommend factoring in that not all of this time is spent actively tattooing. A portion of this billed time includes the final consultation, resizing the design, applying the stencil, and allowing for brief sanitary breaks. Therefore, when you pay for a $3,000 tattoo, you are also paying for the professional preparation that ensures the final application is flawless.
Geographic location is another massive variable. A $3,000 tattoo commissioned in New York City, Los Angeles, or London will inherently be smaller than a $3,000 tattoo commissioned in a smaller suburban market. The overhead costs of operating a sterile, fully licensed studio in a high-rent district are passed down to the client. Despite this, we recommend prioritizing the artist's portfolio and hygienic standards over finding the largest possible piece for your budget. A smaller, perfectly executed $3,000 tattoo is vastly superior to a massive, poorly saturated piece that will require expensive laser removal later.
2. Style Complexity vs. Square Footage
The artistic style you choose is the ultimate determining factor in how big a $3,000 tattoo will be. The density of detail, the necessity for smooth color blending, and the specific needle configurations required all dictate the speed at which the artist can work.
Color Realism and Hyper-Realism
Color realism is arguably the most time-consuming style in the tattoo industry. Achieving photographic accuracy requires the artist to build multiple layers of pigment, slowly transitioning between incredibly subtle shade variations. There are no thick, bold outlines to rely on. Because of this meticulous, slow-paced process, a $3,000 tattoo in the color realism style is usually relatively compact. You can expect a $3,000 tattoo in this category to cover the outer forearm, the calf, or a localized section of the thigh. It typically equates to an area roughly the size of standard printer paper, taking the full 15 to 20 hours to complete.
American Traditional and Neo-Traditional
Conversely, American Traditional and Neo-Traditional styles are designed for visual impact and longevity. These styles utilize bold, heavy black outlines, stark black shading, and solid, saturated color fills. Because the artist uses large magnum needles to pack solid color quickly, these tattoos progress much faster than realism. A $3,000 tattoo in the American Traditional style is going to be exceptionally large. From our experience, this budget could easily fund an entire patchwork sleeve on the arm, a massive and complete chest piece, or a striking, full-coverage back piece. The square footage you receive for a $3,000 tattoo in this style is immense.
Black and Grey Wash
Black and grey tattooing sits comfortably in the middle of the spectrum. Without the need to constantly clean the needle and switch between dozens of color ink caps, the artist can move efficiently. A $3,000 tattoo executed in smooth black and grey can easily encompass a full half-sleeve (from the shoulder down to the elbow) wrapping entirely around the arm, or a highly detailed, sprawling thigh piece. It offers an excellent balance between intricate detail and substantial bodily coverage.
3. Estimating the Physical Dimensions of a $3,000 Tattoo
While the variables of speed and style are critical, clients still desire concrete physical estimates. Based on the industry average of a mid-to-high-tier professional operating at $200 an hour, a $3,000 tattoo buys you roughly 15 hours of continuous tattooing. What does 15 hours actually cover?
For the average adult arm, 15 hours is enough to complete a highly detailed half-sleeve. If the design features a lot of negative space (areas where the natural skin tone acts as a color), a $3,000 tattoo might stretch into a three-quarter sleeve. If you are focusing on the leg, a $3,000 tattoo will comfortably cover the entire outer thigh or wrap entirely around the lower calf and shin. For torso work, this budget secures a complete sternum-to-navel stomach panel or a fully realized, edge-to-edge upper back piece.
We recommend keeping in mind that the specific anatomy being tattooed also affects the speed, and therefore the size, of a $3,000 tattoo. Areas with highly elastic skin, such as the ribs, stomach, or inner bicep, require the artist to stretch the skin forcefully and work slower to prevent blowouts (ink spreading beneath the skin). Consequently, a $3,000 tattoo on the ribs may be slightly smaller than a $3,000 tattoo on the sturdy, taut skin of the outer thigh.
4. The Role of Technology in Premium Tattoos
When an individual commits to a $3,000 tattoo, they are rightfully expecting absolute perfection. The margin for error at this premium price point is non-existent. From our experience supplying elite studios, the foundation of a flawless, high-end piece is the initial stencil transfer. If the stencil is smudged, improperly sized, or lacks fine detail, the entire 15-hour session is compromised. This is why top-tier artists rely on advanced technology to guarantee their clients receive the exact value of their $3,000 tattoo.
We highly recommend integrating professional hardware like the INKSOUL® T08FD Tattoo Transfer Printer into the workflow. This device bridges the gap between digital design and physical application, ensuring that the intricate details you are paying for are perfectly mapped onto the skin before a single needle is used. It is designed specifically for the mobility and precision required by modern tattoo professionals.
Smart Touch Screen: A 2-inch interface allows for fingertip parameter adjustments, completely eliminating the need for a cumbersome PC connection for settings. This speeds up the consultation phase, giving you more actual tattooing time for your $3,000 tattoo.
Unmatched Mobility: With a built-in 1200mAh battery and a highly portable weight of only 745g, it is completely wireless. Artists can bring the printer directly to the station, making collaborative sizing adjustments on the spot.
Flawless Precision: Printing at a controlled speed of 10-15mm/s ensures that complex geometric patterns, fine line work, or micro-realism details are transferred flawlessly without the machine "eating" or jamming the thermal paper.
Universal Compatibility: It supports standard print widths of 210-216mm (A4 size), making it compatible with all standard tattoo transfer papers on the market, ensuring the largest possible stencils for your $3,000 tattoo.
By utilizing precision tools like the INKSOUL® T08FD, artists eliminate guesswork, streamline their preparation time, and ensure that every minute of your budget is spent applying world-class art to your skin.
5. Summary Table: Size Estimates by Style
To provide a clear, quick-reference guide on how big a $3,000 tattoo will be, we have compiled this summary table comparing different tattoo styles against their estimated coverage areas and required timeframes.
Tattoo Style
Average Hourly Rate
Estimated Hours for $3,000
Estimated Size / Body Coverage for a $3,000 Tattoo
Hyper-Realism (Color)
$250 - $350
8 - 12 Hours
Outer forearm, single calf, or focused portrait piece.
Realism (Black & Grey)
$200 - $300
10 - 15 Hours
Half-sleeve (shoulder to elbow), full thigh panel.
Japanese Traditional (Irezumi)
$180 - $250
12 - 16 Hours
Full forearm sleeve (wrapping), large chest panel.
American Traditional
$150 - $200
15 - 20 Hours
Full arm patchwork sleeve, massive full back piece.
Fine Line / Geometric
$200 - $300
10 - 15 Hours
Intricate full forearm wrap, large intricate sternum/torso piece.
6. Frequently Asked Questions (FAQs)
Should I tip my artist on top of a $3,000 tattoo?
Yes. Tipping etiquette in the tattoo industry applies regardless of the total cost. While 20% is the standard for smaller pieces, tipping on a $3,000 tattoo is often handled slightly differently. Many clients tip a flat rate of $100 to $200 per full-day session. We recommend discussing tipping preferences with the studio manager, but acknowledging the artist's hard work with a gratuity is always a sign of a respectful client.
Can I complete a $3,000 tattoo in a single session?
It is highly unlikely and medically unadvisable. A $3,000 tattoo generally requires 15 to 20 hours of needle time. The human body typically hits an endorphin wall after 6 to 8 hours of continuous tattooing, after which the pain becomes incredibly difficult to manage. Furthermore, the skin becomes overly traumatized and will stop accepting ink properly. You should expect to split a $3,000 tattoo into two or three full-day sessions.
Does a $3,000 tattoo include the cost of the design drawing?
Typically, yes. Most reputable artists include the drawing and preparation time within their overall quote or hourly rate. However, when commissioning a $3,000 tattoo, the artist will usually require a non-refundable deposit (often $200 to $500) to secure the appointment dates and cover their drawing time in case of a cancellation. This deposit is then deducted from the final cost of the tattoo.
Will my $3,000 tattoo fade over time?
All tattoos age with the skin, but a $3,000 tattoo executed by a highly skilled professional using premium pigments will hold up significantly better than a cheaper alternative. Proper depth penetration and solid saturation prevent premature fading. To protect your investment, we strongly recommend strict adherence to the artist's aftercare instructions and the daily application of a high-SPF sunscreen over the tattooed area whenever exposed to direct sunlight.
7. Industry References
To ensure the accuracy of our pricing estimates and technical advice regarding the application of a $3,000 tattoo, we constantly monitor the standards set by leading authorities within the professional body art and dermatology sectors. We recommend consulting these resources for further education:
Alliance of Professional Tattooists (APT) - An organization dedicated to promoting health, safety, and hygiene within the tattoo industry.
American Academy of Dermatology (AAD) - Providing peer-reviewed medical guidelines on tattoo aftercare, skin trauma healing, and safe pigment application.
Occupational Safety and Health Administration (OSHA) - Establishing the strict bloodborne pathogen standards and cross-contamination protocols that justify the overhead costs of premium tattoo studios.